In May 2016, I took delivery of my Focus ST. Both the Fiesta ST and Focus ST come with a free day of driving school at Utah Motorsport Campus (formerly Miller Motorsports Park) in Tooele, Utah. Since my day at driving school (doing sick skids and hot laps), I’ve wanted to run autocross and rallycross around Detroit. The only problem is that my ST is a brand new car, and I don’t want to race it; it gets enough abuse as a daily driver. Clearly the solution here is to buy the cheapest running car I can find that is manual and rear-wheel drive, right?
Yes. At least it was for me.
The rest of August and September 2016 were spent scouring craigslist for suitable autocross beaters.My only requirements were; the car must cost less than $1500, and be in good enough condition to get to my garage under its own power. One friend at the lunch table recommended a Porsche 944, my supervisor pushed the Toyota MR2, others suggested the tried and true Miata or come American muscle in the form of older Camaros and Mustangs. True masochists tried convincing me to get a Mazda RX-7 that had clearly lived a hard life as a drift missile.
In reality, no Miata in my price range hadn’t been heavily modified and thrashed within an inch of its life on track. Living near Detroit, older Mustangs and Camaros were (and will be forever) plentiful and any replacement parts would be dirt cheap, but most had V6 engines and they struck me as an unimaginative solution to my racecar woes. I found a Subaru Impreza 2.5RS sedan that was supposedly in good enough condition, but when I went to check it out, I found the bottom of the engine dripping in oil, and the owner couldn’t tell me if the head gaskets had been changed already. Since 90’s 2.5 liter Subaru engines were notorious for blowing head gaskets, I passed since I likely wouldn’t be able to do that repair in my garage.
The next car I found that piqued my interest was a 1986 Toyota Supra, listed for $1100. Listed problems included a cracked windshield, one stuck popup headlight, and a leaky fuel tank, but it would allegedly still run and drive. I contacted the seller to see if it was still available since the listing was over a week old. Almost immediately I get a response that yes, it is still up for sale. I try and arrange to meet up so I can inspect the car in-person and… nothing. I tried calling, texting, and emailing, but I never heard back from the owner. I know they didn’t keel over because the listing continued to be updated, and the price dropped to $800. I’m still sad that I couldn’t buy that Supra.
Eventually I found a ‘94 Mercury Cougar, which seemed perfect because it was listed as manual, RWD, had a V8, and would run and drive, all for $900. I called the owner, and left a message asking to verify that it indeed had a manual transmission and a V8. The owner texted me back the next day saying that Massachusetts (I kept my old cell phone number when I moved) seemed too far away for me to be a legitimate, interested buyer, and that he didn’t want to sell me the car. I assured him that while I do have a Massachusetts phone number, I actually live two towns over from him. Luckily he believed me, and we arranged for me to come look at the car.
When I got to his house, I didn’t see the Cougar outside. I thought it might be in the garage or something until the man answers his door, opens his garage, and leads me through it to his fenced-in backyard. There lay the Coug’. Upon closer inspection, the car is actually an automatic not a manual. Additionally, the car is filthy and there doesn’t appear to be a gate in the fence to facilitate driving the car. I asked the owner about the last time the car had driven. Three months ago, but he assured me that it would start right up with a fresh battery. Ok… The fact that he welded in some extra steel to the front passenger shock tower wasn’t a good indicator of the condition of the rest of the underbody, either. With that, I declined to buy the car, thanked him for his time, and left.
August 2014, my senior year at UVM starts, I’m president of the club/ captain of the team, everyone wants to go to a brand new complex design, and we’re already behind schedule. Perfect.
Actually, I was co-president. Kyle and I had tied in the election. Vice president was my friend and roommate, Charlie. I really didn’t want to be in charge, I just wanted to build a racecar, and had the opinion that running the show would get in the way of that. In fact, I wanted so little to do with being president that I didn’t even vote for myself! I suppose everyone else thought I was the right person for the job, or at least didn’t trust anyone but me to keep the team running. I can only hope that they didn’t regret their collective decision later, since even I’m not sure if I did well or not.
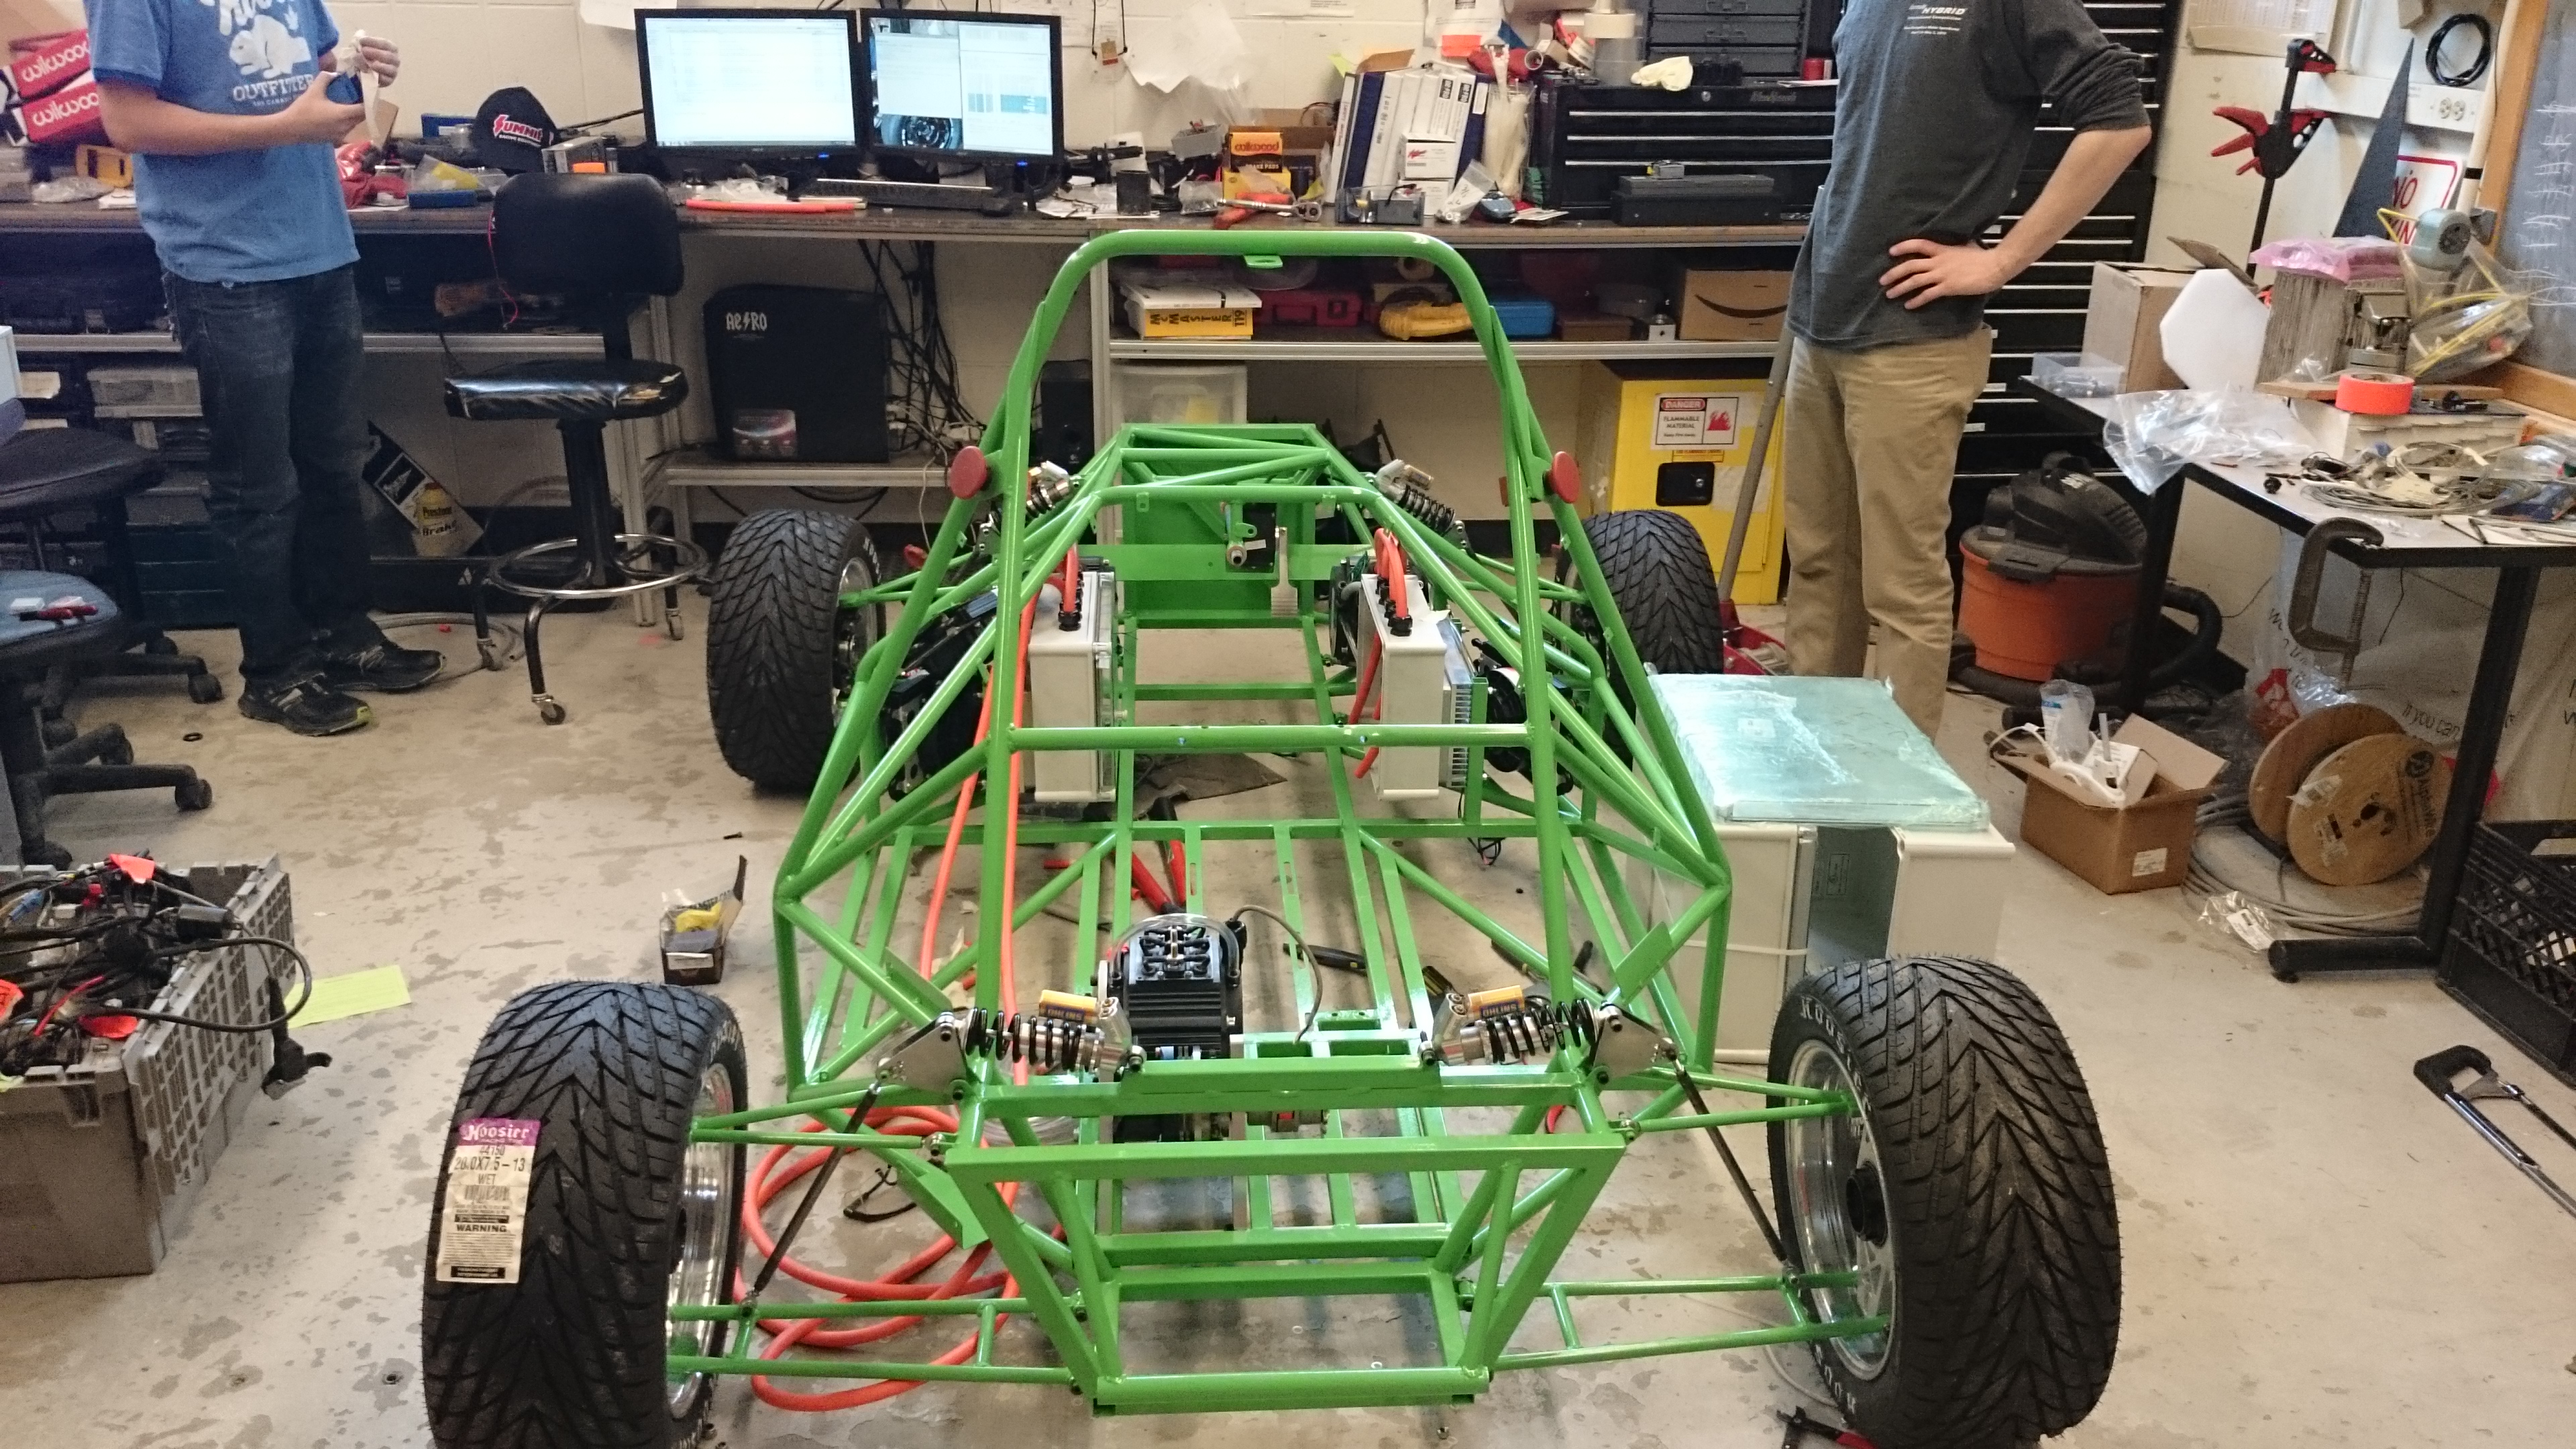
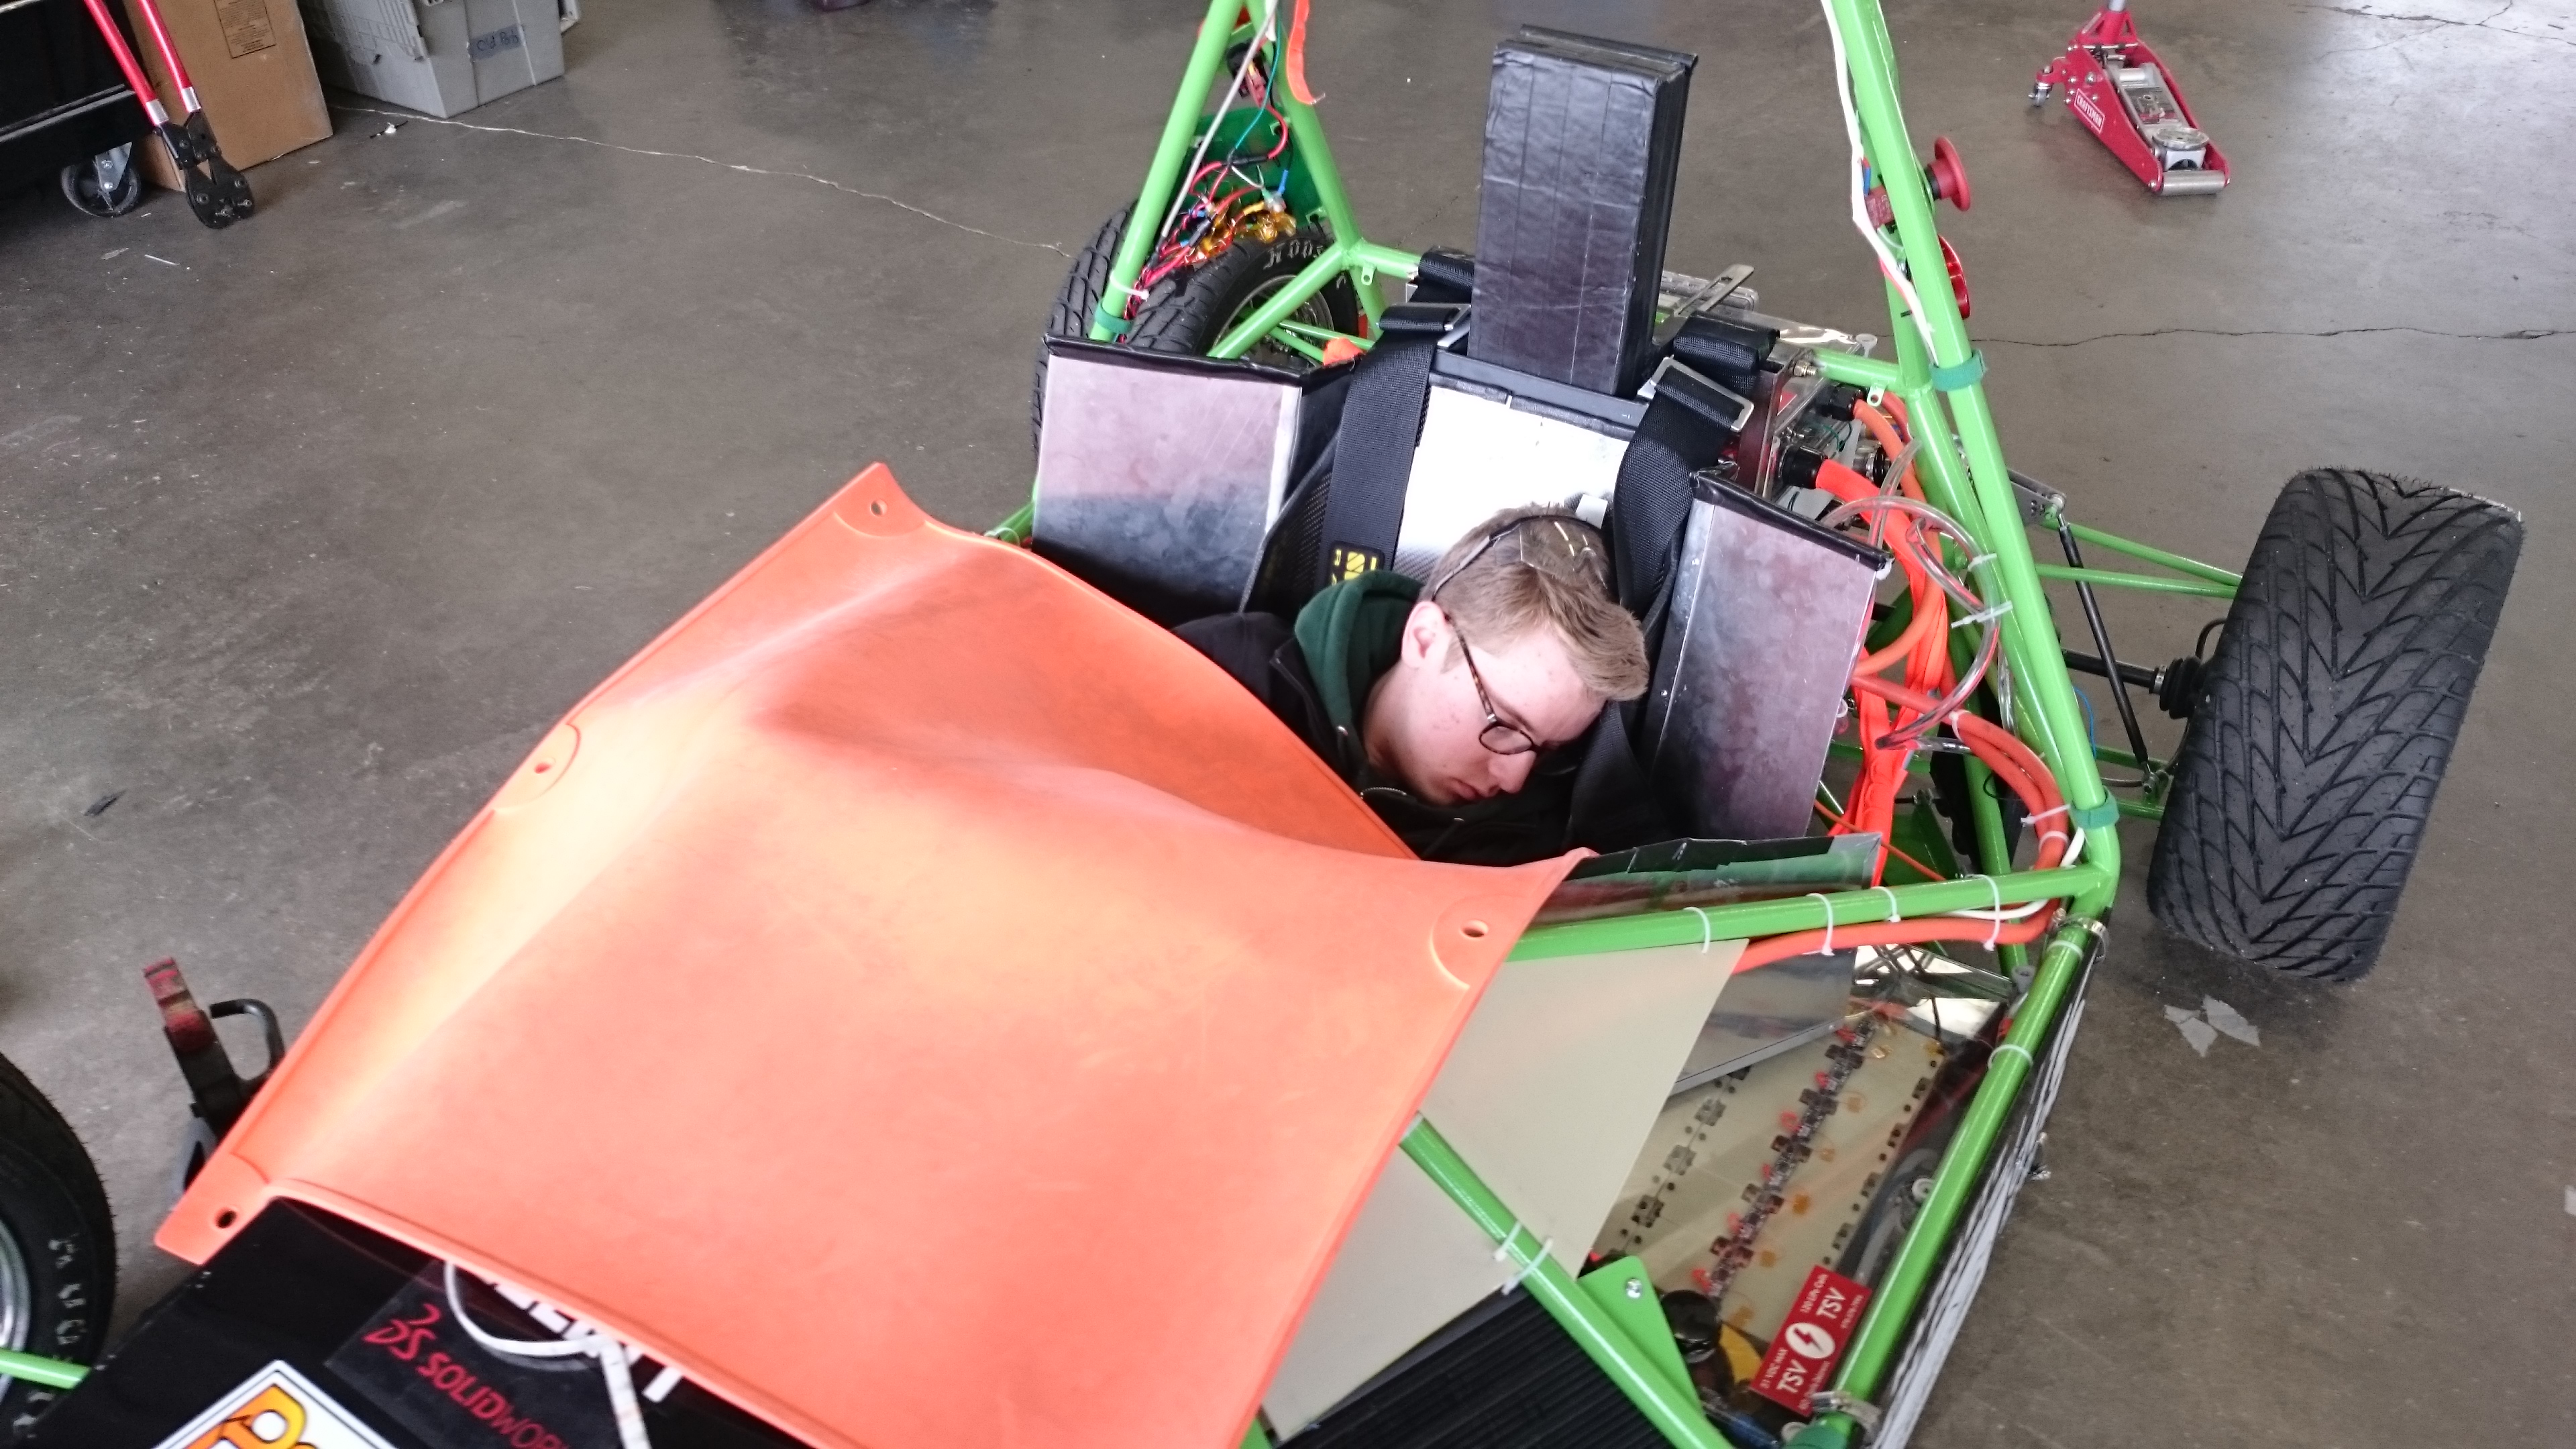
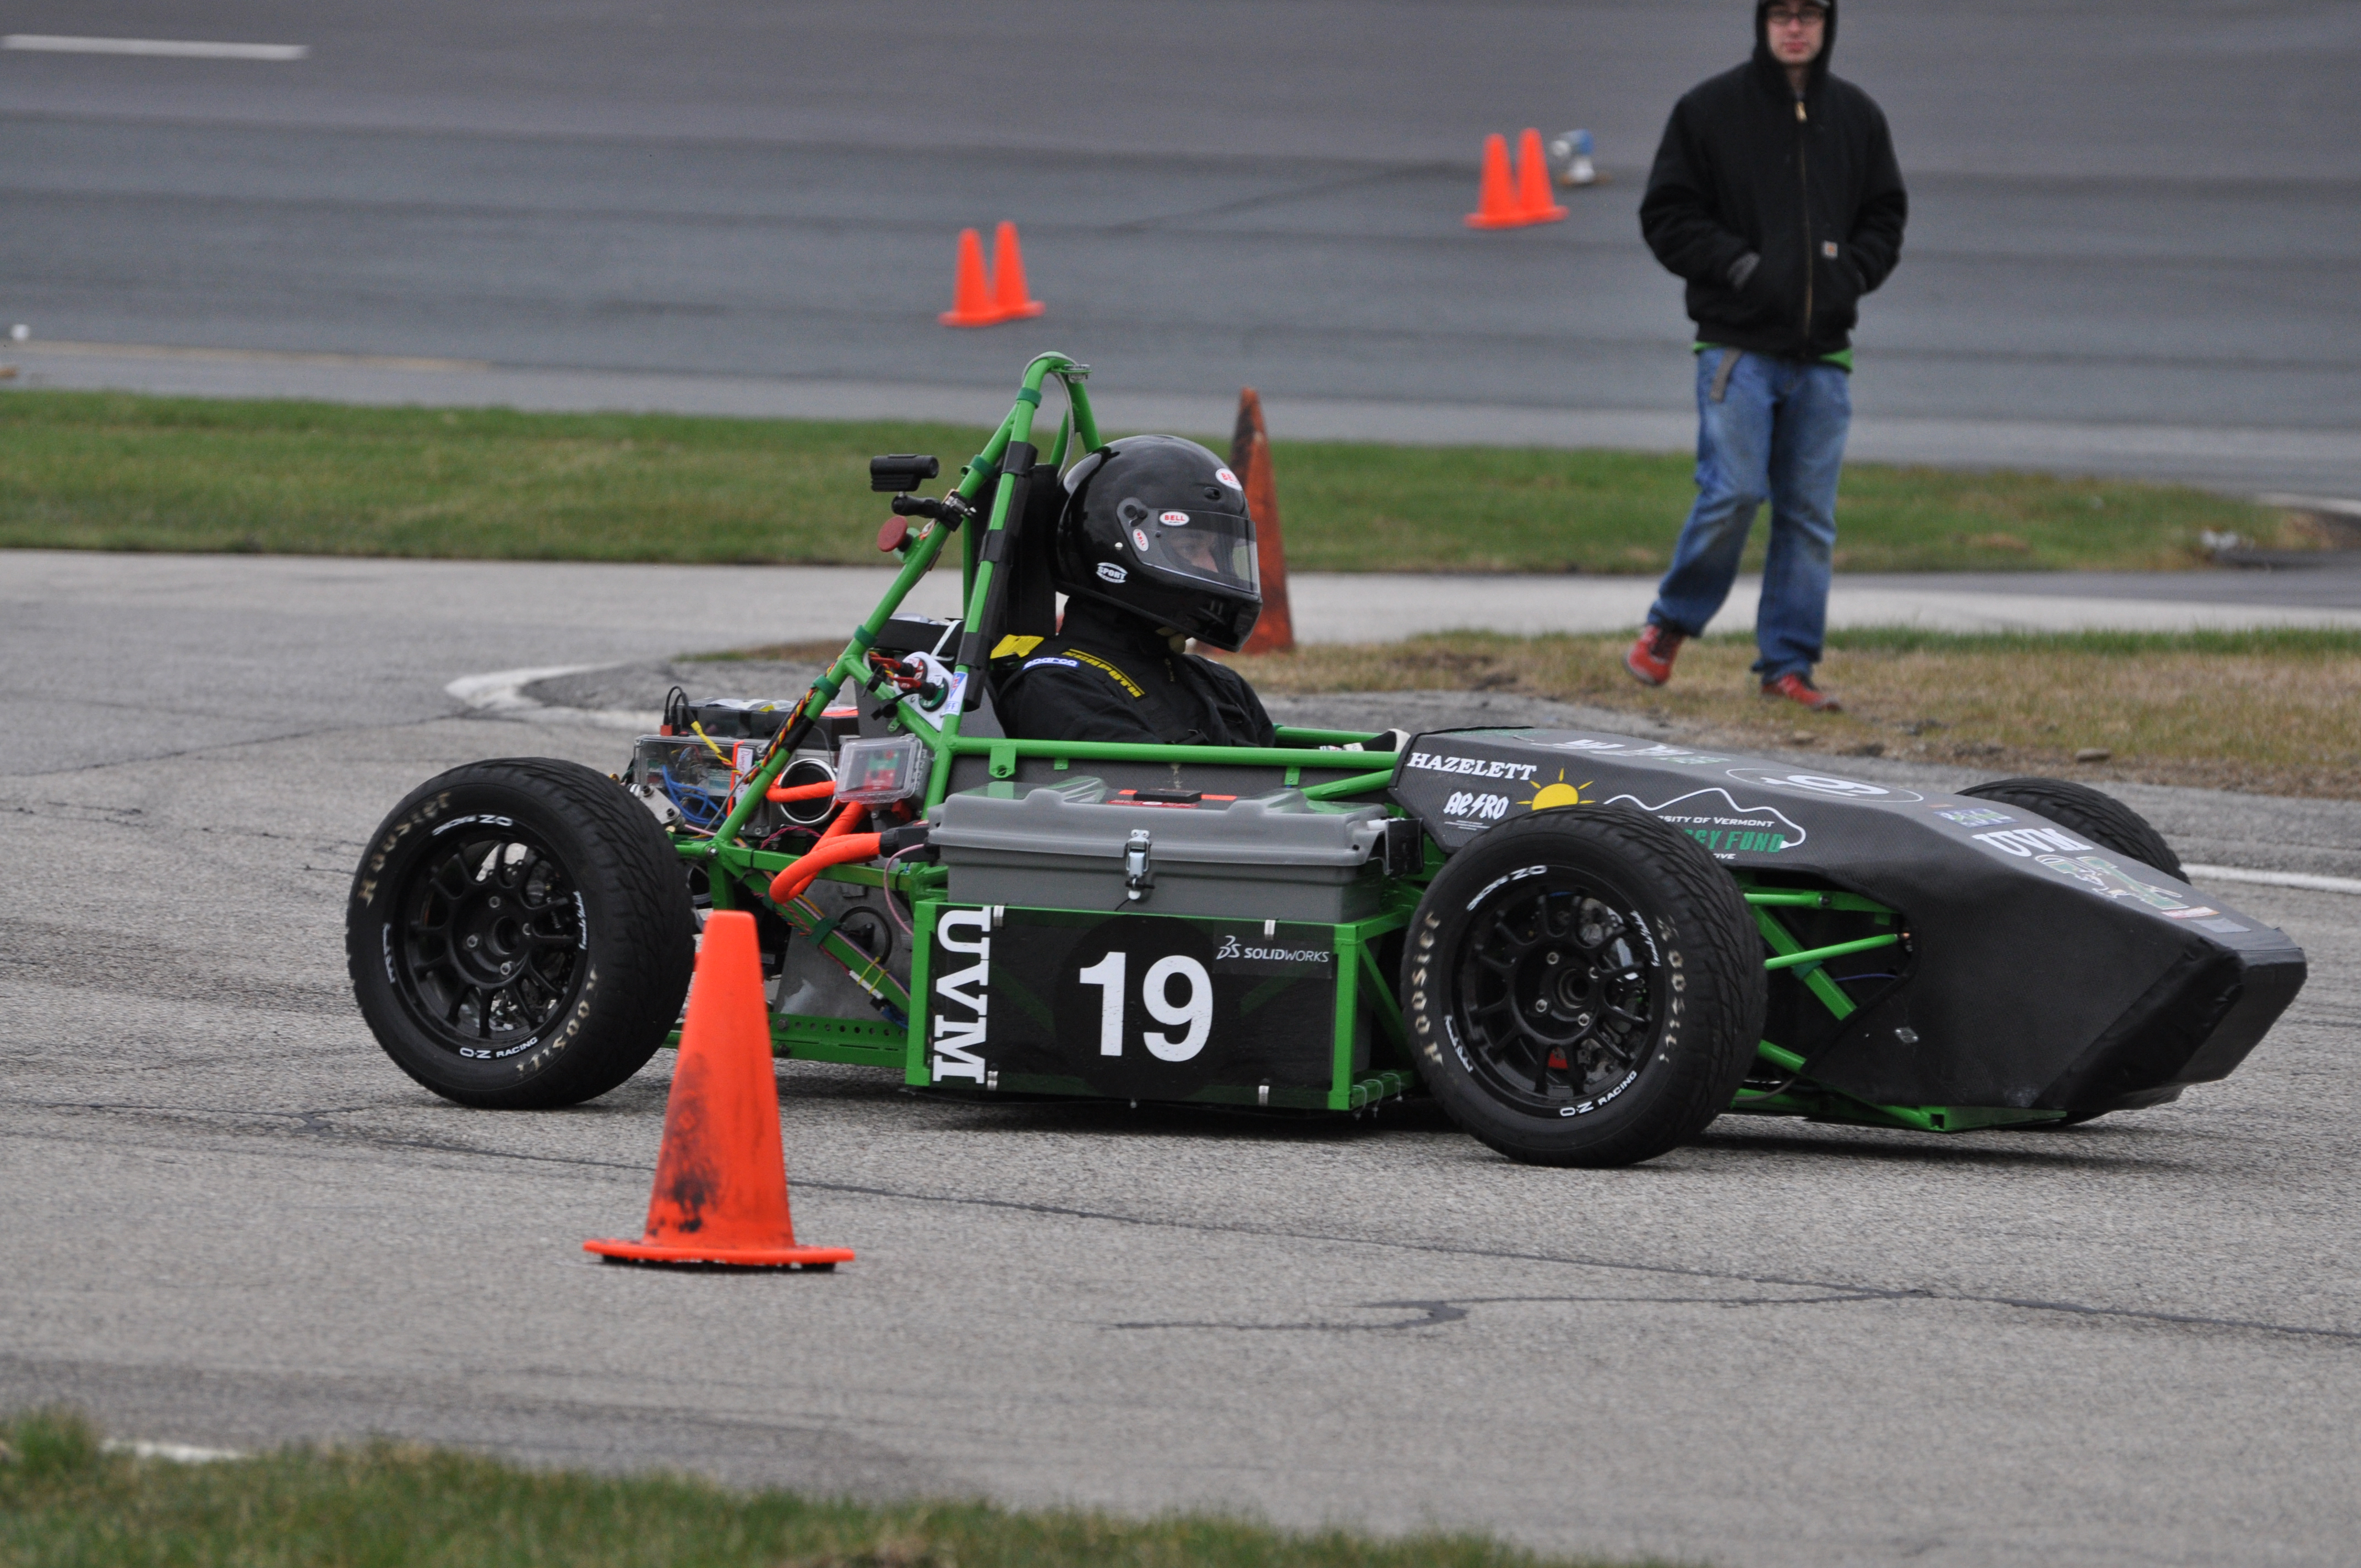
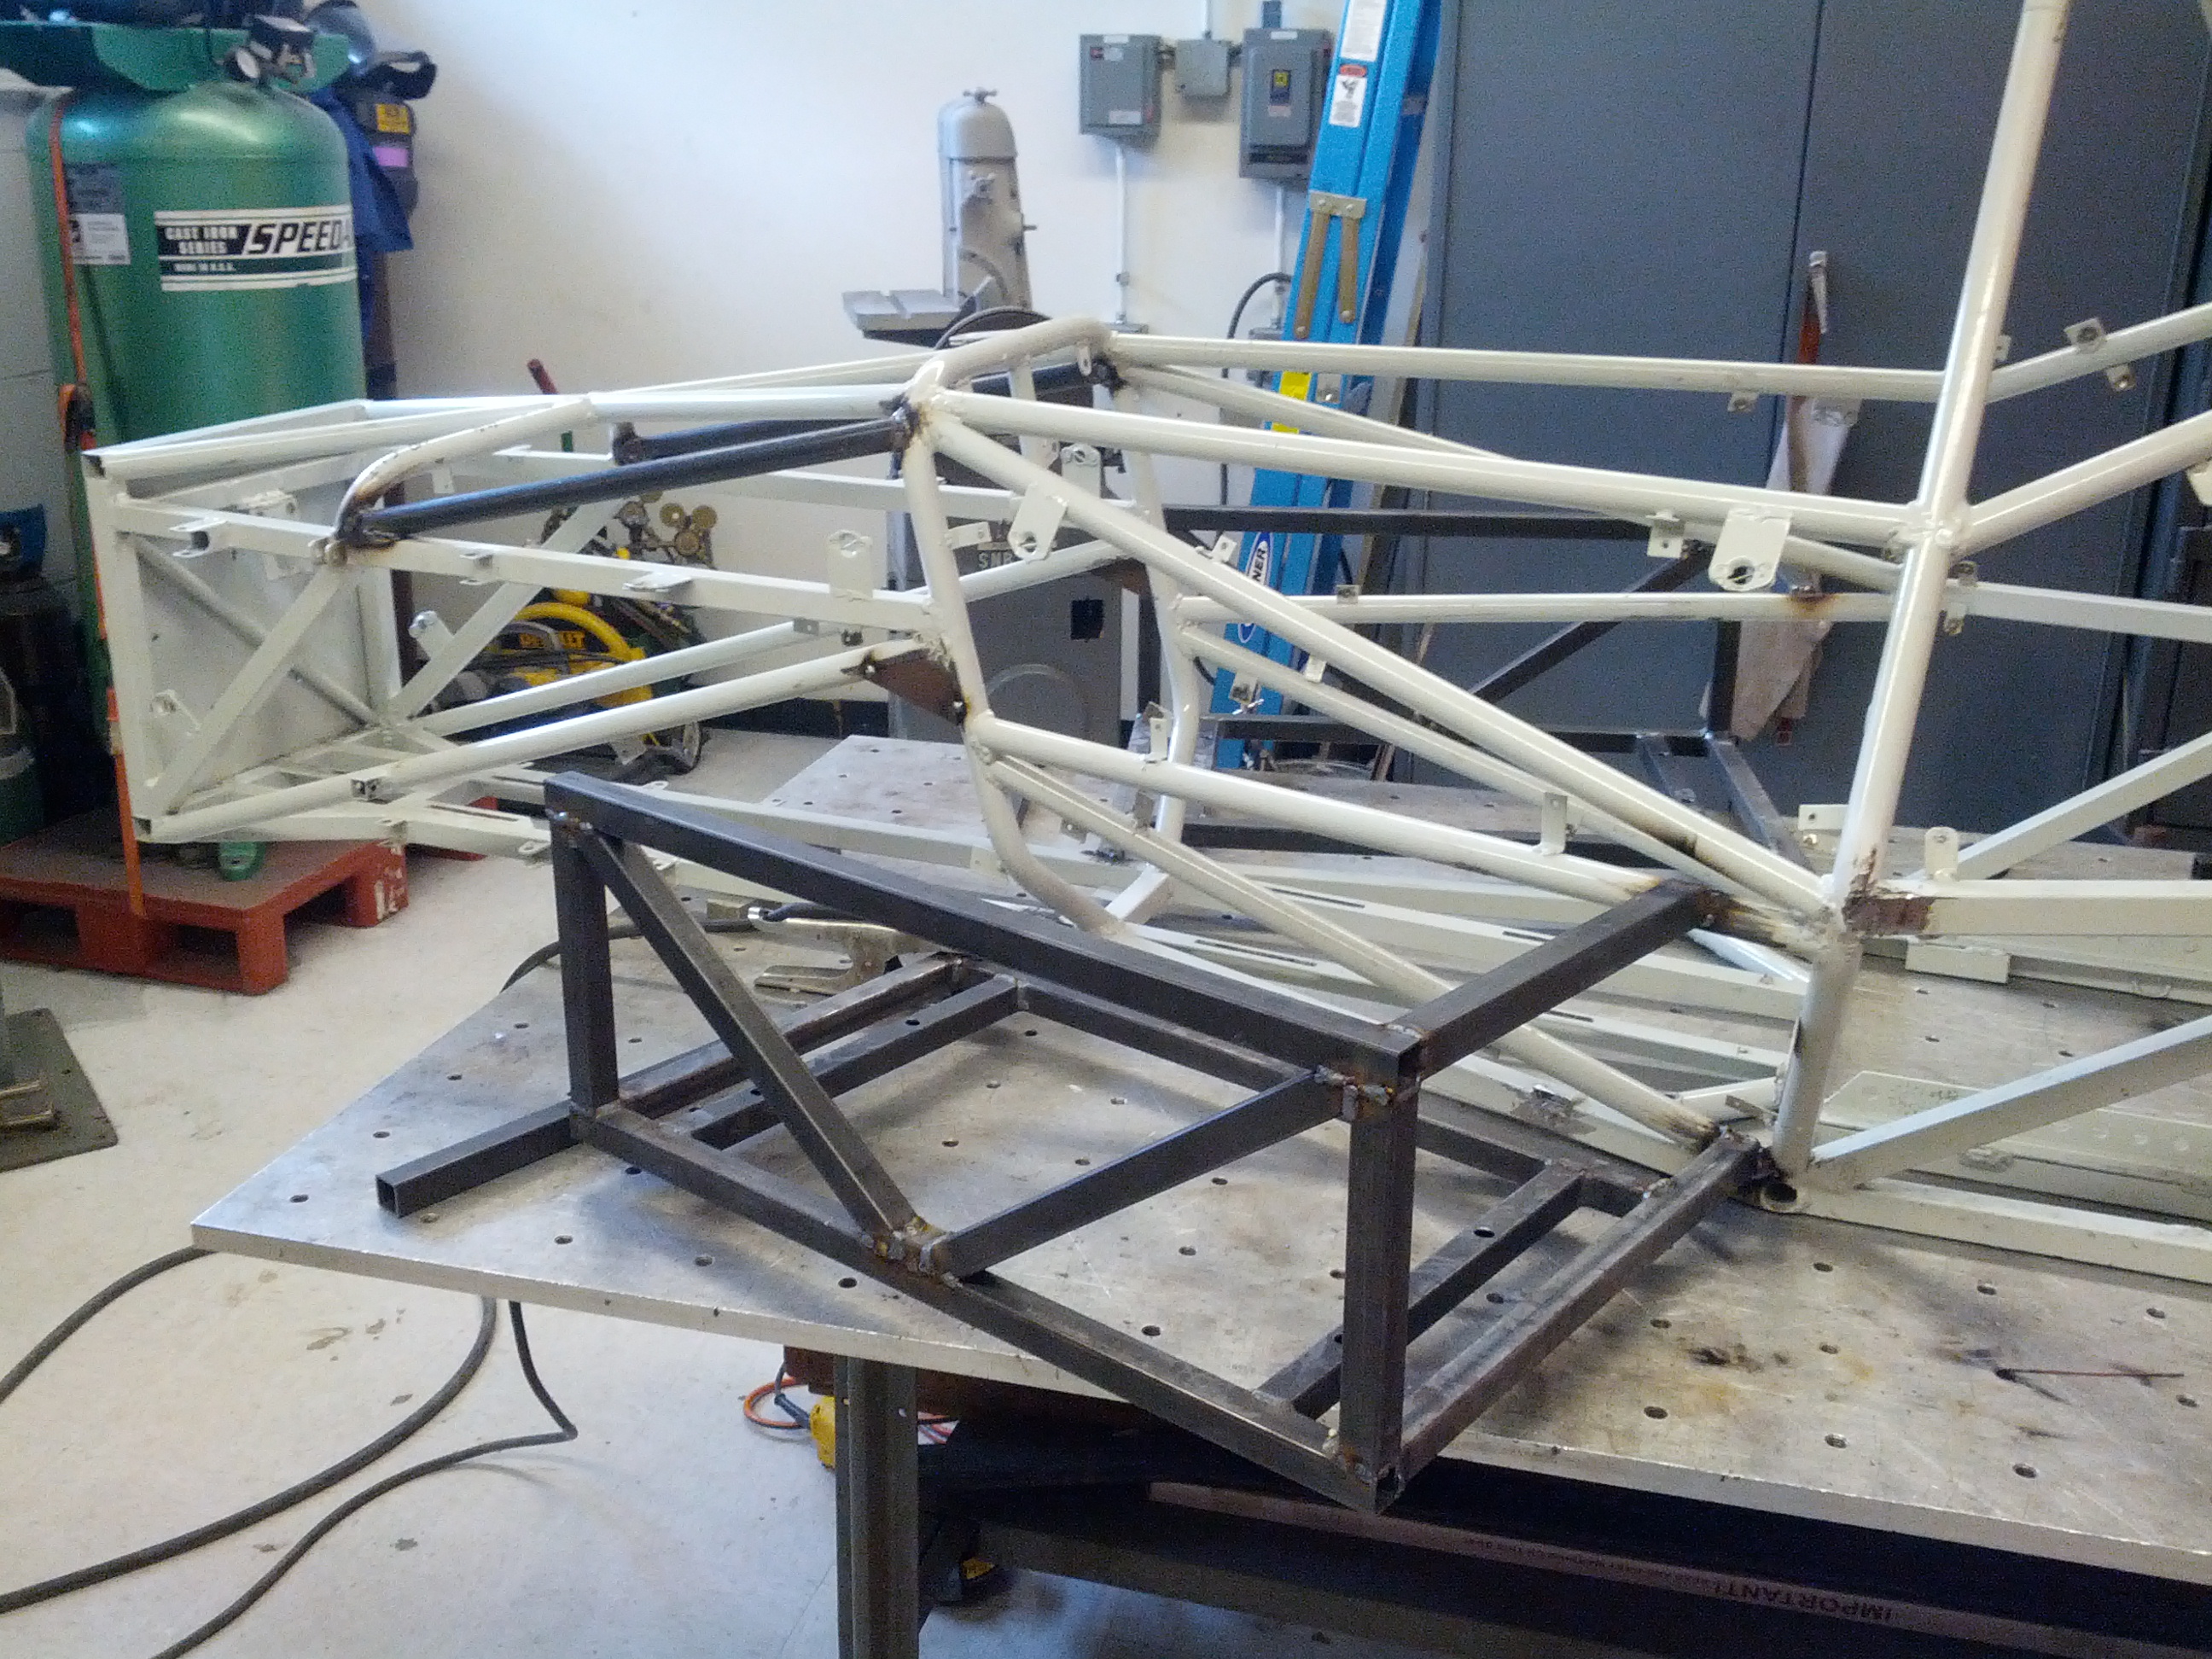
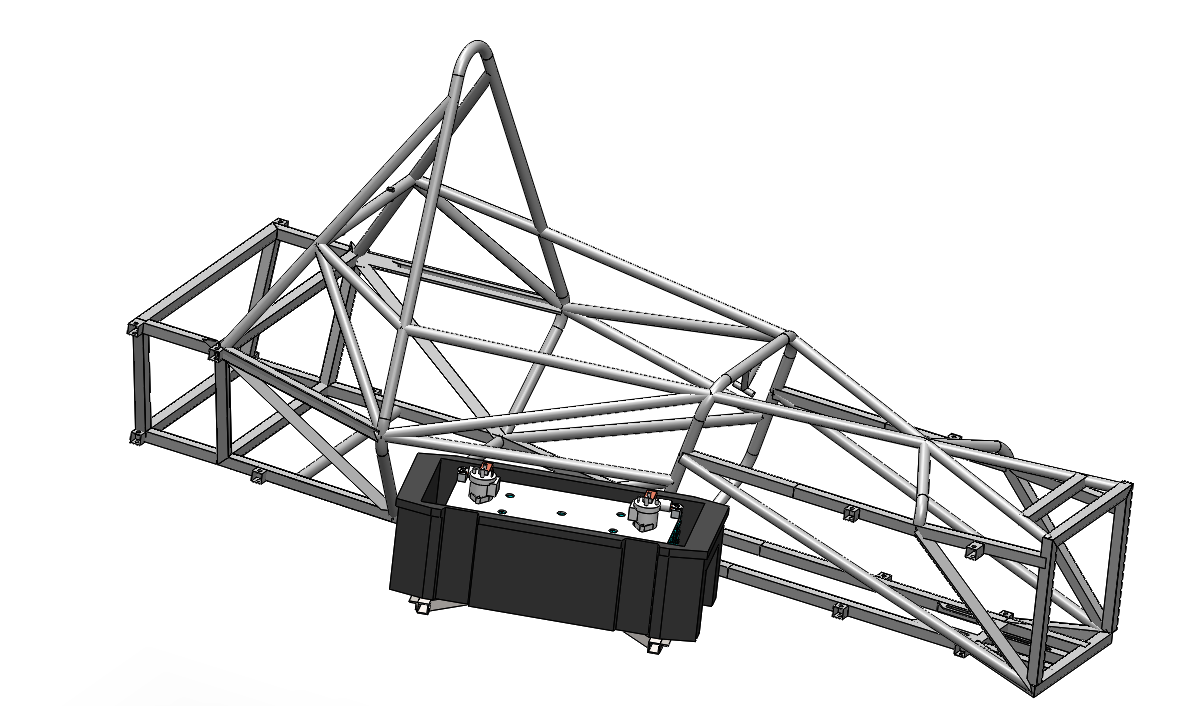
Anyways, a powertrain design proposal had been completed and distributed to everyone by a few extra-gung-ho team members by the middle of summer. The idea was simple enough, and would be functionally flexible and modular. I get an email from the team’s advisor in mid-July, asking for an update on frame design. I wasn’t in charge of designing it, so I asked the team, and apparently nobody had started it yet. Great. Kyle and I agreed to take a parallel development approach to it, and each separately design a frame, getting feedback from the team every few days as more and more parts were packaged. I opted for a more traditional SAE-competition approach with a short wheelbase, narrow driver cell, and sidepods (for the batteries). Kyle went with a long, wide, and low chassis that contained everything including the batteries and front motors within the frame. He applied our classic lime green to it, and it was dubbed “the turtle” in short order. As a team, we were frustrated with packaging components into a chassis that wasn’t designed for them, so Kyle’s frame was chosen on the basis that it was literally designed around the parts that we wanted to use.
The powertrain design report detailed components, configurations, and packaging. The plan was to use a trio of Sevcon motors and controllers, one for each front wheel, and one to be coupled to a 250CC dirtbike engine. The dirtbike engine would use a centrifugal clutch system to add a layer of safety from accidentally slamming an 80LB motor rotor’s inertia directly into the gearbox. The rear motor was connected to the rear wheels by chain drive, through a Torsen Differential. The dirtbike engine would be connected to the rear motor through a clutch pack and an axial coupler called a lovejoy connector, and would be movable from engaged to disengaged with the throw of a lever. This would allow us to run in electric only mode, gas only mode, parallel hybrid, or series hybrid, depending on the configuration of the multimodal powerplant and the control system. The rear powertrain would be assembled on a self-contained subframe, making installation into the chassis as easy as possible. The front motors and controllers would allow for aggressive positive and negative torque vectoring, helping with cornering and straight line acceleration.
By the time the first week of class had ended, we had assembled a cut list for the frame members and placed an order for our custom frame to be cut, bent, welded, and shipped to us. Shoutout to Cartesian Metal Fab. Co. for helping us with the documentation generation and for shipping a beautiful finished product to us!
The next few weeks are largely eaten up by design work. For Andrew, Charlie, and me, that consisted mainly of working on our senior design project: a battery pack and custom battery management system (BMS) for the car. Suspension, powertrain, cockpit, steering, and brakes (among other things) were delegated out to newer members who wanted to get in on the design phase. Me and several other more senior members would also regularly be in the shop, doing whatever needed doing, be it fab work, helping the newbies, or maintaining relations with our partners (mainly the dean’s office, the machine shop supervisor, Floyd, and our sponsors)
Naturally, since Andrew, Charlie, and I had been working with each other for a few years with AERO, and we’d already been thinking of our design over the summer, we were ahead of the game in senior design, but nothing prepared us for the volume of documentation that we would end up producing. Twice-monthly report outs were our “deliverables” and were to contain Gantt charts, Pugh charts, options analyses, pro-con tradeoffs, and insight into our general thought processes for the course instructors.
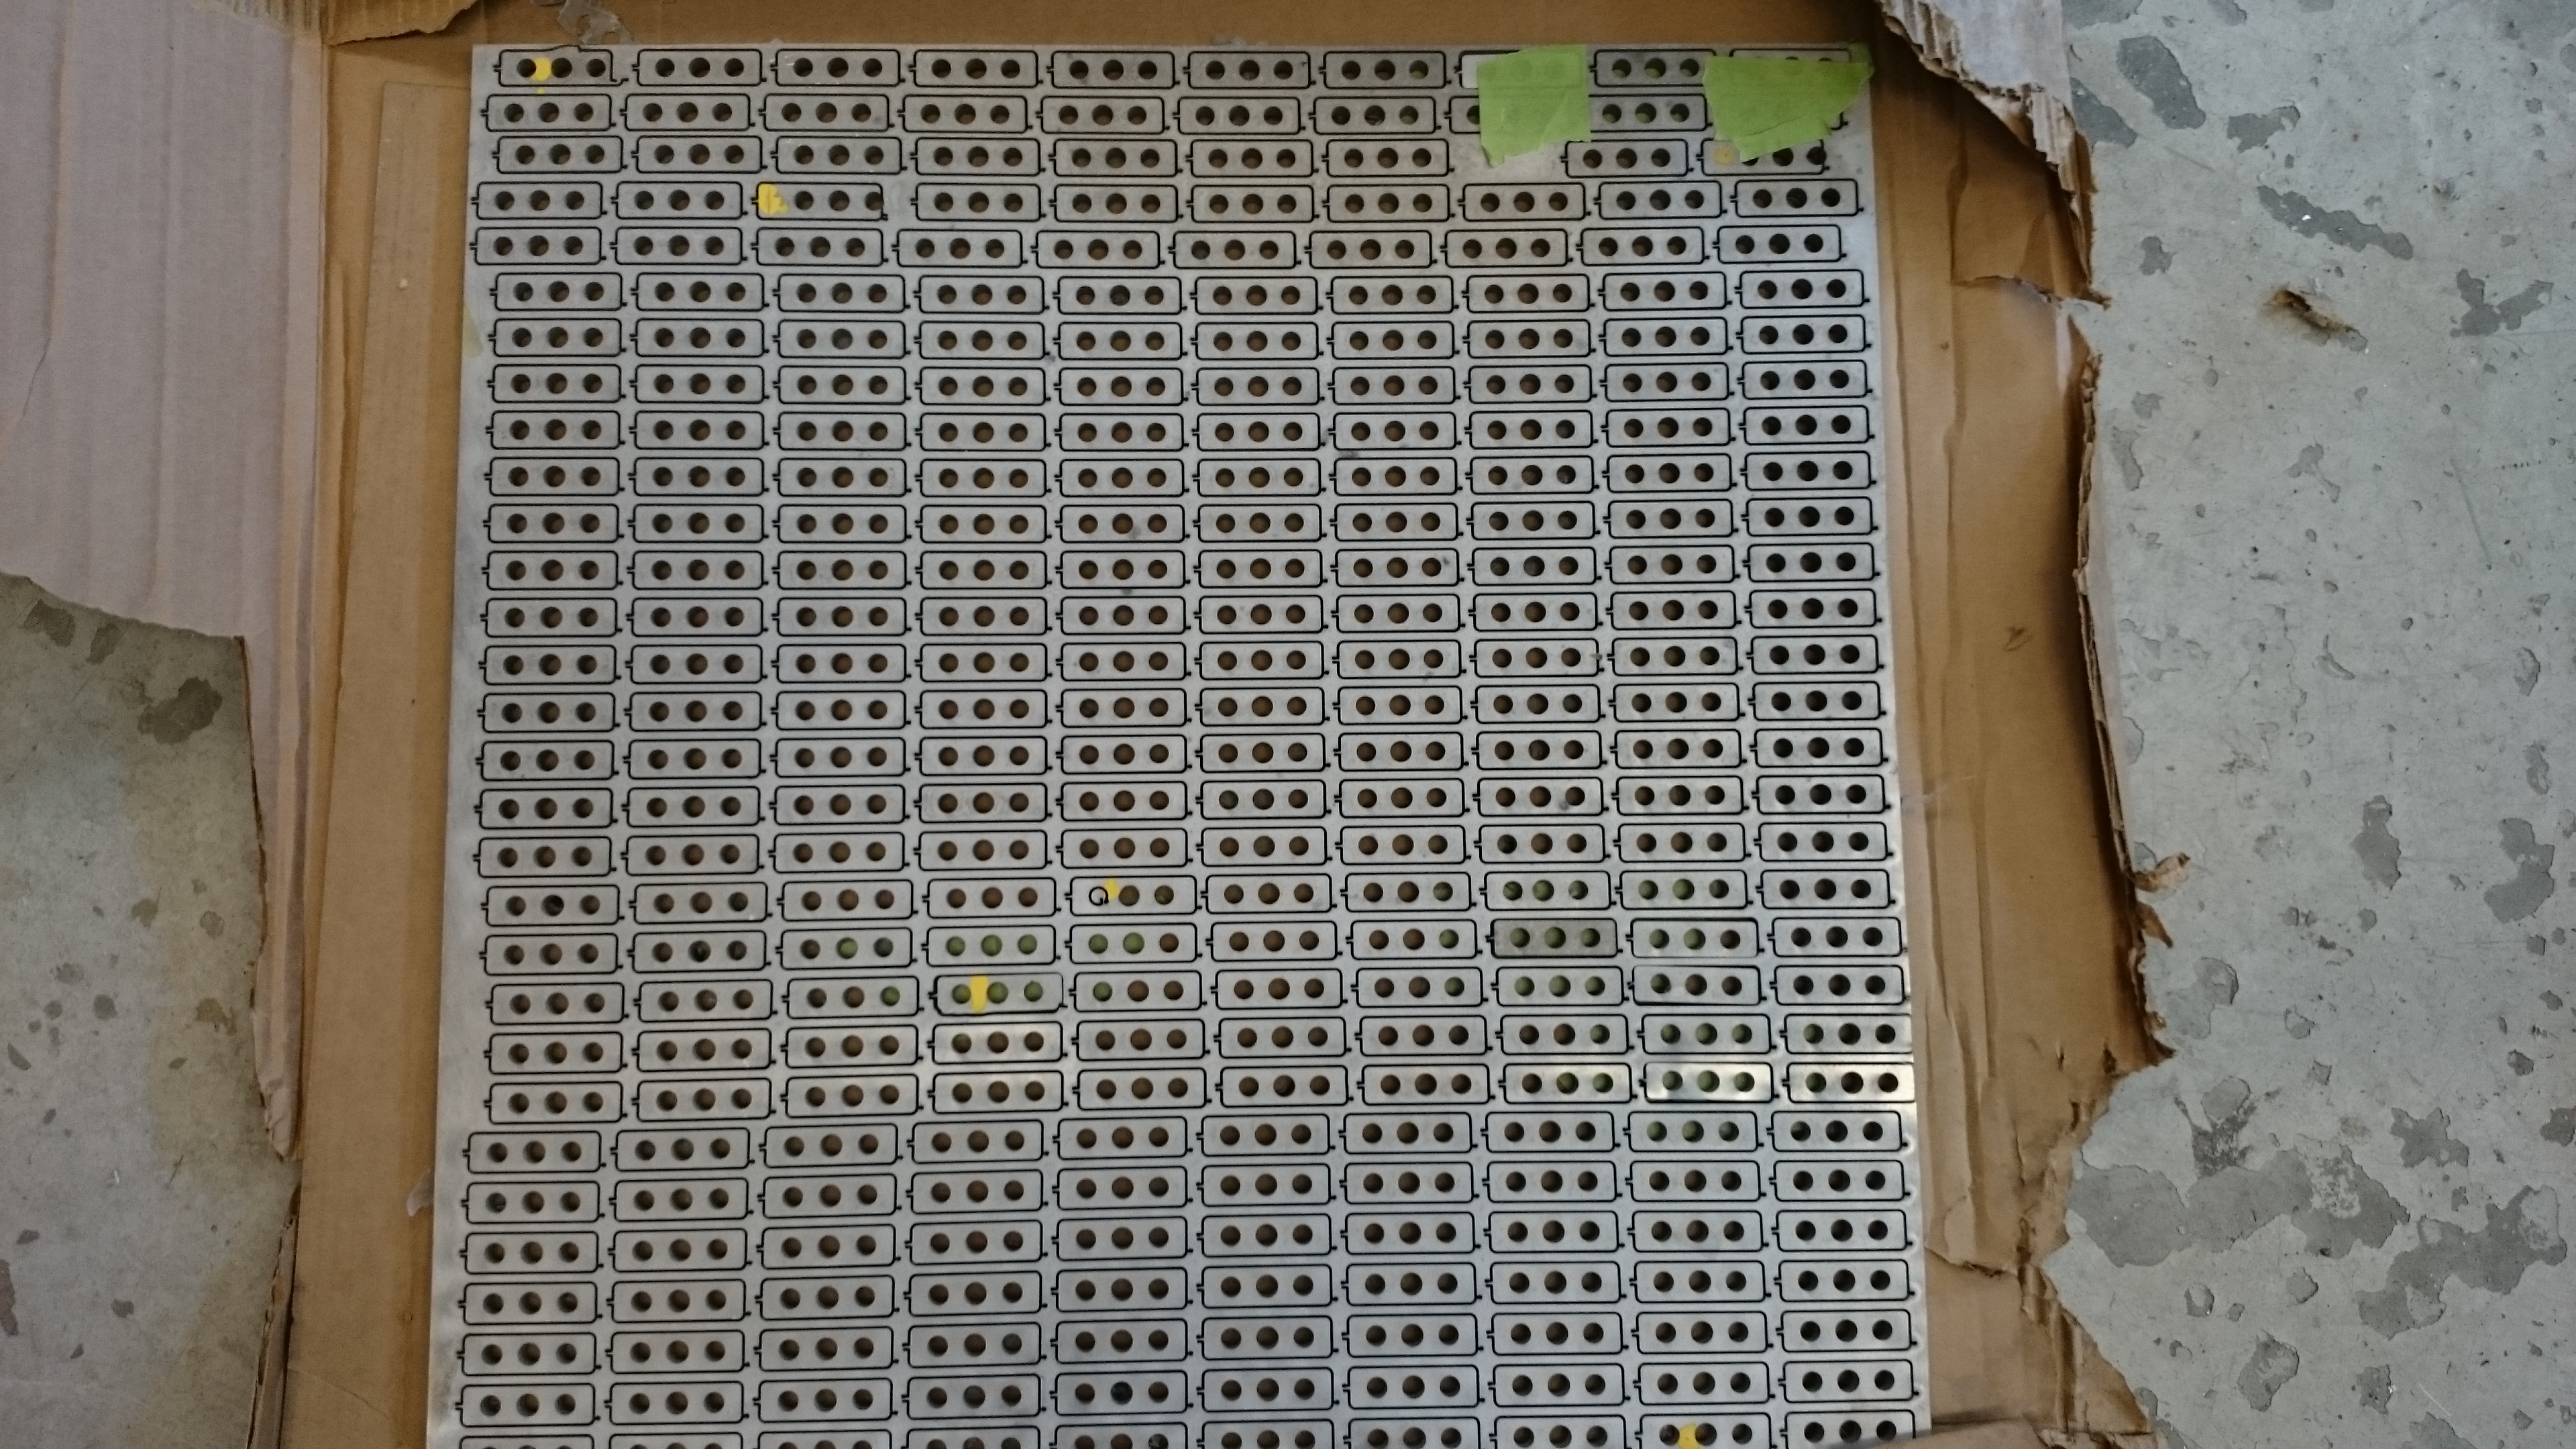
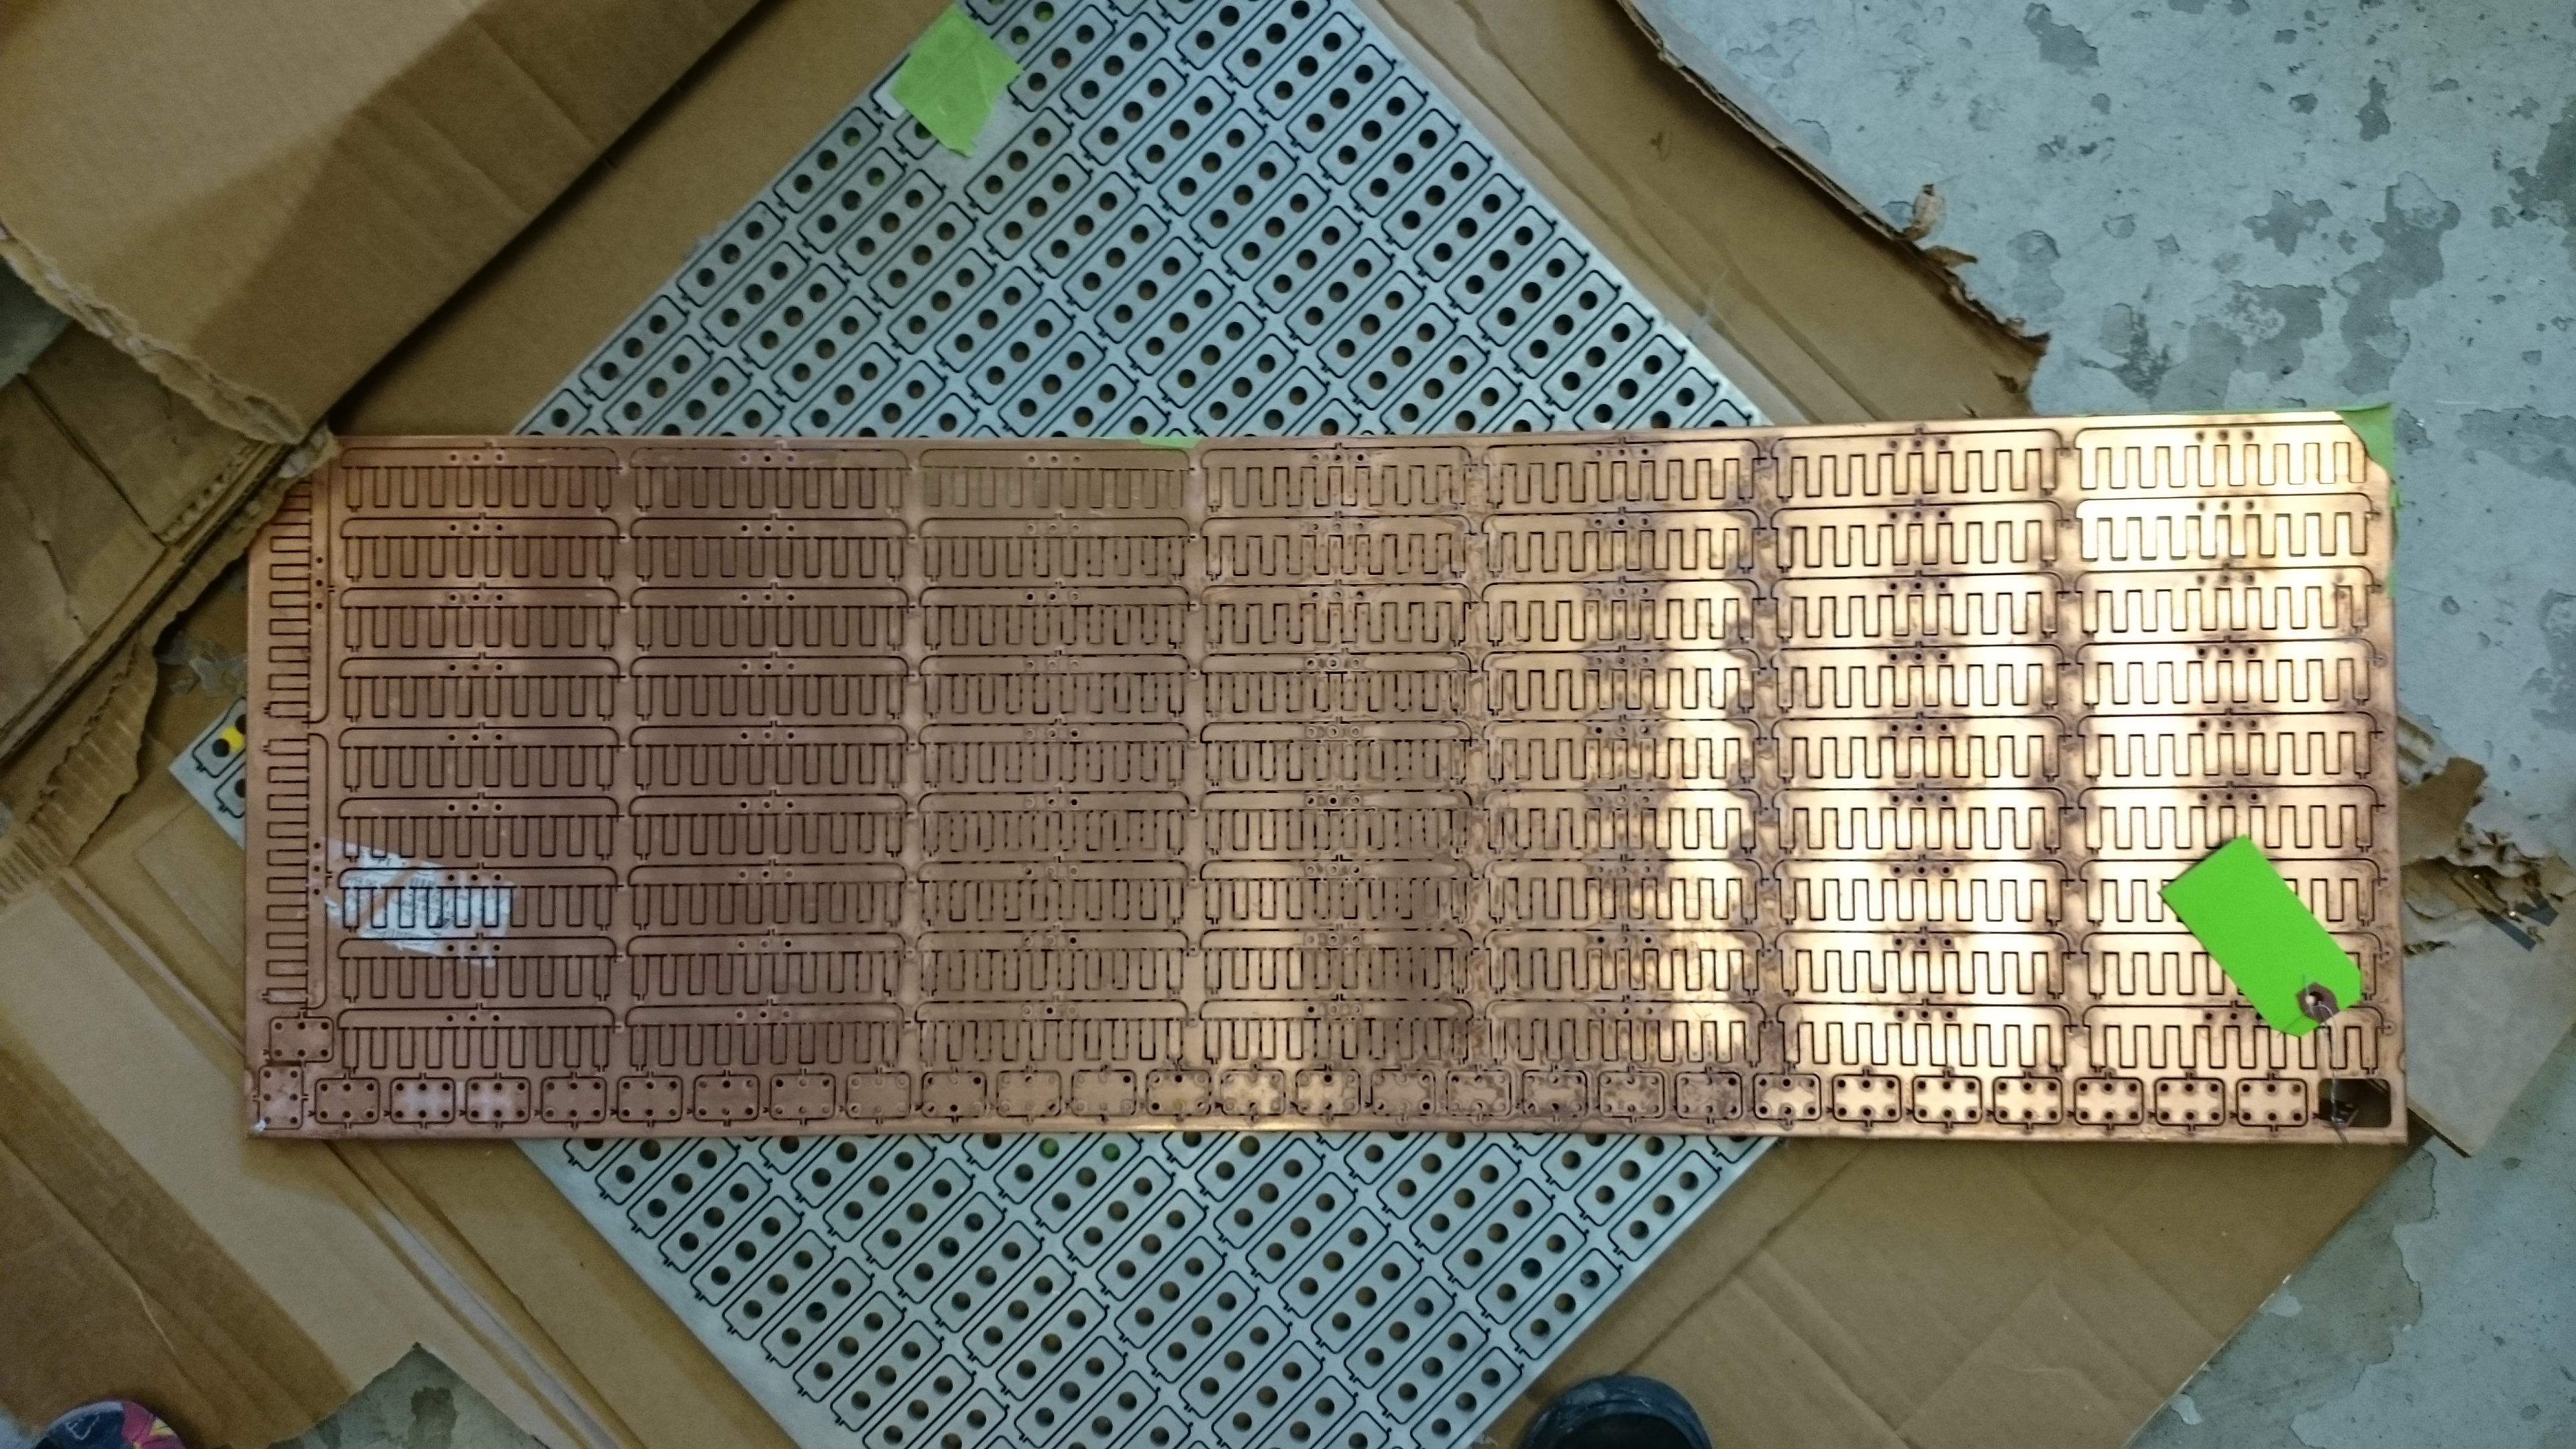
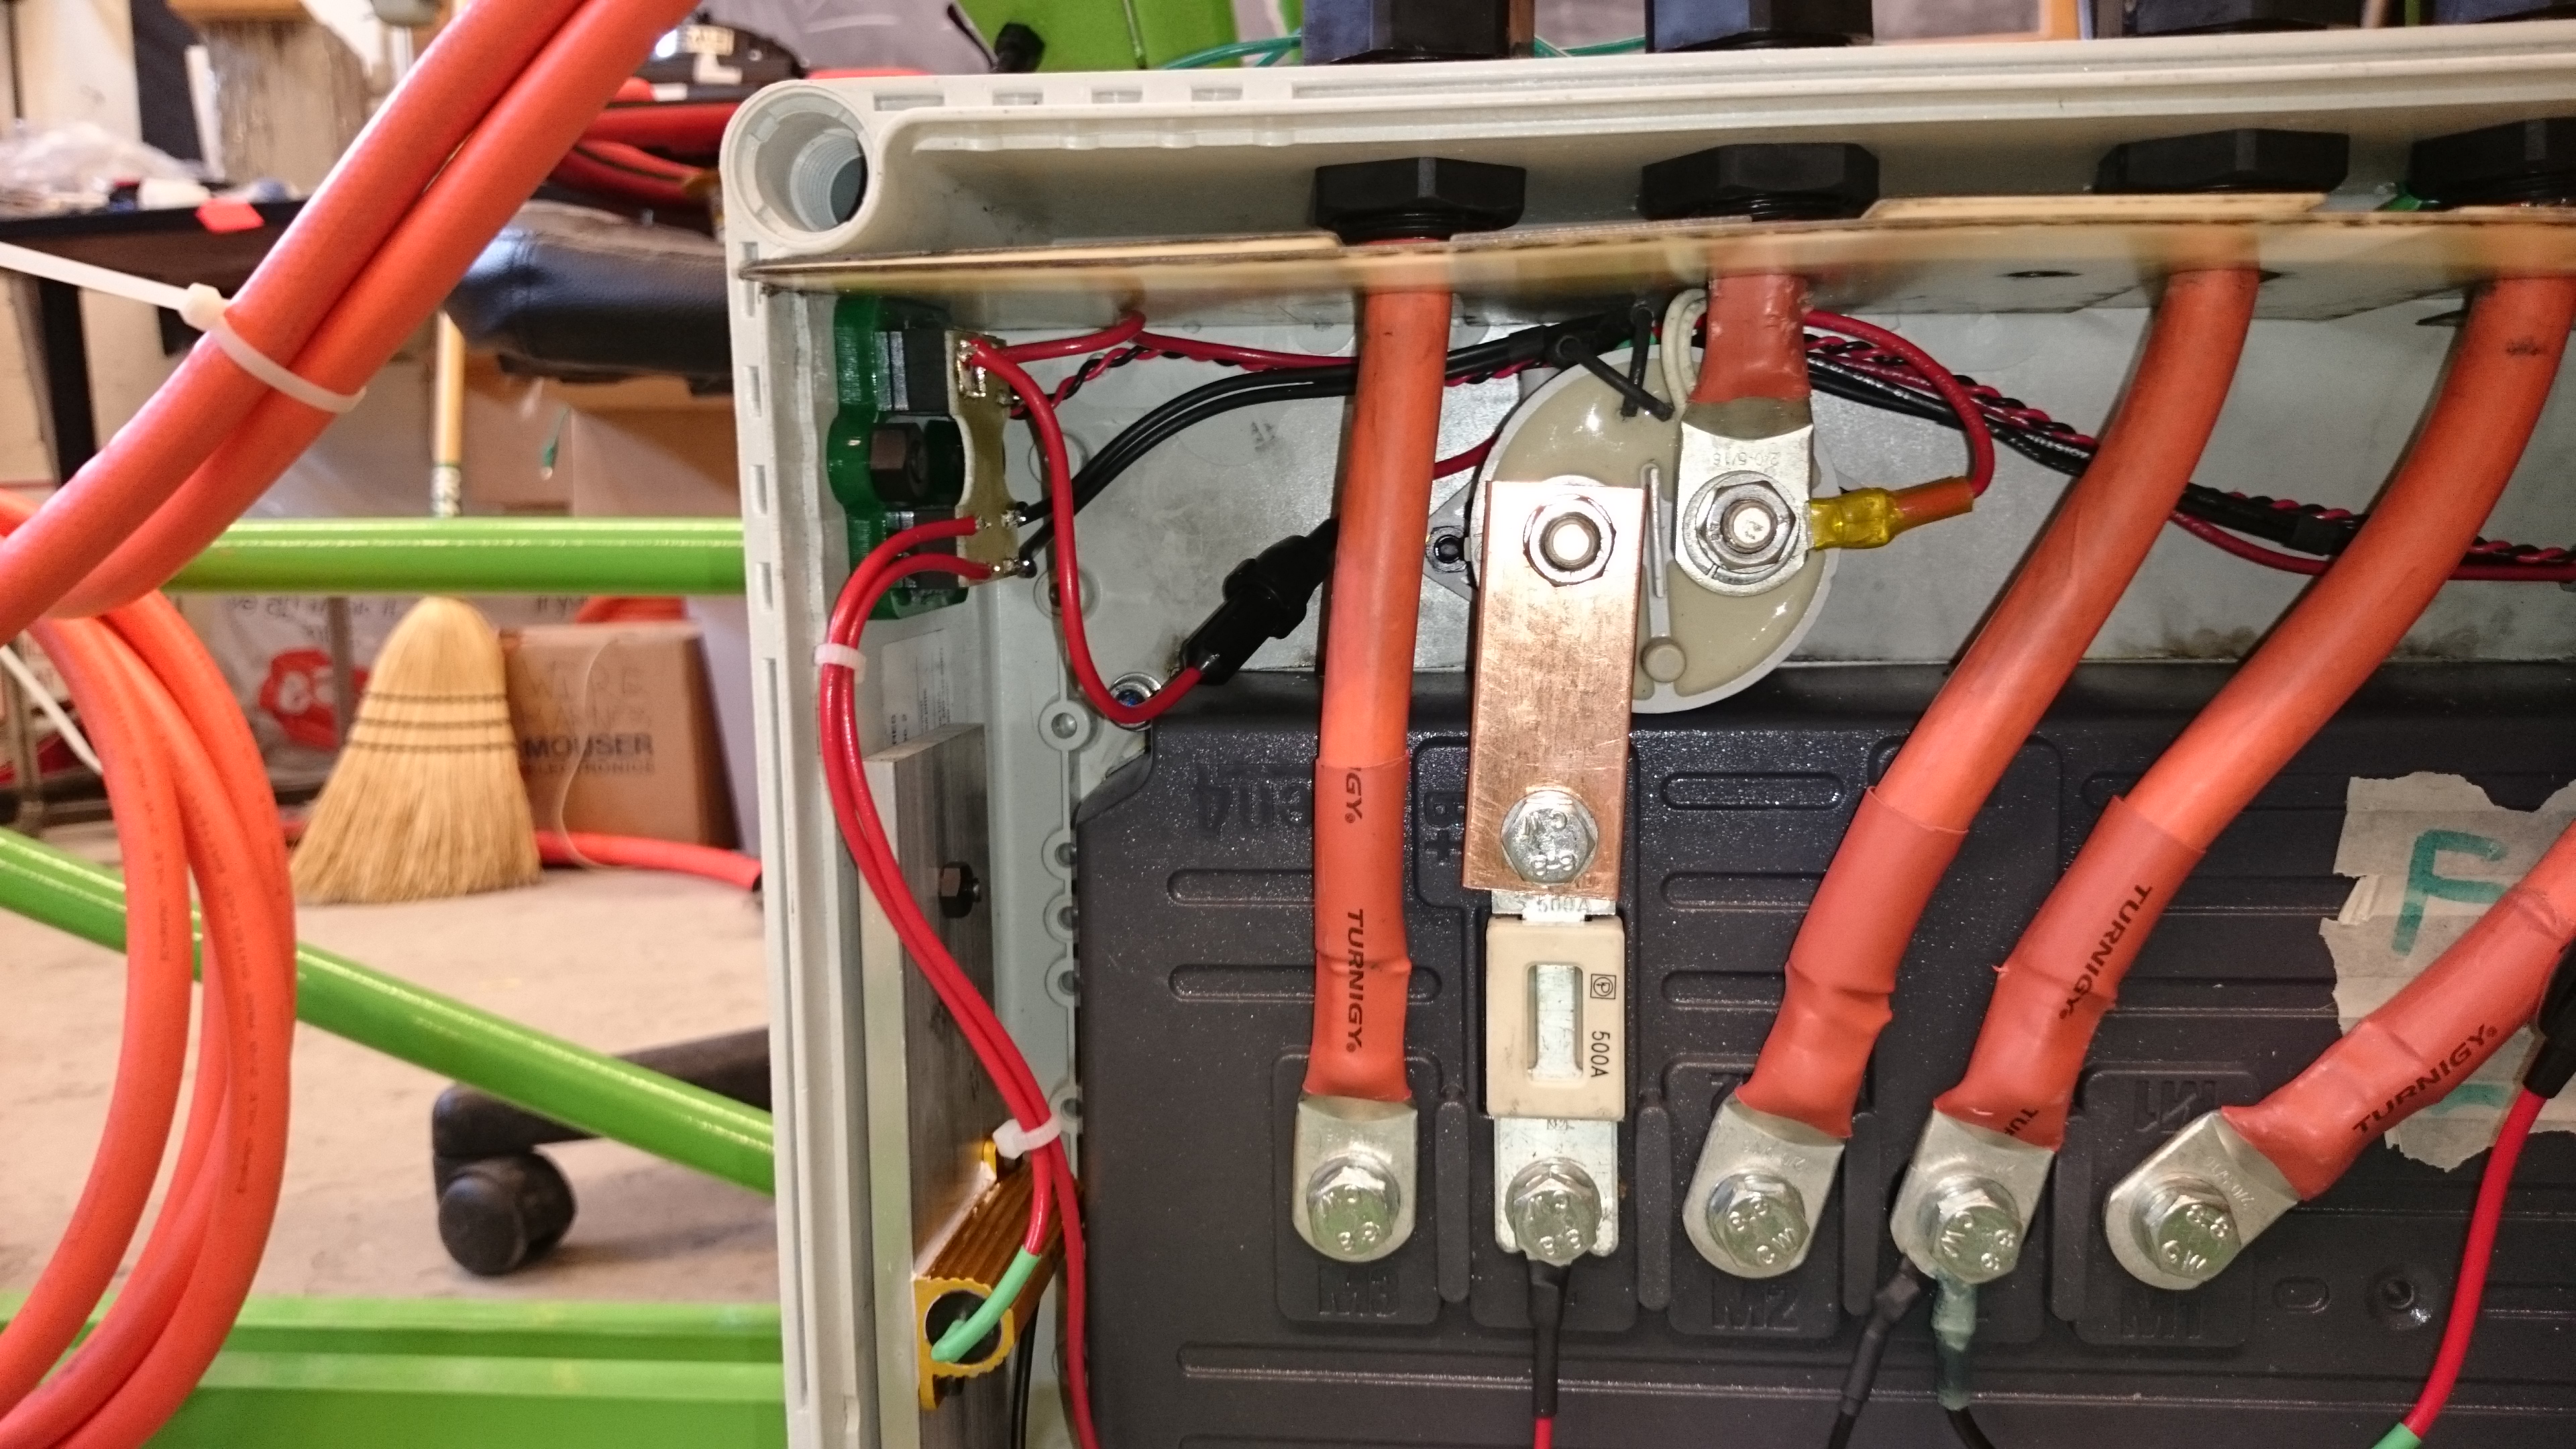
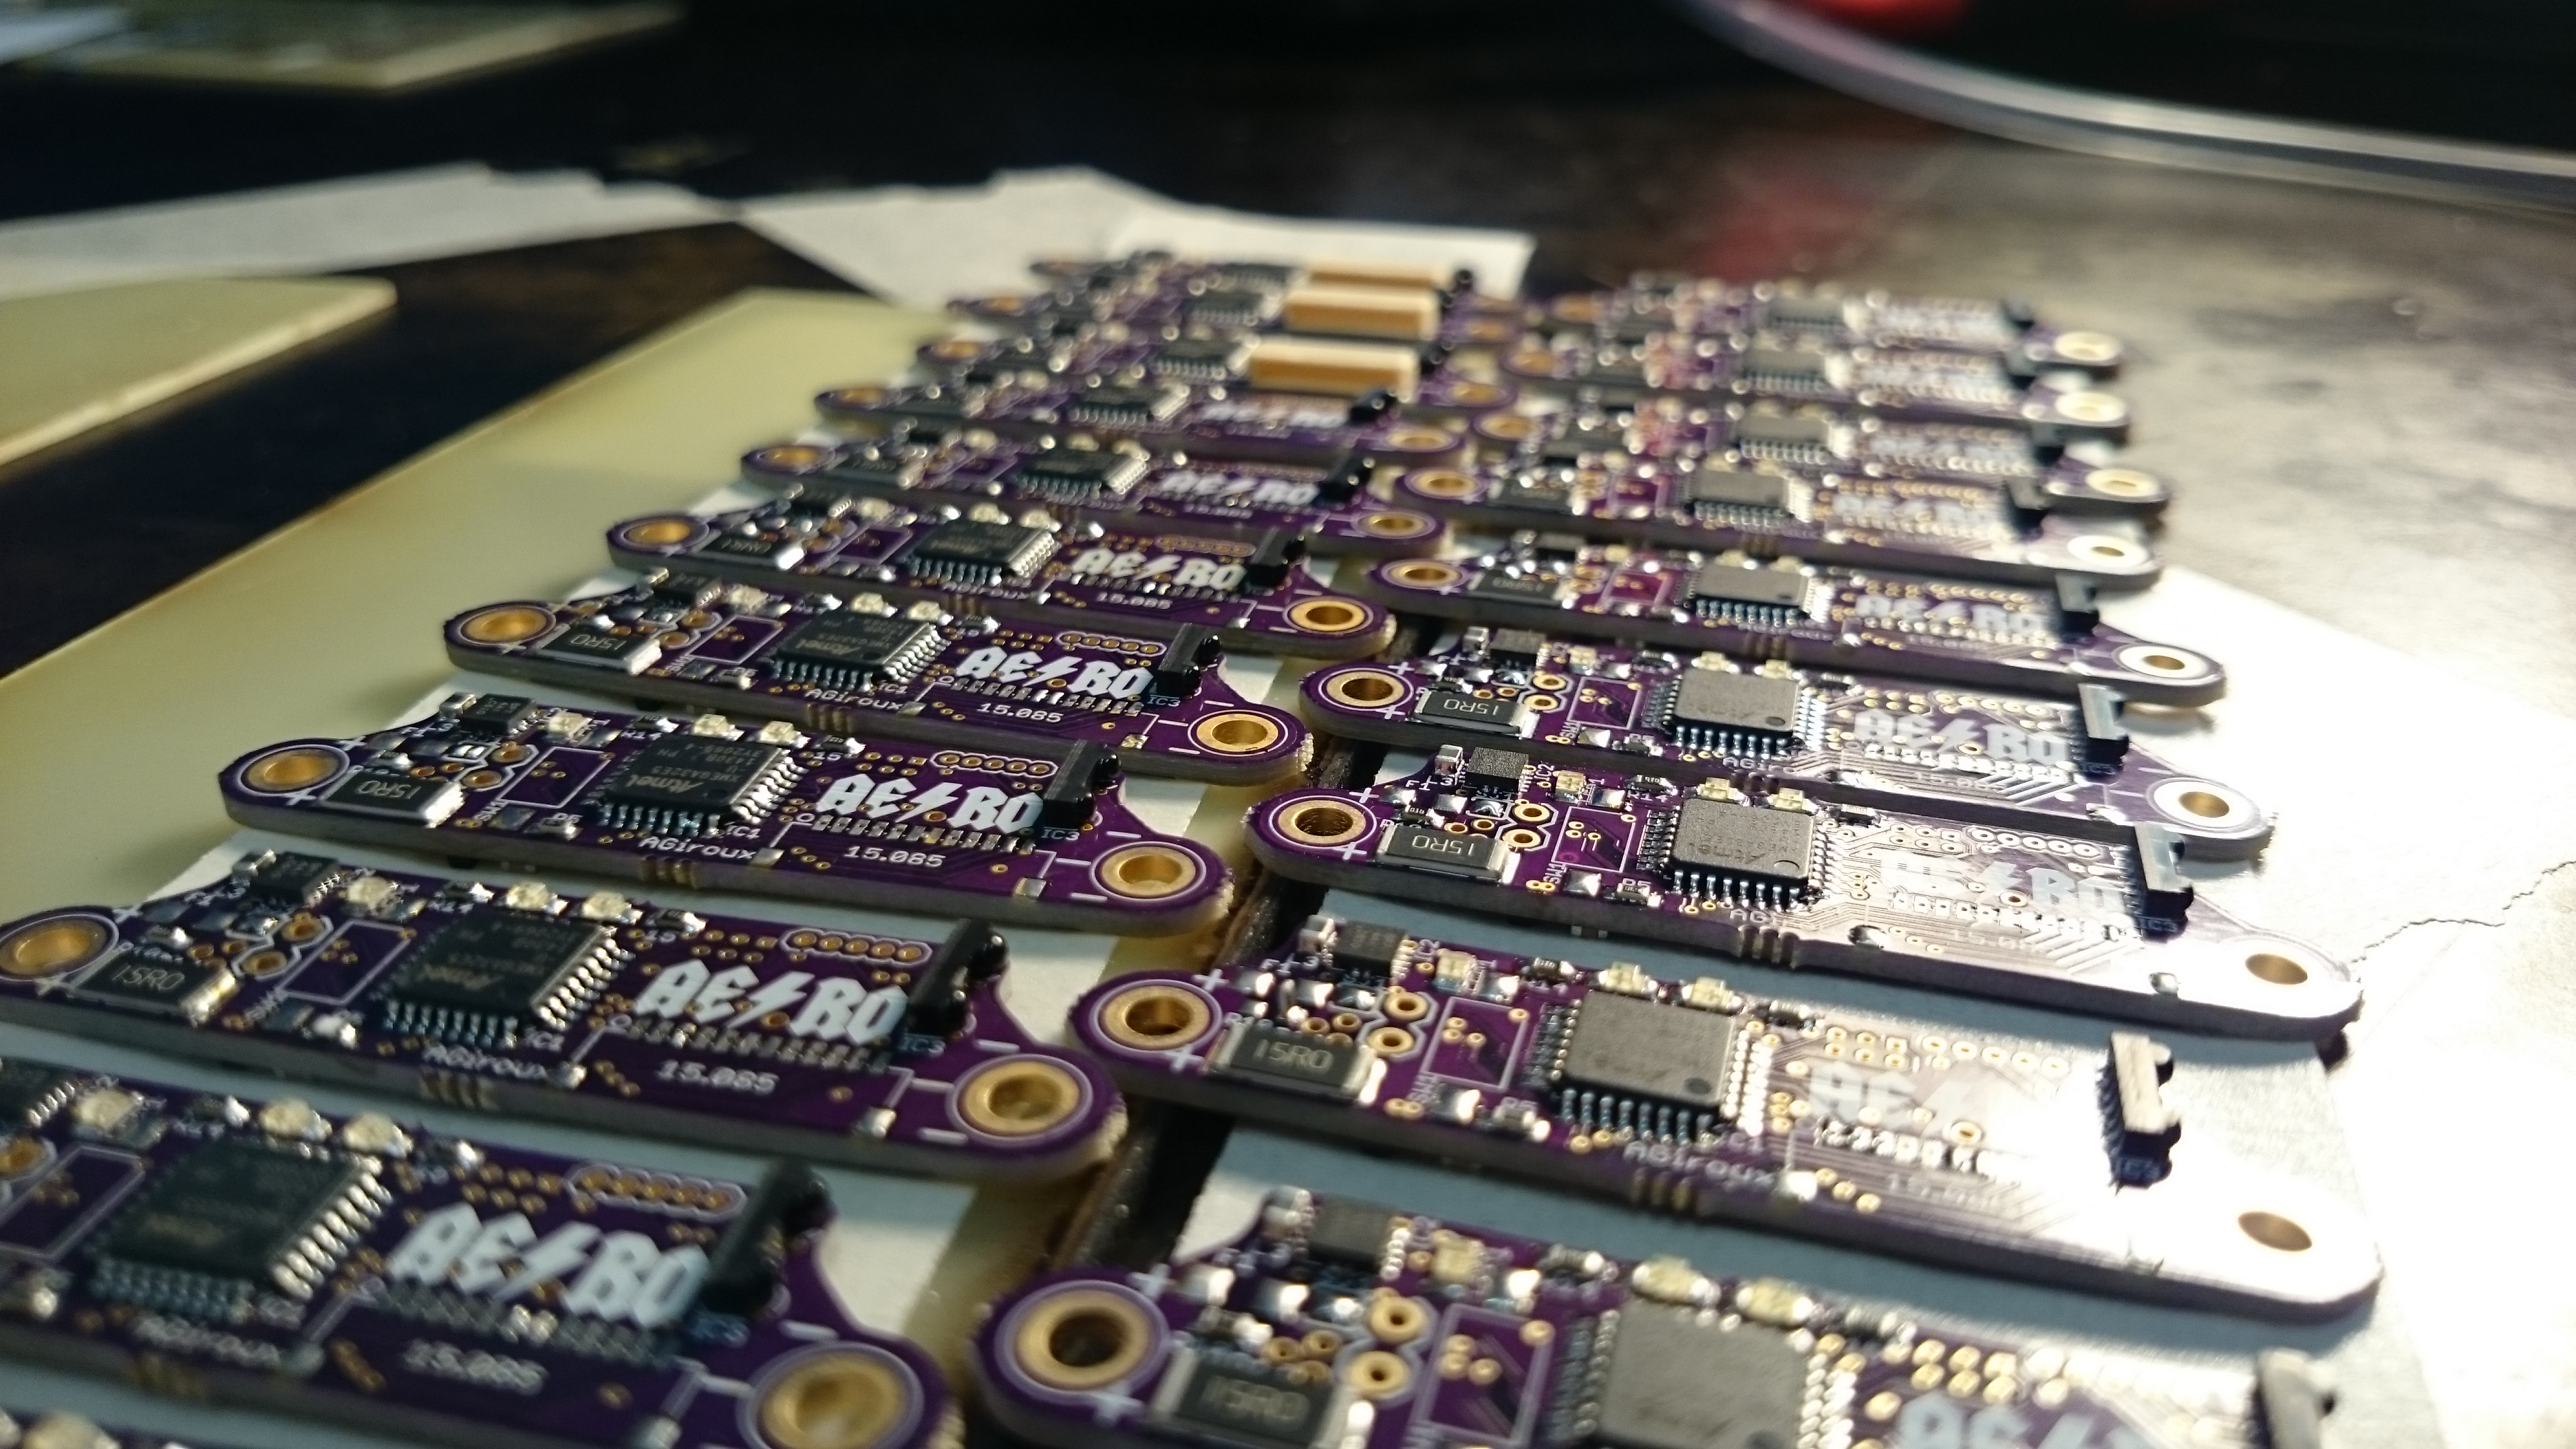
Our initial plan was to have a 24s10p pack constructed of 24 modules of 10 parallel cells that were spot-welded to their respective positive and negative busbars. The pack would be split into two custom-fabricated enclosures, and each enclosure would have an energy segmentation switch so that we could eliminate the presence of high voltage (defined as anything over 30VDC). Atop each 10-cell module would be a BMS sense board to measure voltage and temperature of the cells. These sense boards would then talk to the BMS host over IR transceivers to comms nodes, which were directly connected to the BMS host. We would output the high and low temperatures, pack current, and a go/nogo signal to the car’s main brain. The modules would also be liquid cooled, but luckily we only designed to the output ports on the pack; the greater AERO team was handling the car-side cooling hardware.
By mid-november, things were really getting interesting. We had acquired our dirtbike from which we would be stealing the engine and fuel system. Kyle (my co-president) had to step down from his position and away from the team for personal reasons, which left Sam, the other brain behind the powertrain (dubbed “the modeshifter”), with the bulk of the work. Unfortunately he was also in charge of suspension and starting to feel the pressure of the heavier workload. The design of the front and rear suspension had been completed, but we found a fatal flaw in the front suspension: the design-intent wheel hubs would limit our steering angle to ~4 degrees in either direction. I offered to rework the front suspension and handle fabrication for the front and rear, so that Sam could focus on the modeshifter, which he had already begun receiving parts for.
With the approval of the team, I opted to go for an off-the shelf hub and upright solution, since we were short on time. The team had used Polaris parts in the past (before my time) so there were spares laying around the shop, which gave me the idea to go all-in on the off the shelf plan. In short order, I secured a Polaris sponsorship which got us a steep discount (that I can’t legally disclose), and ordered a set of front hubs, uprights, ball joints, brake calipers, rotors, and pads, with enough nuts and bolts to keep it all together. We could borrow wheel centers and driveshafts from our parts bins. The remainder of the semester was a whirlwind of parts orders, mostly for our senior design battery pack, raw materials, and electrical bench testing.
January 2015
By this time, our senior design project had evolved slighty. We switched to modifying prefabricated electrical enclosures instead of building custom ones ourselves, and our module design solidified, using 3 unique aluminum parts and 4 unique fiberglass parts. This drastically cut down our manufacturing complexity, and would allow us to reduce machining time on our end, and at our manufacturers as well. One snag that we hit was how to weld our batteries together. A university-owned machine shop had a spot welder, but it wasn’t powerful enough to weld the battery tabs to our meaty busbars. Andrew even bought a sketchy battery welder from eBay, but that didn’t work either. We attempted a compression fit with a hi-temp foam, but in testing we found that that incurred a huge temperature rise at the joint.
By the end of the month, we received the Polaris parts, and I had gotten the front and rear suspension arms fabricated with some help from various teammates. One thing was getting more and more clear; we were running behind schedule. Sure, we had lots of components in-house, and some of the electronics were tested, but the powertrain was nowhere near ready, and the batteries were still waiting on the cells to be delivered, and for the structural parts to be fabricated. We were getting to the point where we would need to make the call to axe the internal combustion engine for this years competition. It just wasn’t ready, and I couldn’t ask the Powertrain guys to spend even more time in the shop.
February 2015
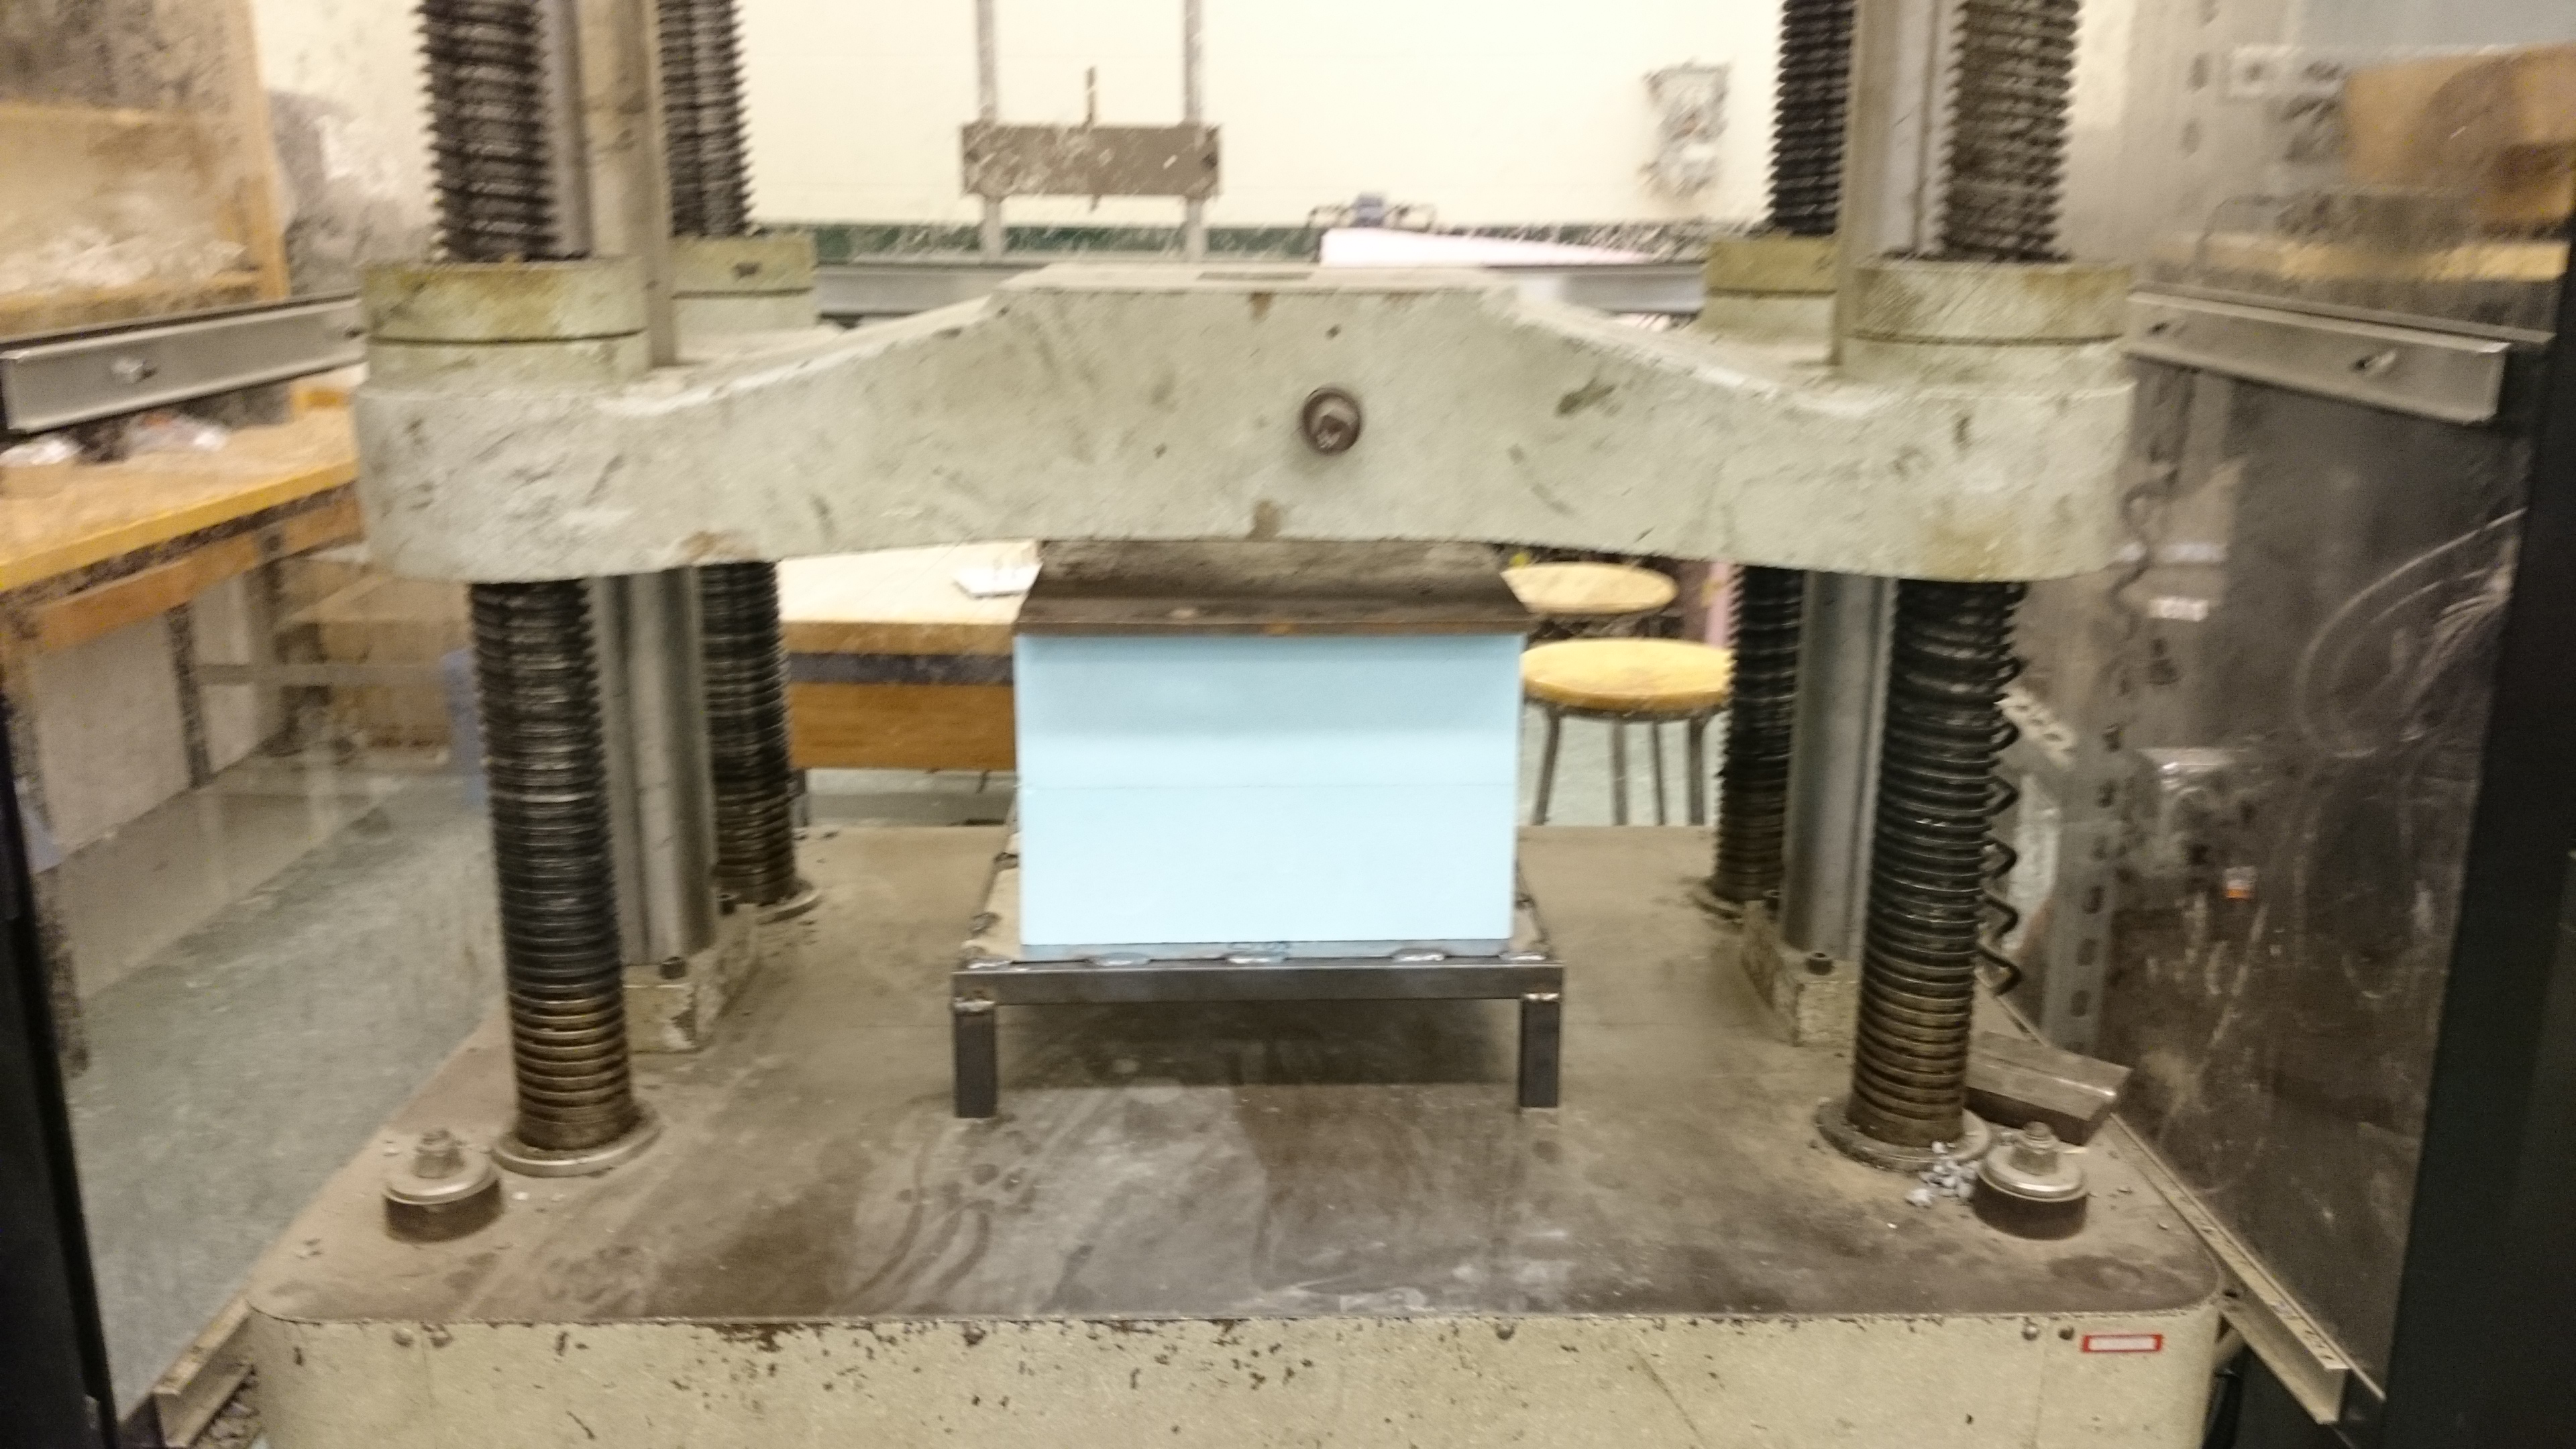
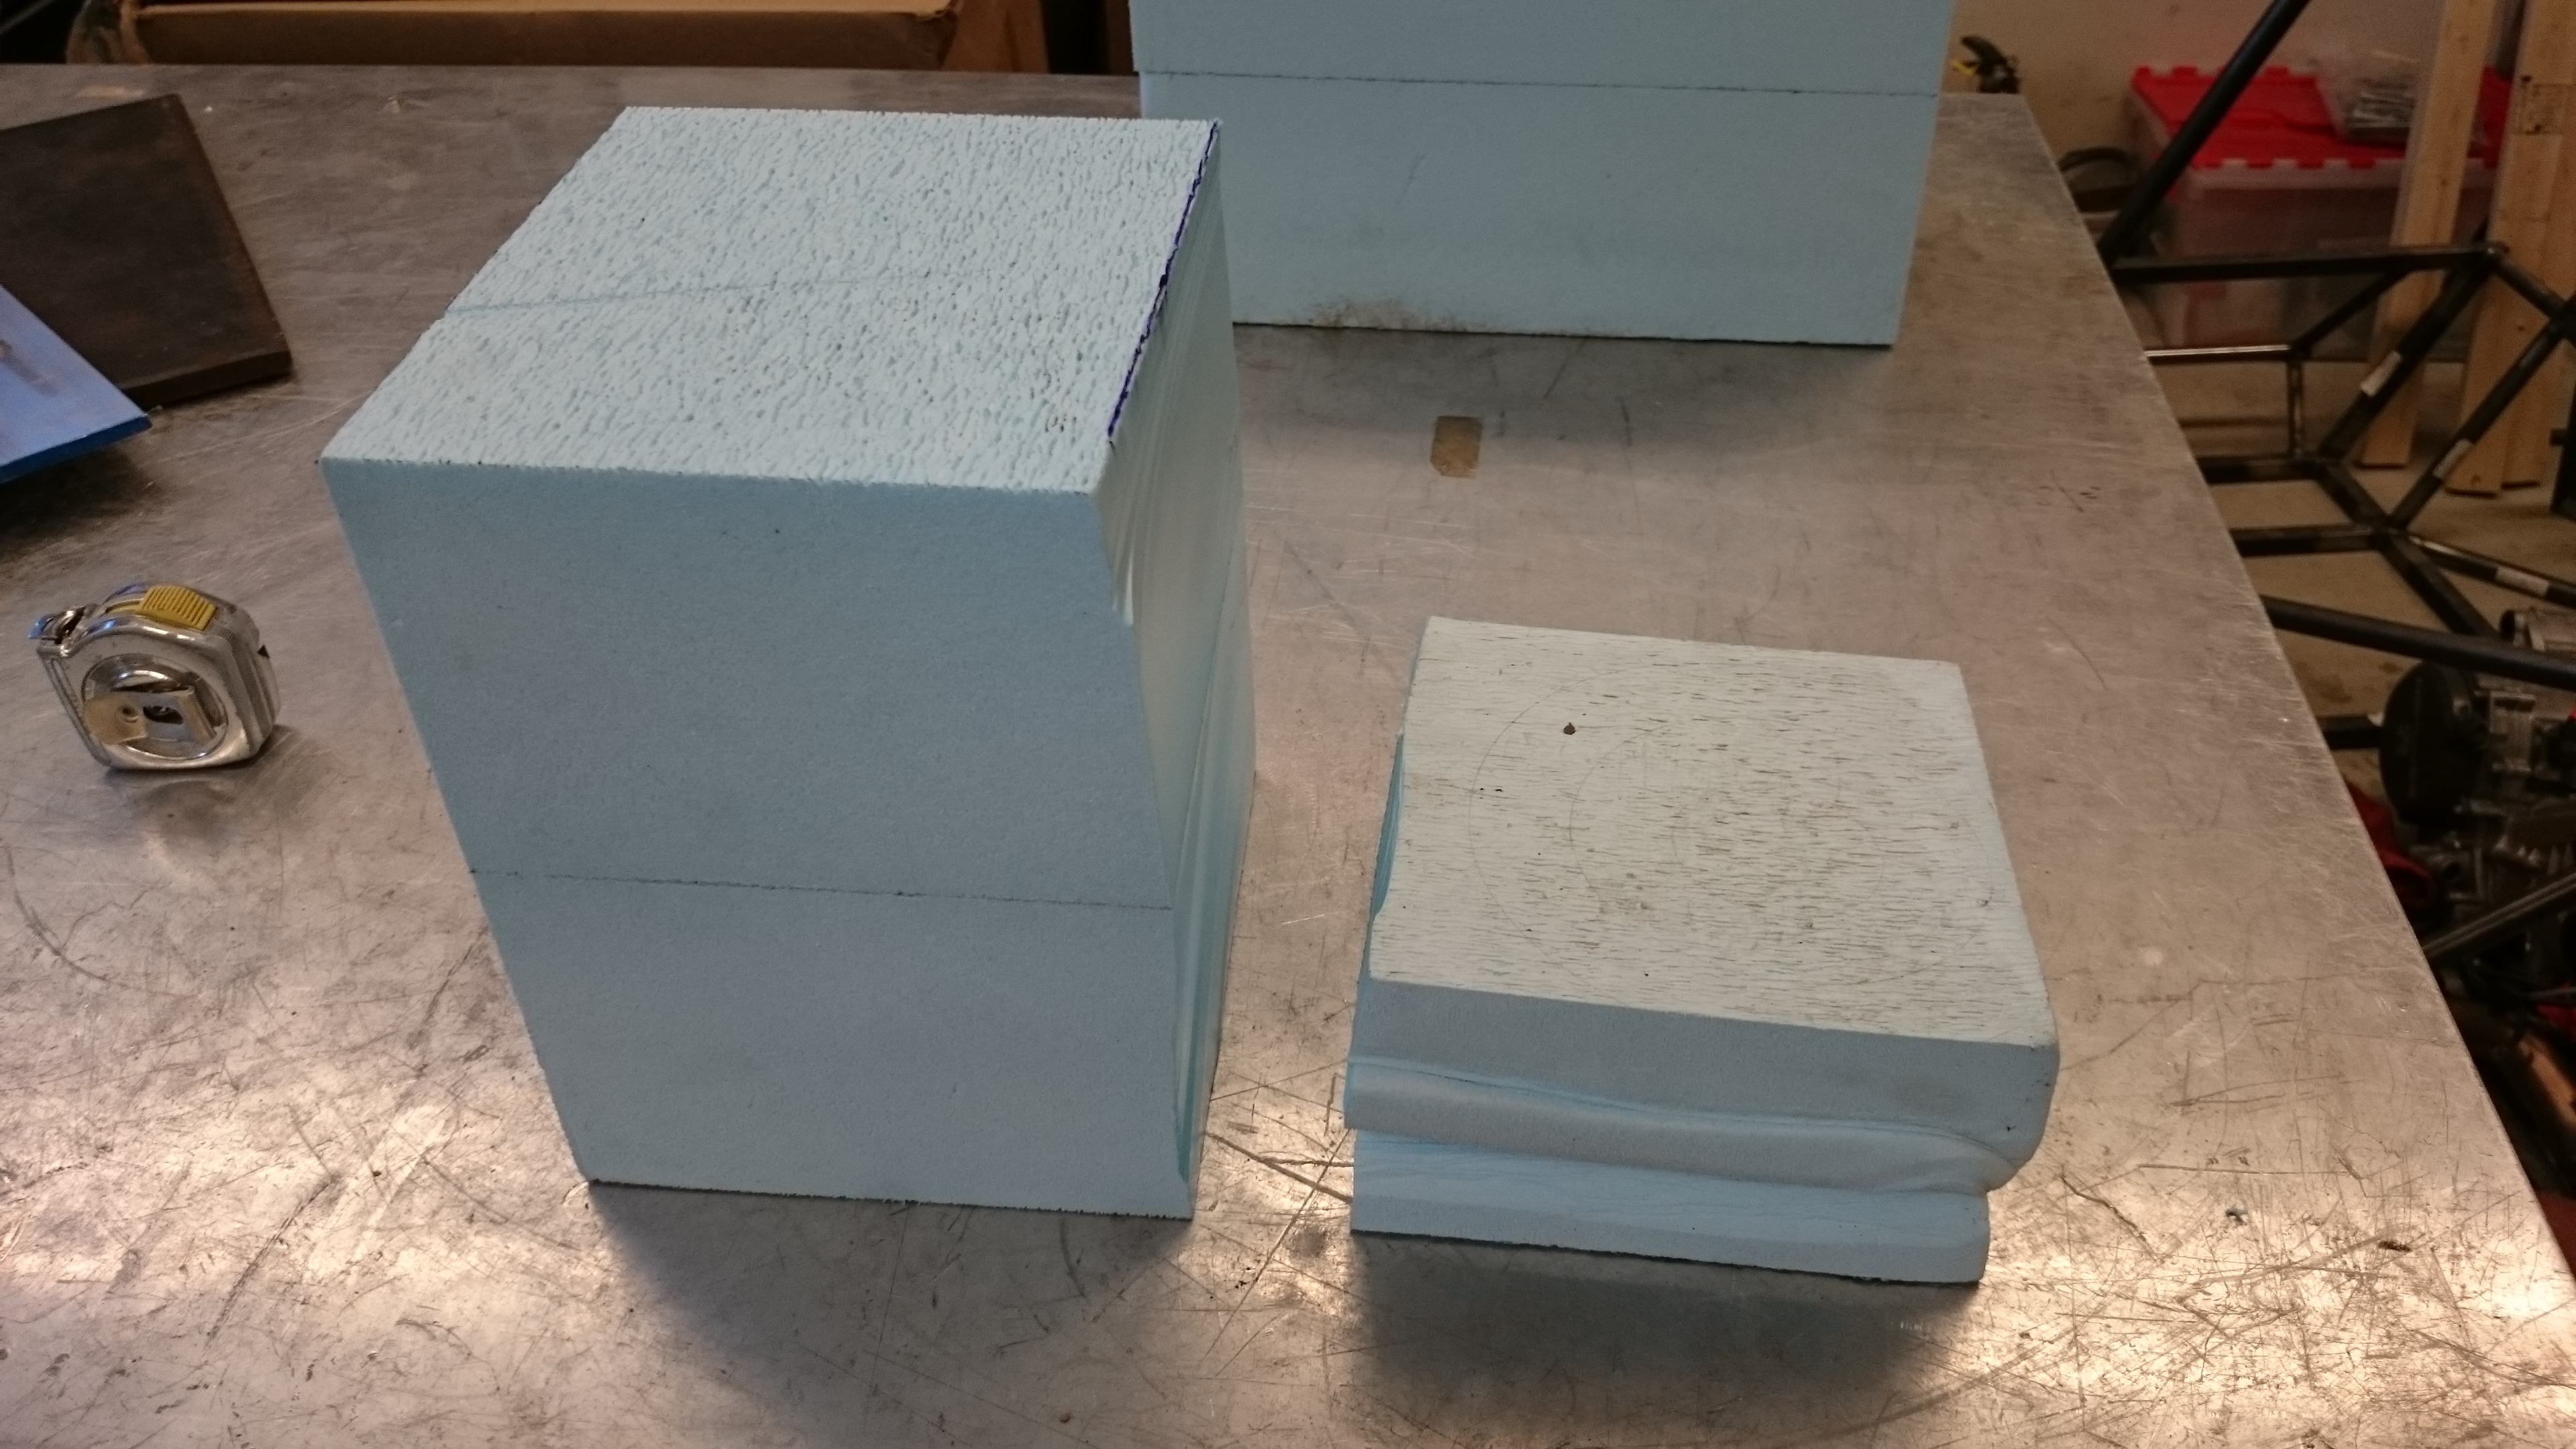
One open item on our list was an impact attenuator. The material I had planned to use, some leftover aluminum honeycomb, was revealed to be ineffective when I ran the numbers. I panic ordered a few cubic feet of Dow Impaxx-700 (the FSAE standard material), and got to work running the numbers on the volume and shape that we would actually need. We received the foam fairly quickly, but I still had to prove out the design. I recreated the front few inches of the car, and crushed it in the university tensile tester the night before the IA data form was to be submitted to the rules committee. That was a long night watching a quasi-static deformation test and crunching the data into a presentable format. Luckily my math worked out on the impact attenuator design, because I didn’t have time to buy more foam and test another iteration.
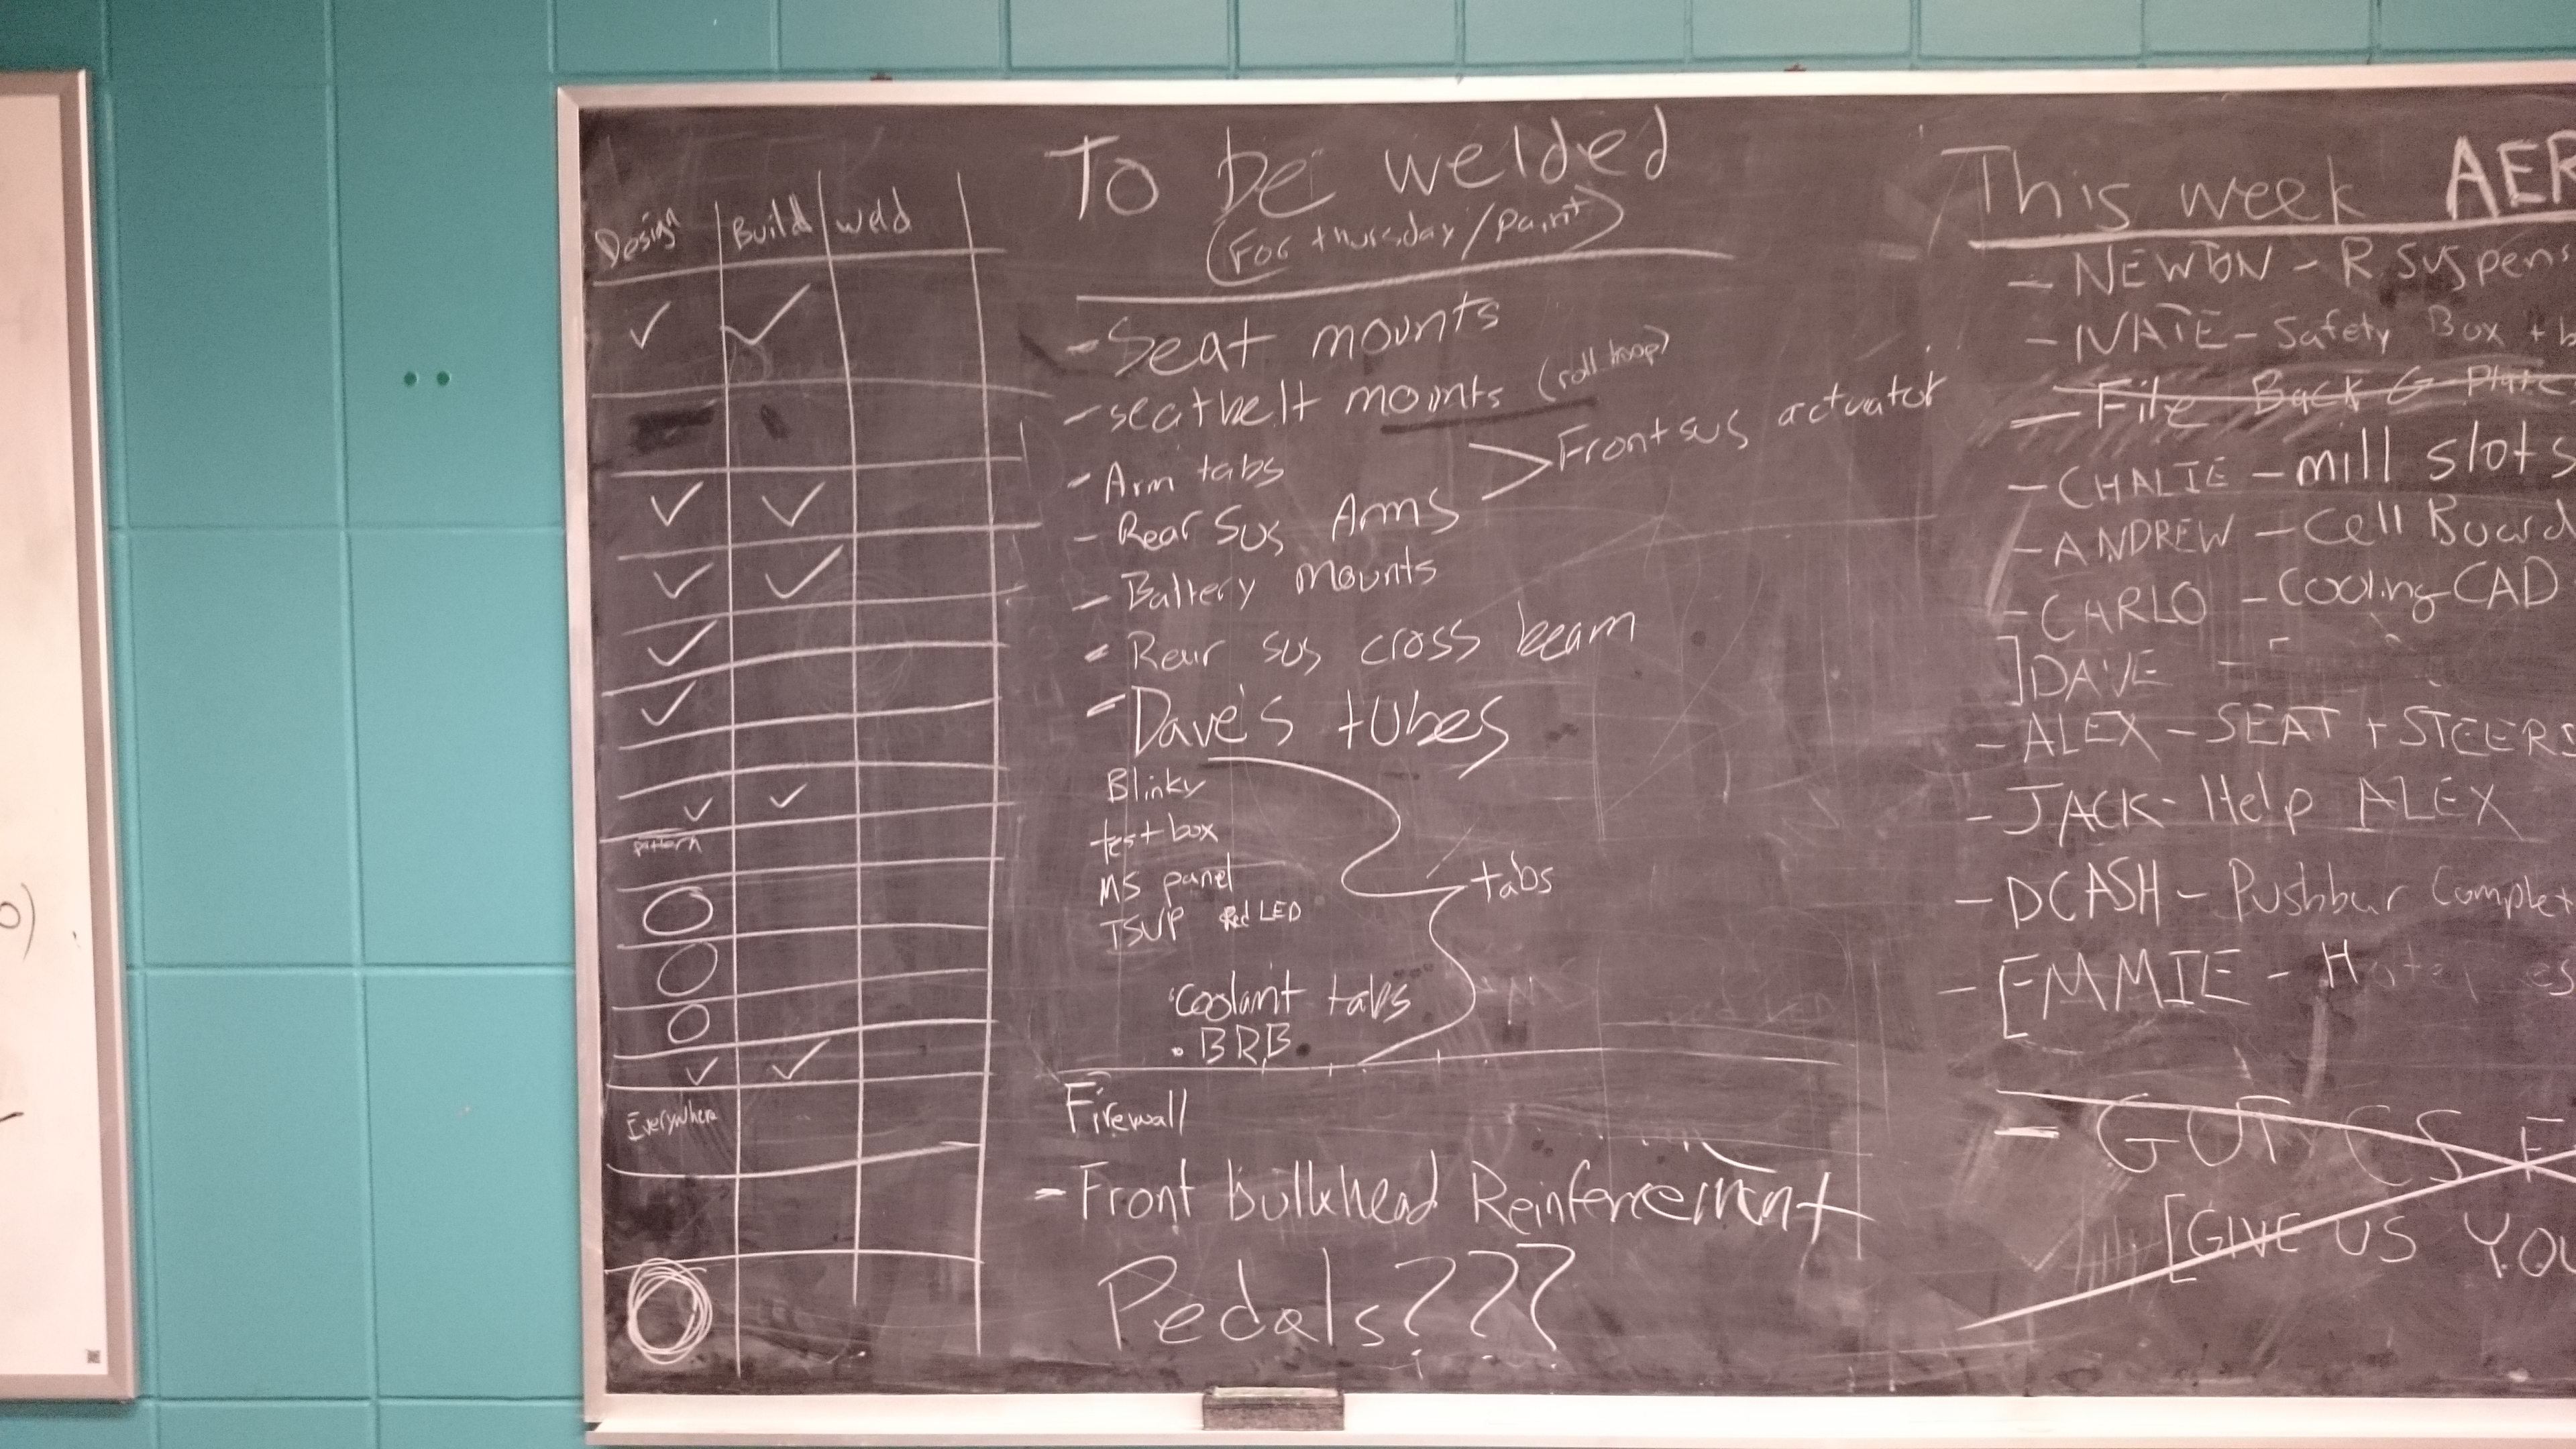
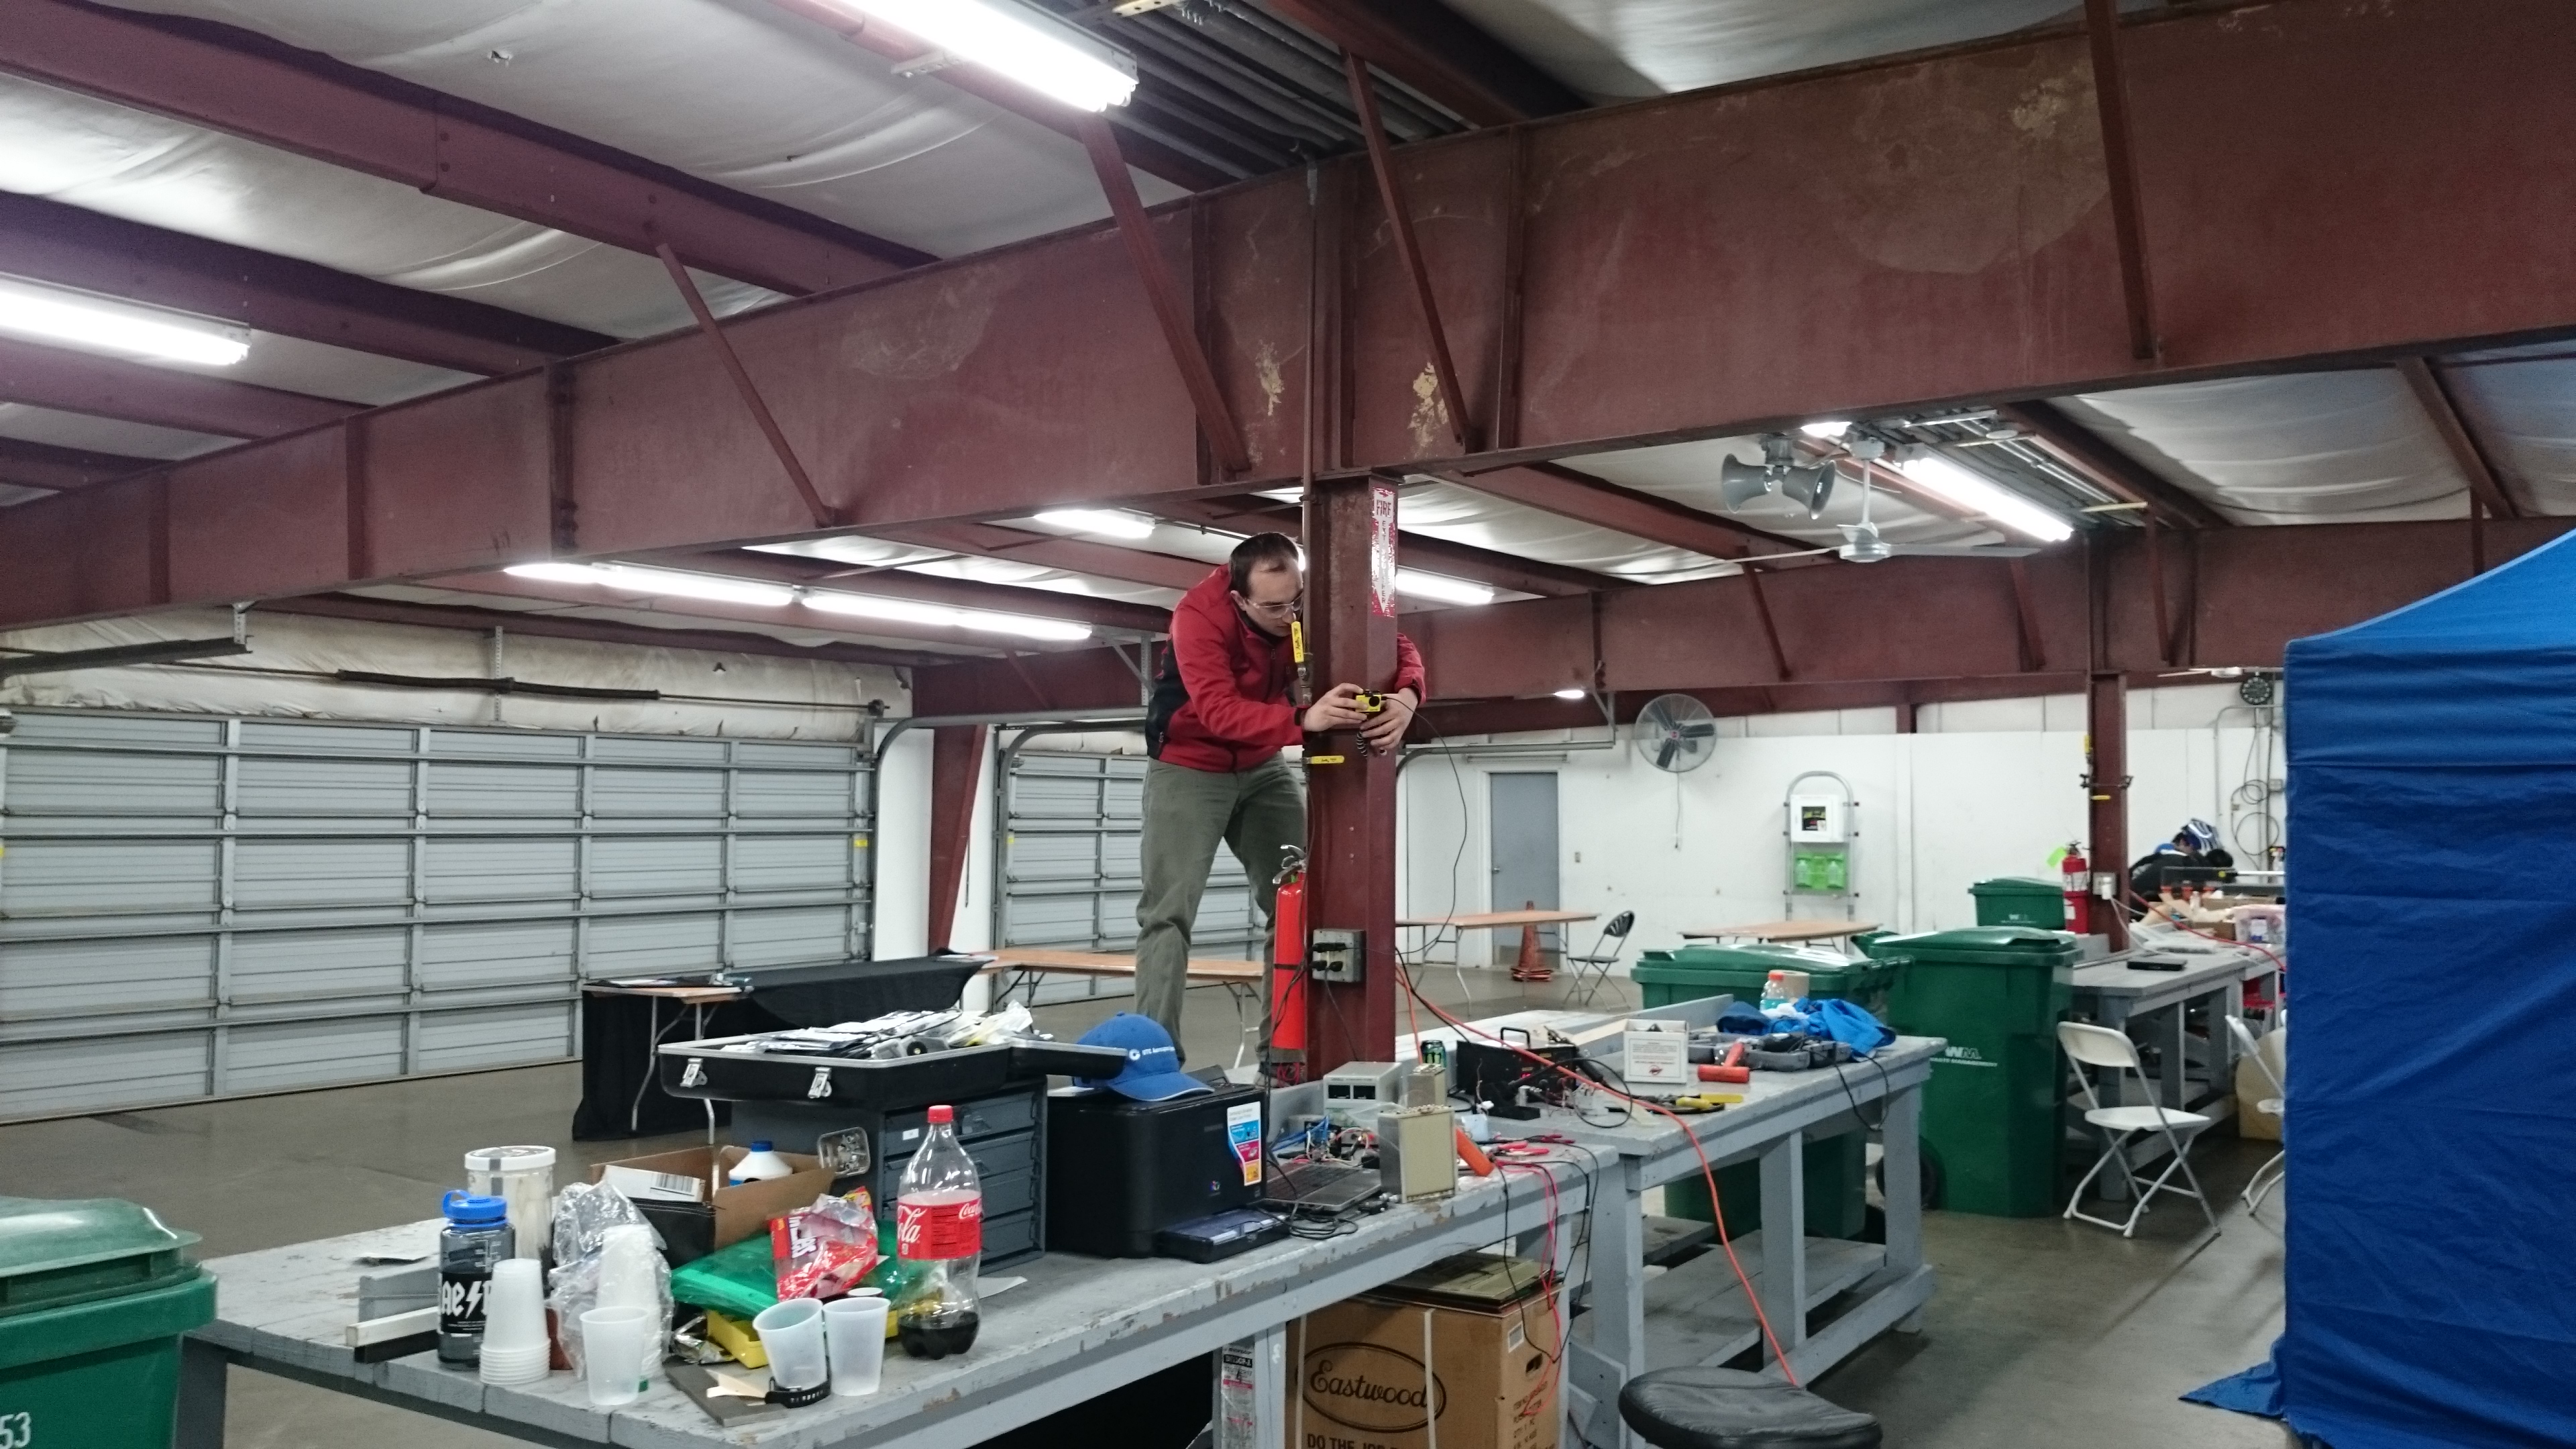
The senior design team had begun receiving cells and prototype circuit boards, but the most pressing issue at this point was metalwork. Our paint sponsor, Hazelett Strip Casting Co., was expecting us to deliver our metal parts for paint by the end of the month (so we could pick them up after our Spring break in March), but there was a whole list of things to do. Frame reinforcements, the pedal box, mounts, brackets, and tabs all needed to be designed, fabricated, and welded onto the frame. It was a true all-hands-on-deck moment for the team, and I was truly proud to see the cumulative effort that people put in throughout the entire week. I don’t think we missed a single item from our list, and everything was able to be painted our trademark bright green.
On a more grim note, it was becoming more and more clear that we were running out of time. Powertrain was non-functional, battery was on schedule, but we knew it would be a tight schedule, and the HV & control systems were still unproven off the bench. Steering was a shitshow, with a $700 industrial baja-grade steering rack sitting in our shop with no feasible way to package it. Between a full load of classes, senior design deliverables, helping teach classes in the machine shop, running the formula hybrid team, and building the car, I was starting to really feel the stress. This is also about the time where skipping class became more common and going to class started feeling like I was wasting time I could otherwise be using in the shop.
March 2015
The first week of March was spring break for UVM. I spent it at my parents house in Massachusetts. The first few days were a much needed break from obsessing over the status of the car, but over the course of the week, it crept back to occupying the top spot of my attention; there was an unbelievable amount of work left to do, and it was starting to look like there weren’t enough man hours left to do it. The stress must’ve been getting to me, because my parents would occasionally ask me what was wrong, because I’d either look worried or have a clenched jaw, or both. They knew I was worried about completing the car, doing well at the competition, getting a job, graduating, etc.
The week we returned to class, the senior design team picked up our metal parts from Hazelett (who kindly cut out hundreds of pieces on the water jet for free), the fiberglass parts from another local fabricator, and set about finishing all the parts. This mainly consisted of drilling and tapping hundreds of holes, and grinding off retention tabs that prevented small parts from falling into the water jet table. With some tools and manufacturing advice from Floyd, the university machinist, we were able to finish that by the end of the week.
In parallel to the finishing work on the battery pack components, I had fabricated the front drive shafts, assembled the suspension, and helped our power electronics guys (who were also the controls system guys) test mount the front motors. They were approaching drive readiness with the front motors, finishing up wiring harnesses and packaging of the motor controllers. This was a good thing, since we’d still be able to drive with just our front wheels. Andrew and the other electricals raided our battery bin to cobble a monster 12v power system together and package it beneath the pedal box.
Things were coming together, but I worried it was too little, too late. With less than 8 weeks to competition, the batteries weren’t built, and tempers were starting to run short since everyone had been contributing huge hours every week. At this point, I think morale was holding steady, if a little low. Even our advisor was cautiously optimistic.
April 2015
April hits, the car chassis is mostly complete except for some minor mods, like reinforcing the steering rack mount, adding a tray for the 12V battery, and finalizing where the differential would mount. We bent and flared brake lines, tracing the route out with twine, then using that to measure our final length. After some finagling with different thread types and connectors, we get a functional and bled brake system on all four wheels, with the Wilwoods in the back and Polaris hardware up front. Throughout that first week, the team as a whole got most of the car assembled so that the high voltage cables could be cut to their final lengths.
The first weekend was spent soldering up ~30 circuit boards with our homebrew pick and place machine (me, with a hacked together vacuum pickup tool), Andrew handling the heat application, and Charlie on inventory management and production expediting. We saw the sun rise many times from Votey Hall, the engineering building, and that weekend was one of those occasions.
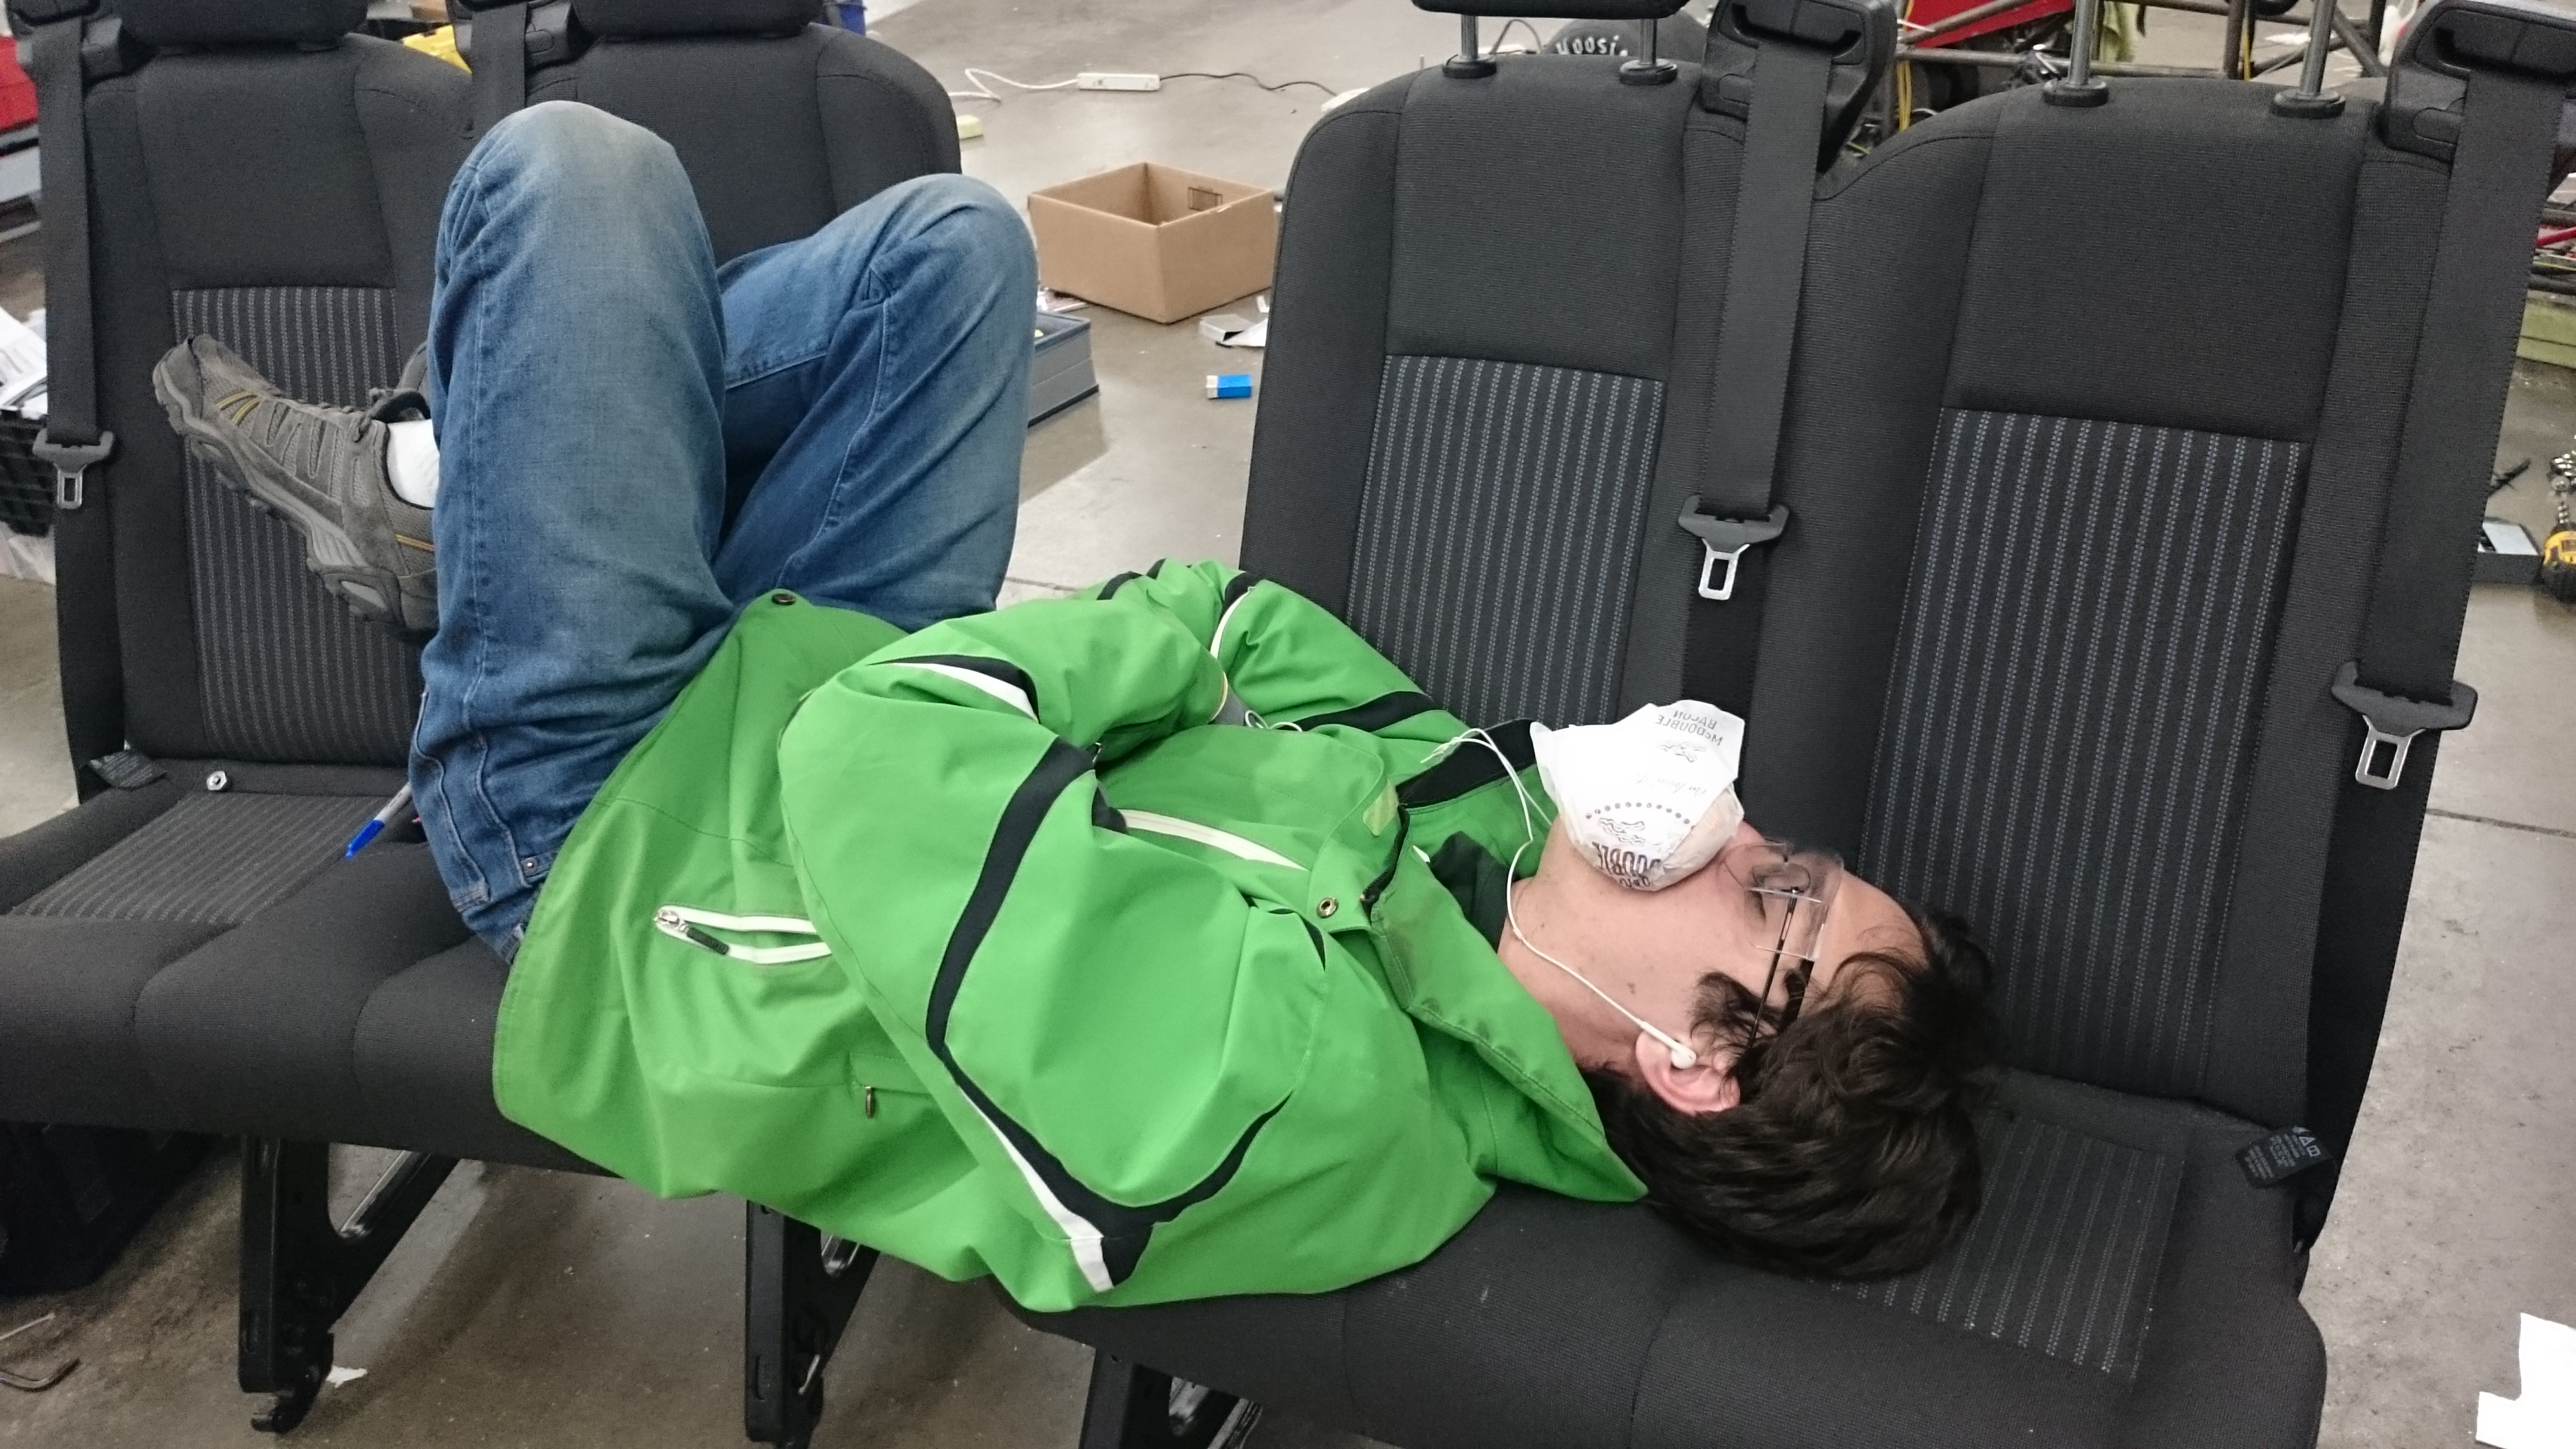
One of the last deliverables for senior design was a proof-of-function presentation to the professors. This meant that the senior design team (charlie, andrew, and myself) had to enlist some extra people to help with the module assembly process. This included applying foam to the cell separator plates, kapton tape along the edges of the cells, and physically stacking up all the plates and spacers into the module. As the night carried on, Charlie and I handled mechanical assembly of the pack while Andrew pulled some EE wizardry and got the BMS installed and working so that it at least looked like it was working (flashing LEDs and whatnot). If it was actually working or not at this point, I don’t know. This was another all night effort, ending shortly after the sunrise of the following day. Since we decided to work all through a Wednesday night and had class the following morning, we didn’t think it was worth it to go home to sleep. Andrew went to McDonalds to get snacks since he had a car and Charlie and I killed time in the computer lab doing homework that was due in a few hours. Around 8:00AM I ducked into Perkins to crash on a couch for an hour before class started, until the cleaning crew kicked me out. Class, computational solid dynamics, started around 9:30, which I think I slept though, then I wend back down to the machine shop to help teach a class. Floyd, the shop manager, gave me a solid ribbing when he realized I hadn’t left the building in over 24 hours.
As the days and hours until competition ticked down, the team started taking up all the available bench space in the rooms surrounding the shop. Borrowed and stolen lab equipment for the EEs, huge piles of fasteners, boxes, and batteries for final assembly of the batteries, and general chaos littered the area. This is about the time where I’m told that most teammates have lost are were losing hope. The only reason people were still working was because I was there, still trying to bring a working car to competition. I didn’t know whether I should feel happy because they cared that I cared, or if I should feel bad that I kept taking up the bulk of their free time for what seemed like a lost cause to them.
The last few days we had before we had to pack the trailer to go to competition were somewhat of a rally, even our advisor was feeling slightly optimistic. The last of the wiring was finished up, and we even started putting time into the car’s nose cone, side panels, and firewall closeout panels. Andrew was still unsure whether he could get the BMS code fully functional, which I can’t fault him for. He put in a herculean effort throughout the whole year, even after he “quit” AERO.
Friday night, a day before we had to start packing the trailer, we still didn’t have a functional car. Faults with the electrical system were rearing their heads. We knew mechanically, the car would pass mechanical tech inspection with a little work, but without the electrical system up and running we’d get nowhere. I saw the writing on the wall, finally, and made the call. I announced, to those who were still working;
“as of now, we’re done with the car. We’ll go to competition, make our presentations, go through tech inspection, and see what happens. We’ll take all the feedback we can get, and if we’re lucky, we might even get into the meat of electrical tech. Go home, take the night off, come back on Sunday to pack the trailer. Thanks for all your hard work, and I’m sorry if you think I’ve let you down as the team President.”
Personally, I was crushed. Failure was something that was new to me. I don’t mean like a test or a project, either. Building that car and being successful as the president of the team meant everything to me. How could I have worked so hard for so long, and given it my all, only to come up with a dud? If I had to guess, it was partially because I was bad at incorporating new people into the team, and partially because I didn’t trust many people to get things done, so I ended up doing a lot of various projects myself instead of handing it off to someone else.
Anyways, on Sunday I went back to the shop just to see if anything new was happening. To my surprise, there were a handful of people tying up loose ends, crimping cables, adding whatever little finishing touch they could. I was happy to note that Andrew wasn’t there, he needed a break. I ended up spending the rest of the day and some of the night there helping wherever I could. Since I was driving the van down to Loudon, people suggested I go home and try and get some sleep since we’d be getting to Votey bright (dark?) and early to load the trailer. I agree, but of course little sleep actually happens.
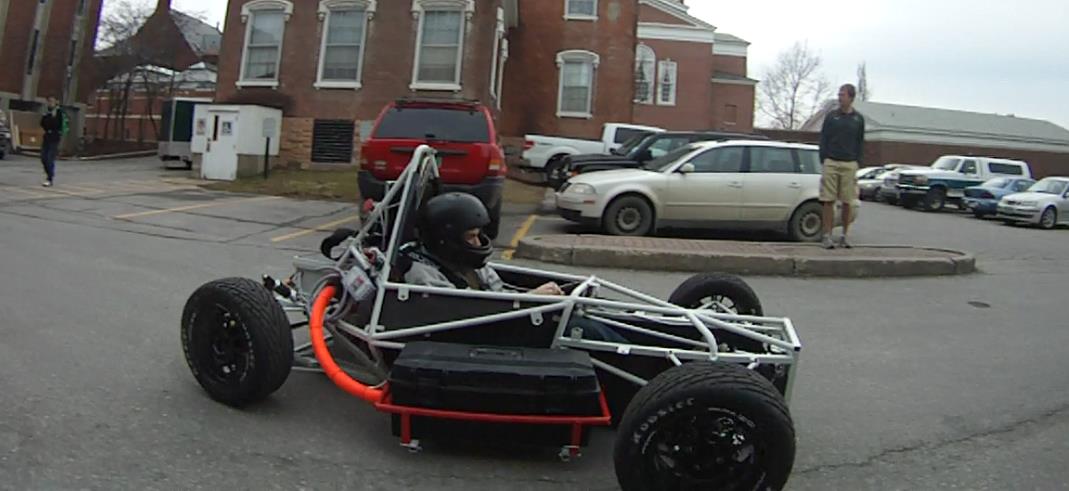
Monday morning, the first day of the competition, Charlie and I walk from our apartment to go get the vehicles we rented from SGA so we could meet everyone at Votey before the sun rises. It’s always hectic when we’re hustling all our tools, gear, and parts down the hallway and into the trailer, playing some serious Tetris to make it all fit. The only big roadblock was the fact that my front suspension was 1) awful, and 2) wouldn’t fit into the trailer with the wheels on. Go me! We resort to removing the wheels and supporting the chassis on a jack to scrape the car into the trailer. We strap it down, and our cargo Tetris resumes. As the sun is rising, we deem it “good enough for Nate”, distributed radios, and set off in a convoy down Route 89.
Monday, Day 1
Nothing about the competition is easy, but the first day always feels like it never ends, but there still isn’t enough time. Security opens the gates to New Hampshire Motor Speedway around 8:30 AM (I think, could be wrong) for registration, so that’s usually when AERO aims to arrive. Of course we never hit that, we’re almost an hour late, but we’re still one of the first to arrive and the registration line is short. We complete our paperwork and proceed into the compound, into the track infield, and to the paddock area to find our garage bay. By 10:00 AM, we’re unloaded with all of our crap expanding to fill the new, empty paddock we would know as home for the next 96 hours. The official schedule for the first day is registration and electrical pre-tech, where they make sure your car is at least passably safe to stand near. After lunch, mechanical and electrical tech inspection open up for those teams which have completed pre-tech. Eventually there is a high voltage safety class where they explain how painful and gruesome our deaths could be if we were to come in contact with high voltage, followed by a recruiting presentation from Detroit’s Big 3: Chrysler, GM, and Ford.
Before lunch, we tried to get through pre-tech where we demonstrate that our safety circuits work, and things are going well until we get to the part where we need a working BMS. At that point, we didn’t have one, so Andrew brokered a deal where we could defeat the monitoring system once to demonstrate that certain other safety systems worked. The judges were not thrilled that we were so quick to come up with a way to defeat our battery monitoring system, but allowed it anyways. In the afternoon we started mechanical tech, where Michael Royce and his team of scrutineers tried their very best to find critical safety flaws with our car and driving equipment. As we roll in we immediately get dinged for my hack job suspension. It was safe and followed all the rules, but could have been better in pretty much every way. Also, when I ordered our numbering stickers, I didn’t specify the font size properly so we had to redo those out of printer paper and packaging tape. Tech eventually closed for the evening, leaving with a moderate To-Do list, which is pretty normal. It looked like we would pass mechanical tech once we made the appropriate changes, and returned to mechanical tech inspection. While most of the team and I were at mechanical tech, Nate and Andrew were at Electrical Documentation inspection, where the judges sit down with you and go over all your electrical systems, including datasheets, schematics, and even some code before even looking at the car. With the help of a spare module to illustrate some points about the construction of the battery pack, they passed that phase of electrical tech. Andrew seemed quietly confident that he could make the BMS work enough to pass electrical tech. After the presentations and scrounging some food, we set to work for the night. Eventually I made it to the hotel to put together our project management presentation that was due to be presented on day 2 of the competition.
Tuesday, Day 2
Tuesday’s schedule consisted of electrical and mechanical tech, project management presentations, and design presentations. Design presentations generally go like this: You wheel your car into an empty paddock, set up any presentation materials you might have brought, and pitch the best features of your car to the judges, who are mostly engineers from the domestic automakers. Our high points included our multimodal rear powertrain, torque vectoring front motors, FWD/AWD operation, and our 180kW capable batteries. Normally for AERO, very little emphasis or effort goes into flashy designs, posters, or extensive simulation because we’ve found that the key to winning competition is to actually drive. Function over form, and if you manage to make it to dynamic events, you’re usually guaranteed a top 3 finish. Naturally, this leads to lackluster performance at the design presentation, and the points hit that comes with that. Judges did seem impressed if somewhat skeptical of some of the power numbers we were throwing out there about the batteries (180 kW is absolutely true, we tested it), and liked the configurability and modularity of the powertrain.
After this presentation, we resumed our work on the car to attempt and pass tech. Andrew picked off the electricals to help him get the BMS up and running while the rest of us set to work addressing the items the scrutineers had brought up. Most of our work was about closeout panels and firewalling and safety wire on select fasteners. I was scheduled to present our project management plan (ha!) that afternoon, checking the time religiously so that I wouldn’t miss it. It turns out that I did miss it. I showed up as the judges were leaving the room, wondering where the representative from UVM could be. I guess that was a pretty good representation of our project management skills, after all!
As the afternoon drug on, mechanical inspectors came to check on us, asking if we were planning on coming back to complete tech at some point. Apparently we were one of the frontrunners at this point, which blew my mind. Tech inspection is only supposed to be on Monday and Tuesday of the competition, but it always got extended for Wednesday and sometimes Thursday to try and get more teams through, but generally someone will make it through the bulk of tech by the end of tuesday. In 2015 that was not the case, and the competition organizers were getting stressed out about that. We never did make it back to mechanical tech on Tuesday, but we were feeling good about our progress.
At some point, my parents arrived at the track, I’m not exactly sure when though. They came to support the team every year, and always were up for buying food, drinks, and snacks for the team. Eventually the autocross drivers’ meeting happens, and since we’re feeling tentatively confident and I wanted to bolster spirits, I tagged all my teammates who had kicked ass in the shop over the last few months to come to the meeting with me. Driving the car at competition is the ultimate payoff for us, and I wanted to have them at least be eligible to drive if we pulled off a miracle and passed tech.
Tuesday was another late night, and we didn’t want to leave quite yet. I took a ride to the nearest McDonalds and got food for everyone to try and keep the good work going a little longer. I think we ended up leaving the track around midnight, which qualifies as an early night when you’re talking about Formula Hybrid.
Wednesday, Day 3
Wednesday is usually the day most spectators show up to the competition. It has the acceleration runs and autocross, which are the most entertaining things to watch. Our team advisor, the assistant dean of the college of engineering, Floyd the university machinist, and an assortment of parents all came to the track that day too.
Mechanical inspectors came back to make sure we’d get through mechanical tech that day. We answered that we intended to. Andrew had made some progress with the BMS, and was rapidly testing different parts and configurations. He’s happy that it is working enough to get us through tech, so he starts buttoning the system up so we can present it to the inspectors. In the final check before we got inspected, we lost all response from the BMS. Either the main PCB got set down on a metal surface that it didn’t like, or it got ESD’d, or some critical component failed, but whatever happened screwed us. That was our last working BMS host board. It did all the voltage and temperature measurements, error checking, and reporting out to the main vehicle controller. Without it we couldn’t pass inspection, let alone drive. All our recent progress, all our hope, dashed in an instant. Luckily most people were out of the paddock, watching some team try to do their brake test. Andrew was beside himself, incredulous that such a small part could have taken us out of the competition. Charlie went and crashed in the trunk of his parent’s SUV. I tried to keep my mind off it, unwilling to come to terms with the fact that we really had failed.
The team took it surprisingly well, but maybe they didn’t realize how close we had gotten to passing tech. Mechanical inspectors came back again to ask for our ETA, only for us to tell them that we were no longer going to mechanical tech. We set about tidying our stuff up, and made the car look as good as possible for the group picture on the exit of NASCAR turn 4. The team leadership knew that many of the underclassmen were struggling with courses, and could take advantage of an extra day back in Burlington to prepare for finals, so we told them that they could take the van back to the university if they wanted.
That day happened to be my birthday, so I went out to dinner with my parents while Andrew, Charlie, and Nate (the other 3 people that stayed at the track) presumably got drunk at the hotel pool.
Thursday, Day 4
The four of us rolled out of bed and to the track in no particular hurry. We weren’t in the endurance race, so all we needed to do was finish packing and go the awards ceremony. One team, Atilim, I think, needed some safety gear in order to pass mechanical tech. Since we weren’t driving, they asked if we would lend it to them, which we did. Formula Hybrid teams are usually pretty generous with loaning tools and parts, and we wanted to keep that competitive spirit alive. Packing is packing, so I won’t bore with the details of piling all remaining stuff into the trailer and truck bed.
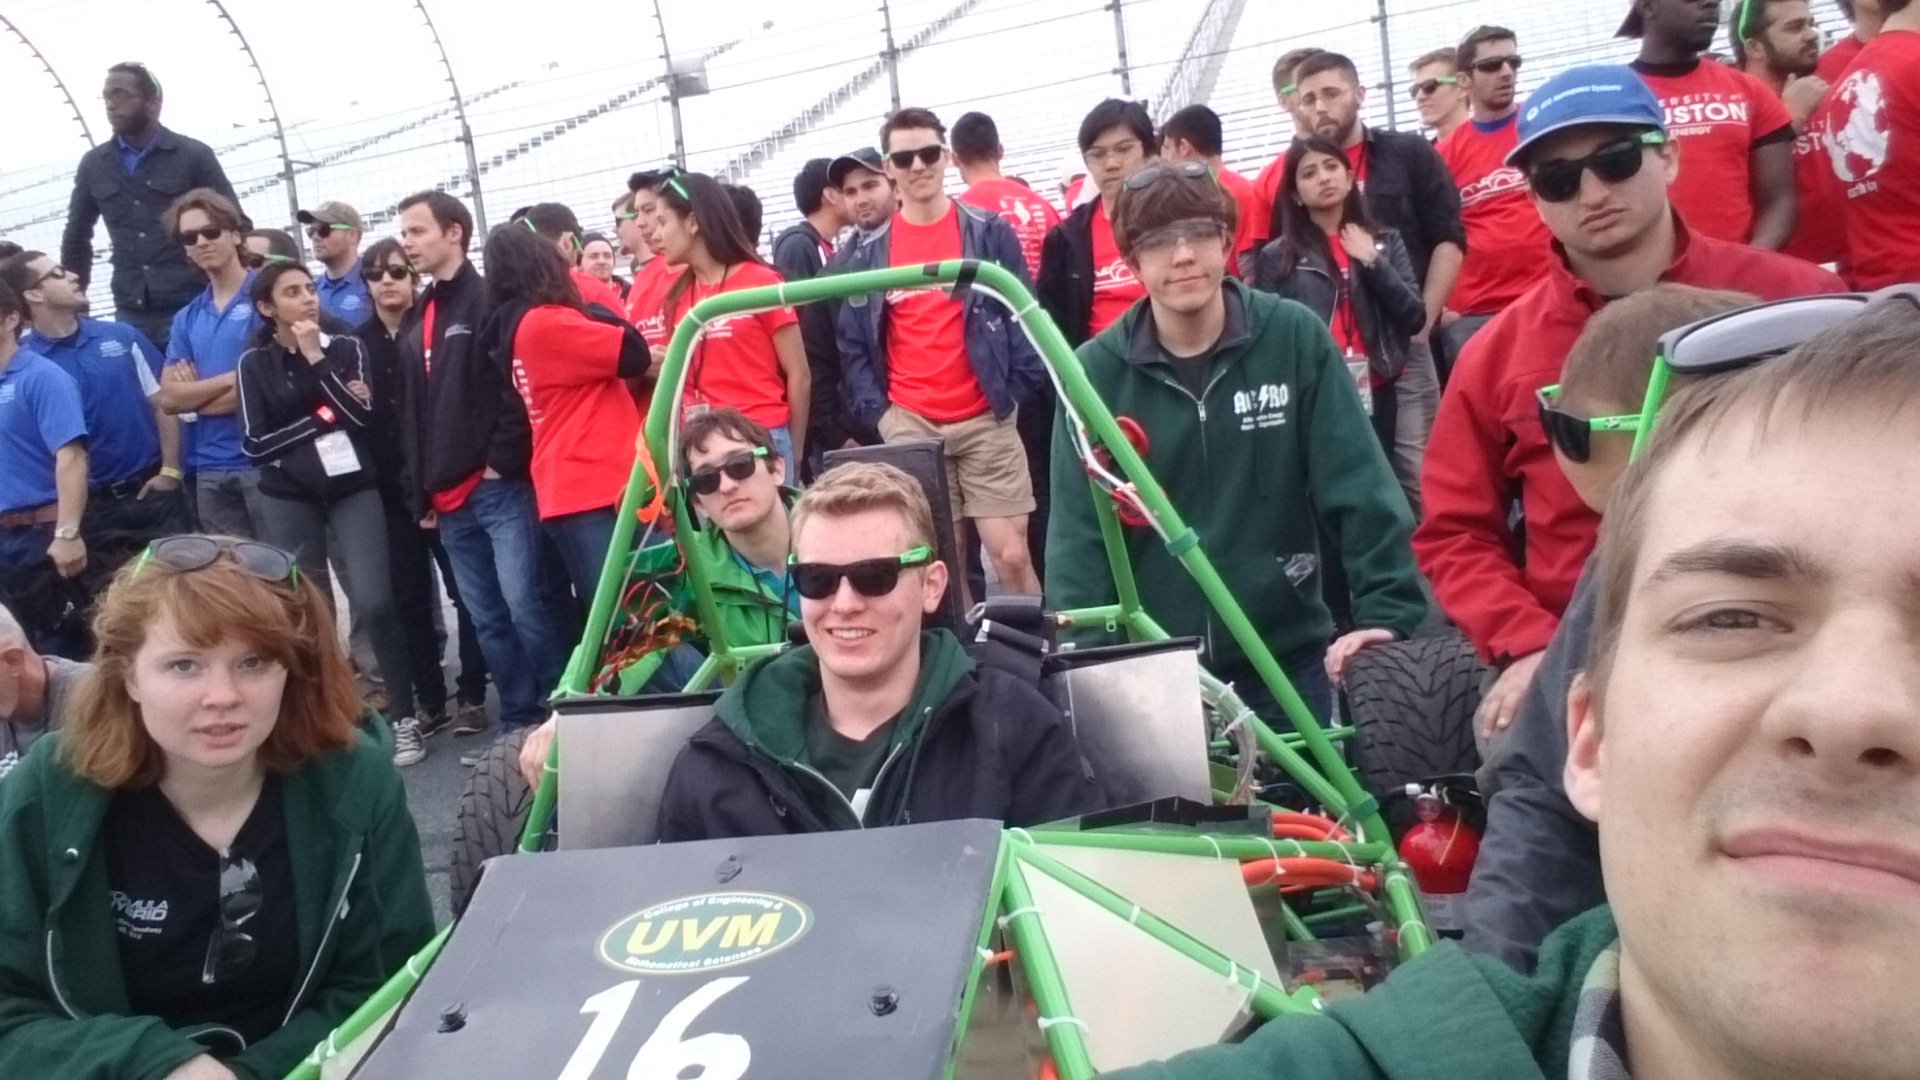
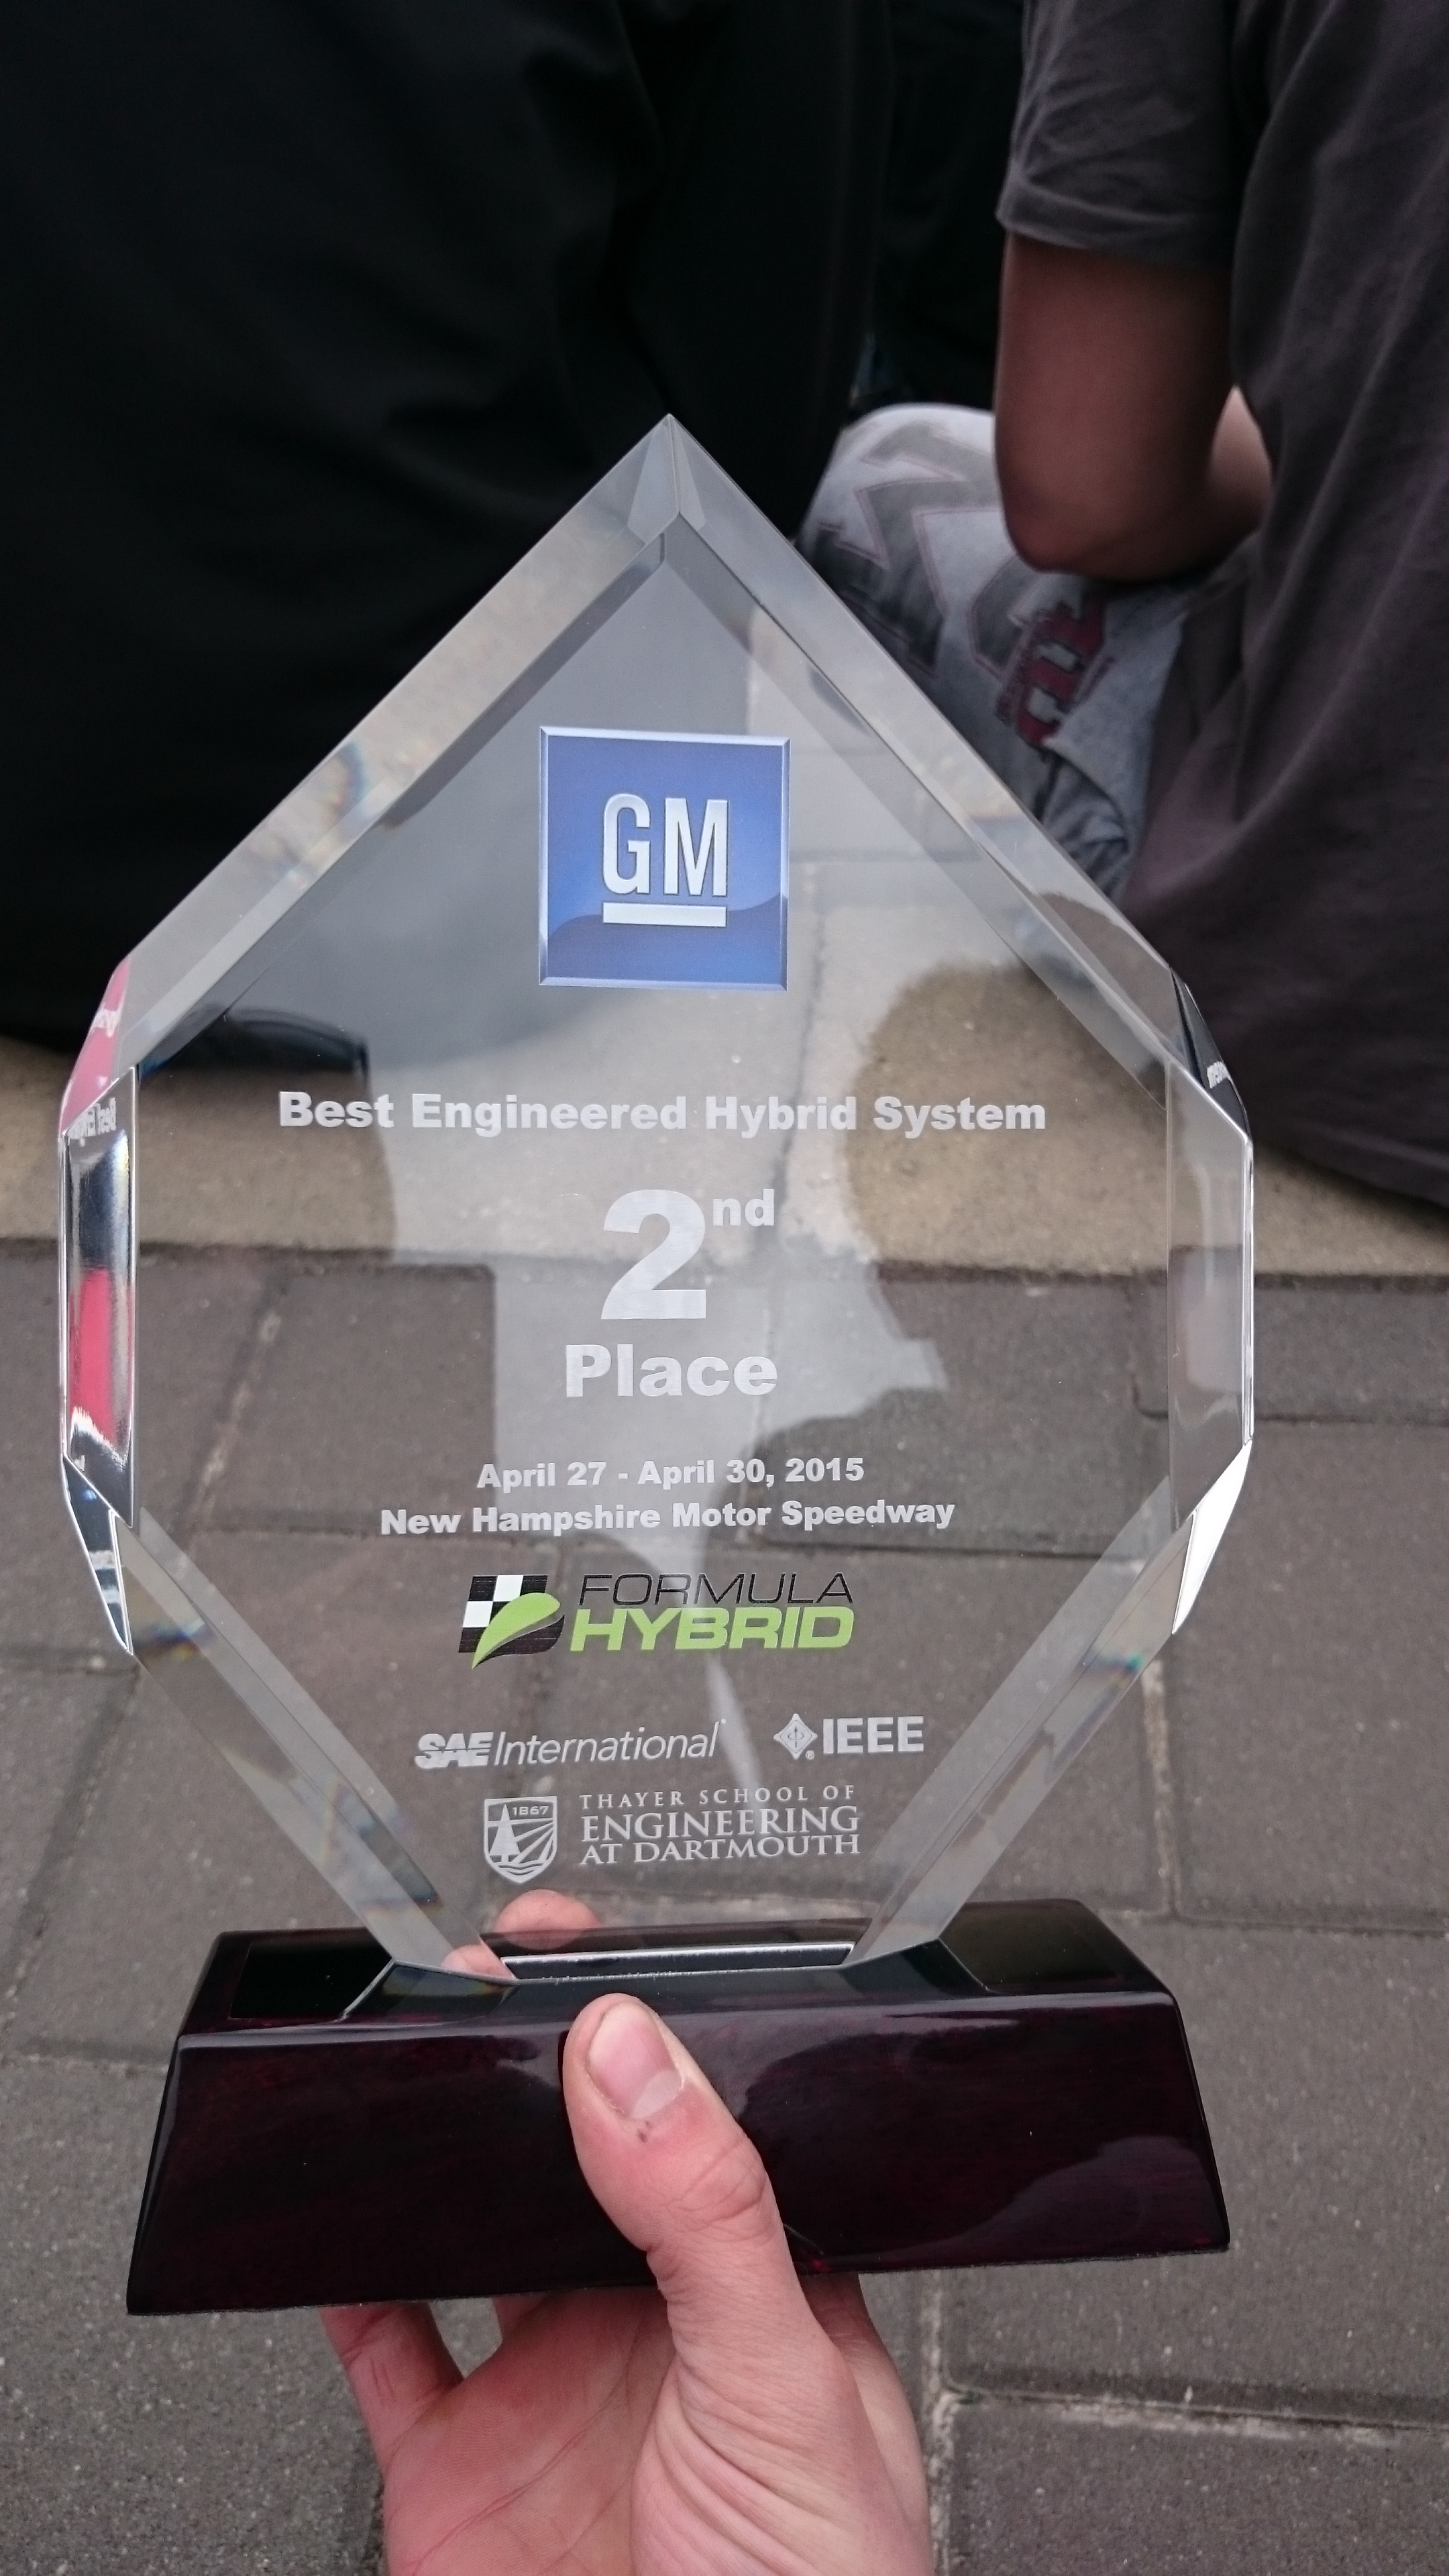
We went to the awards ceremony when it started that afternoon, and to our surprise we didn’t leave empty-handed. We won one of GM’s powertrain engineering awards which included a trophy and some cash. By the time it was over, it must’ve been almost 6:00 PM, so we left as soon as we could for the 3.5 hour trek back to Burlington.
Epilogue
At some point, I interviewed with Ford, and apparently did well even though I don’t remember when the interview was or what most of the questions were. Days after the competition, I received an email from Ford HR asking me to apply to a position on their job site so that they could fly me to Dearborn, MI for a second interview. Ultimately I got the job, and now I’m an electrified powertrain engineer at Ford Motor Co.
Charlie and I also interviewed with GM, but they were slower to react to the surge of qualified applicants, so we didn’t hear back from them until mid-summer. Charlie turned down the opportunity to interview with them since he didn’t want to relocate to Detroit. I did follow up with GM, and eventually got an offer from them, which I ended up turning down. Charlie now works at a biotech company near Boston.
Andrew refused all job offers from all automakers, citing the fact that Detroit was not in Vermont. He did end up leaving his job in Vermont to intern for GM in their new battery lab, where he influenced some of their next gen offerings. They offered him “stupid amounts of money” to stay, but he now works for a startup in Vermont with one of his professors.
To any of my friends and teammates that happen to read this: please correct anything I got wrong, or send me anything you’d like me to include. I know I glossed over a lot of things, but if I skipped an important event or got the story wrong, let me know and I’ll edit it.
While I was still wrapping my brain around how to fly a quadcopter and keep track of how it was oriented in space, I figured that learning to fly a RC plane might be helpful because forward is always known,and up us usually easy to discern unless you’re crashing. I was mostly wrong.
I wanted to build my own air frame because it costs next to nothing once you’ve got the electronics. The cheapest almost ready-to fly (ARF) planes on hobbyking cost at least $40, so I tried to meet or beat that number for my total cost. I ended up needing a motor, speed controller, two servos, battery connector, some wire, and a radio receiver.
Parts cost:
Set of 10 male and female XT-60 connectors: $10
2212, 1000kV motor + 30A speed controller: $17
9g servos (5 of them): $12
Receiver: $18
Extras:
Spare motor + speed controller (in case I wanted to have dual motors and yaw on a flying wing): $17
The 3 extra servos from the above order (since I only needed two for my first build)
9 extra sets of xt-60 connectors (bought a 10-pair pack)
Tons of props
Servo Y leads and extenders: $10
I already had batteries, and props only cost $1-$2 each, so I didn’t include them. All in all, I spent more on my parts than a functional plane would cost, but I could now move all my parts from airframe to airframe with no issue, which would be almost impossible with an off-the-shelf integrated solution.
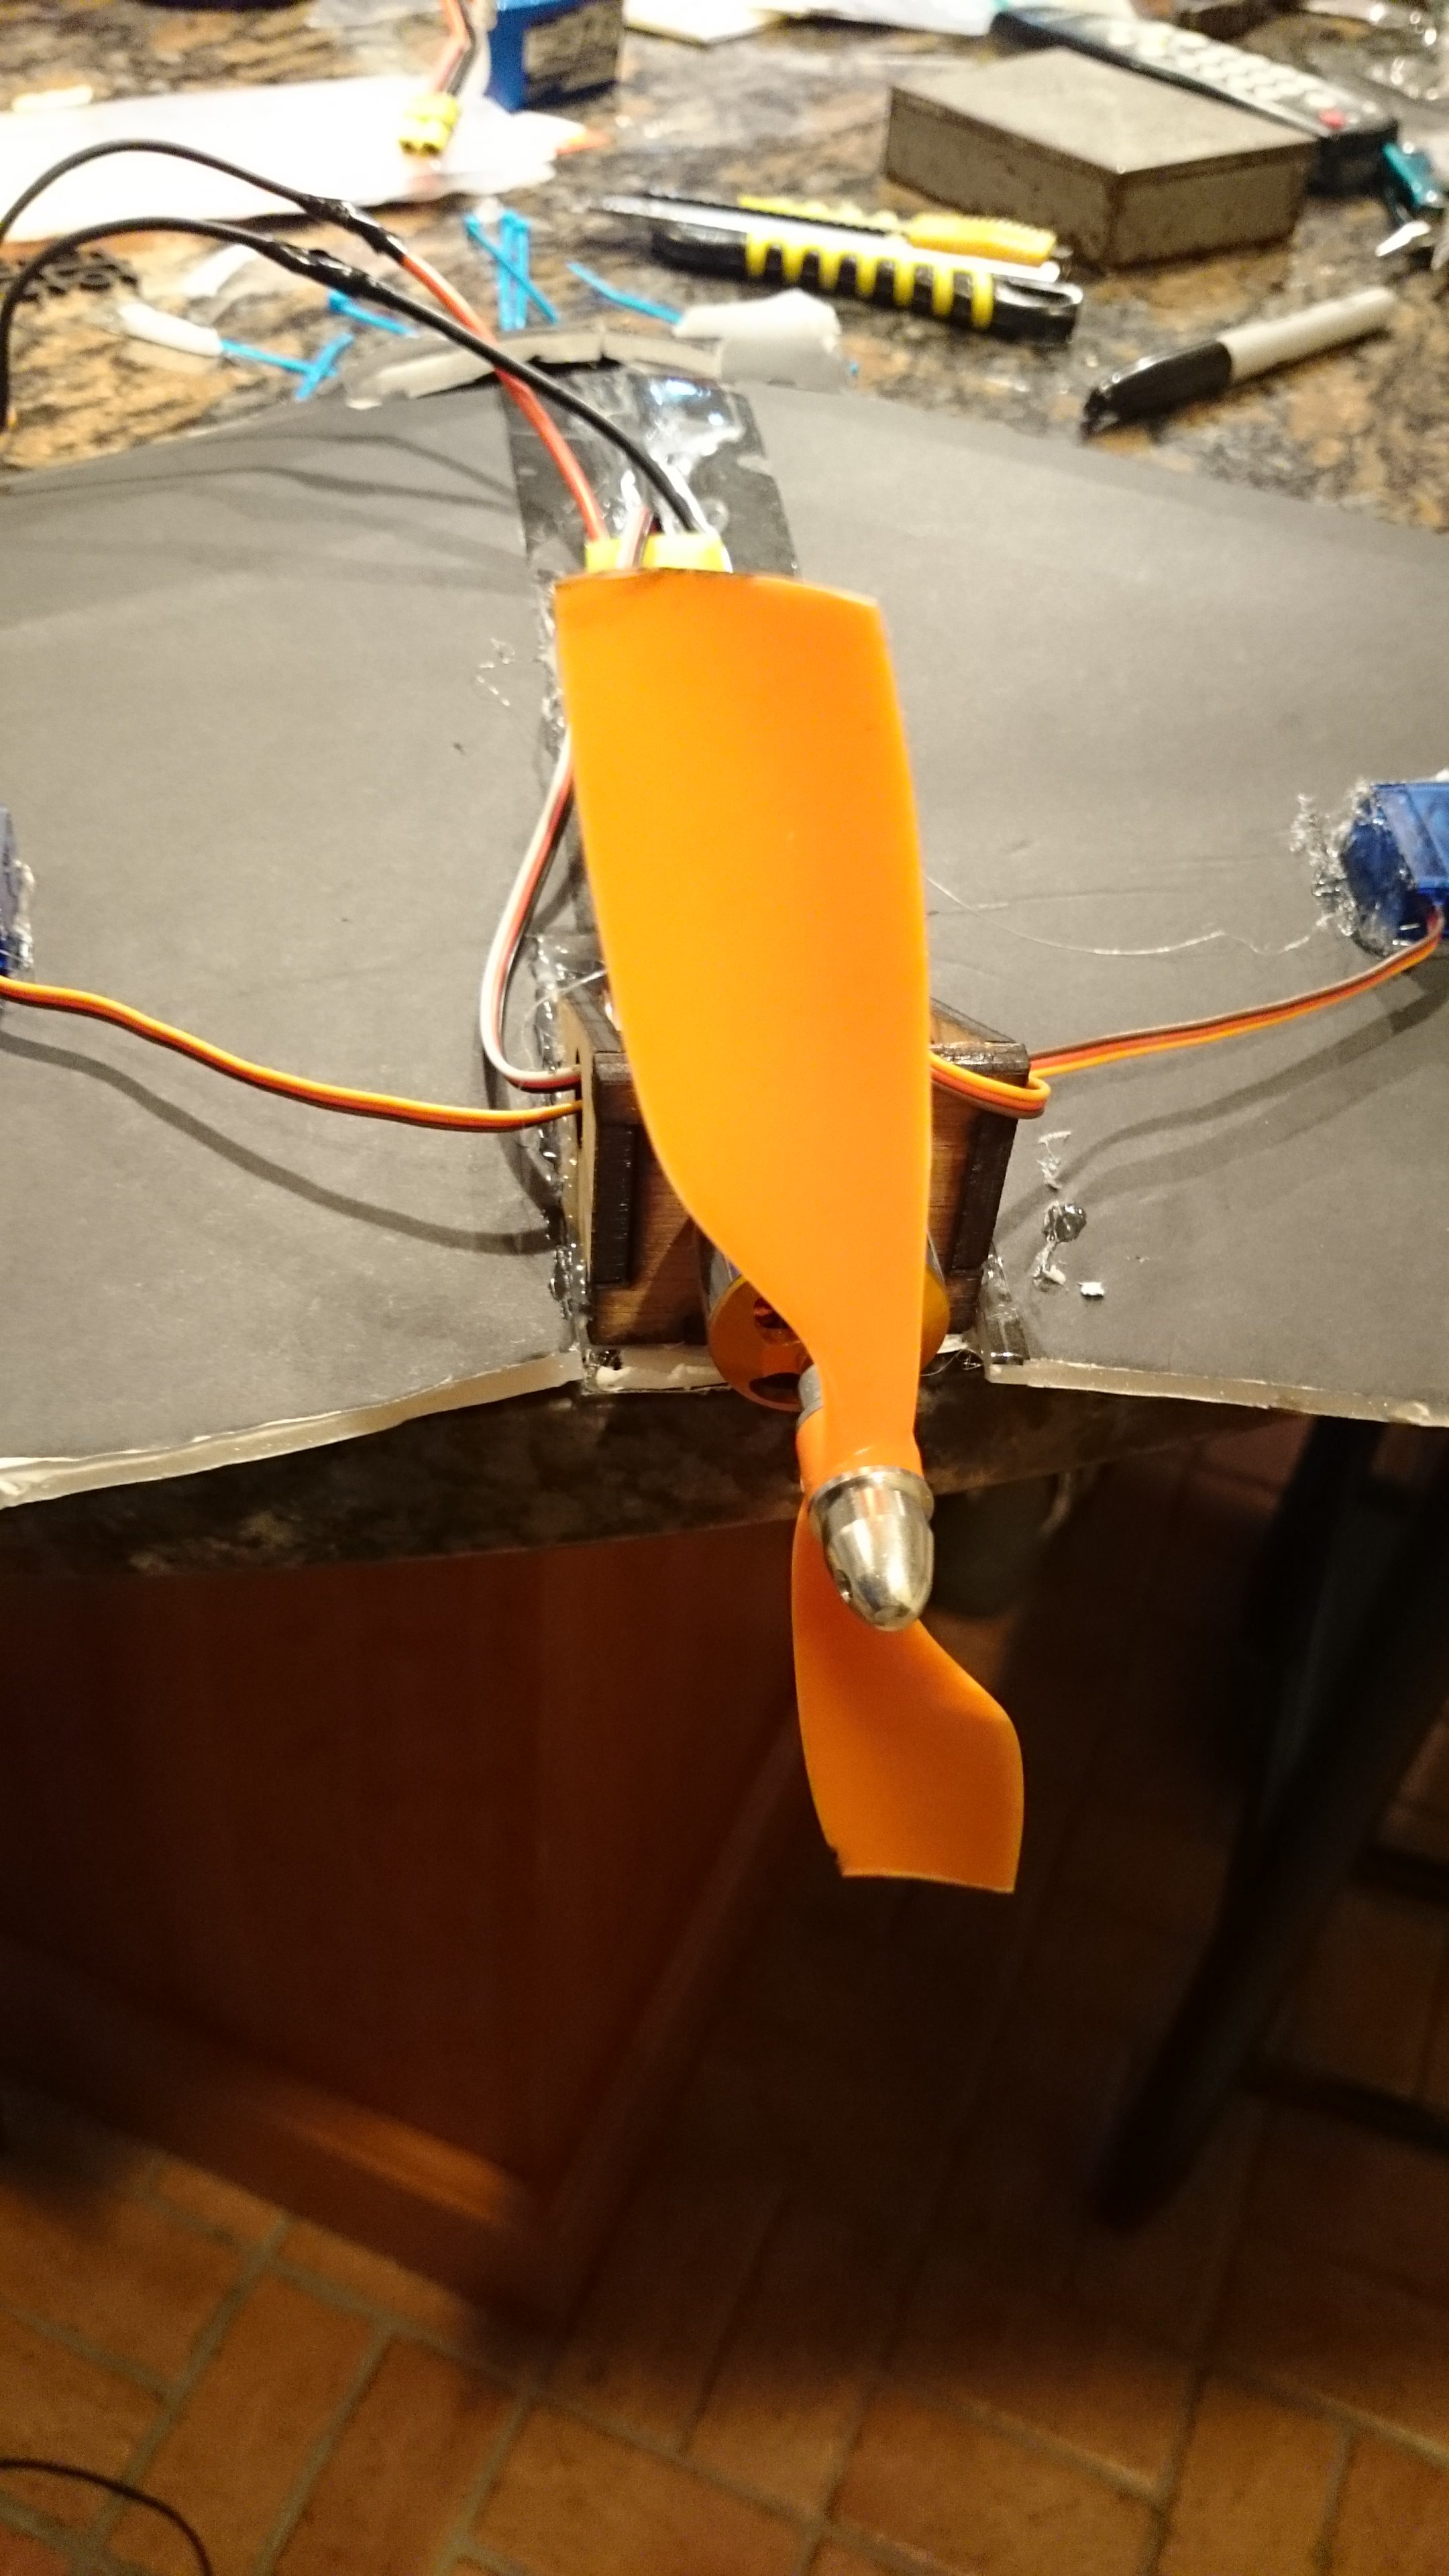
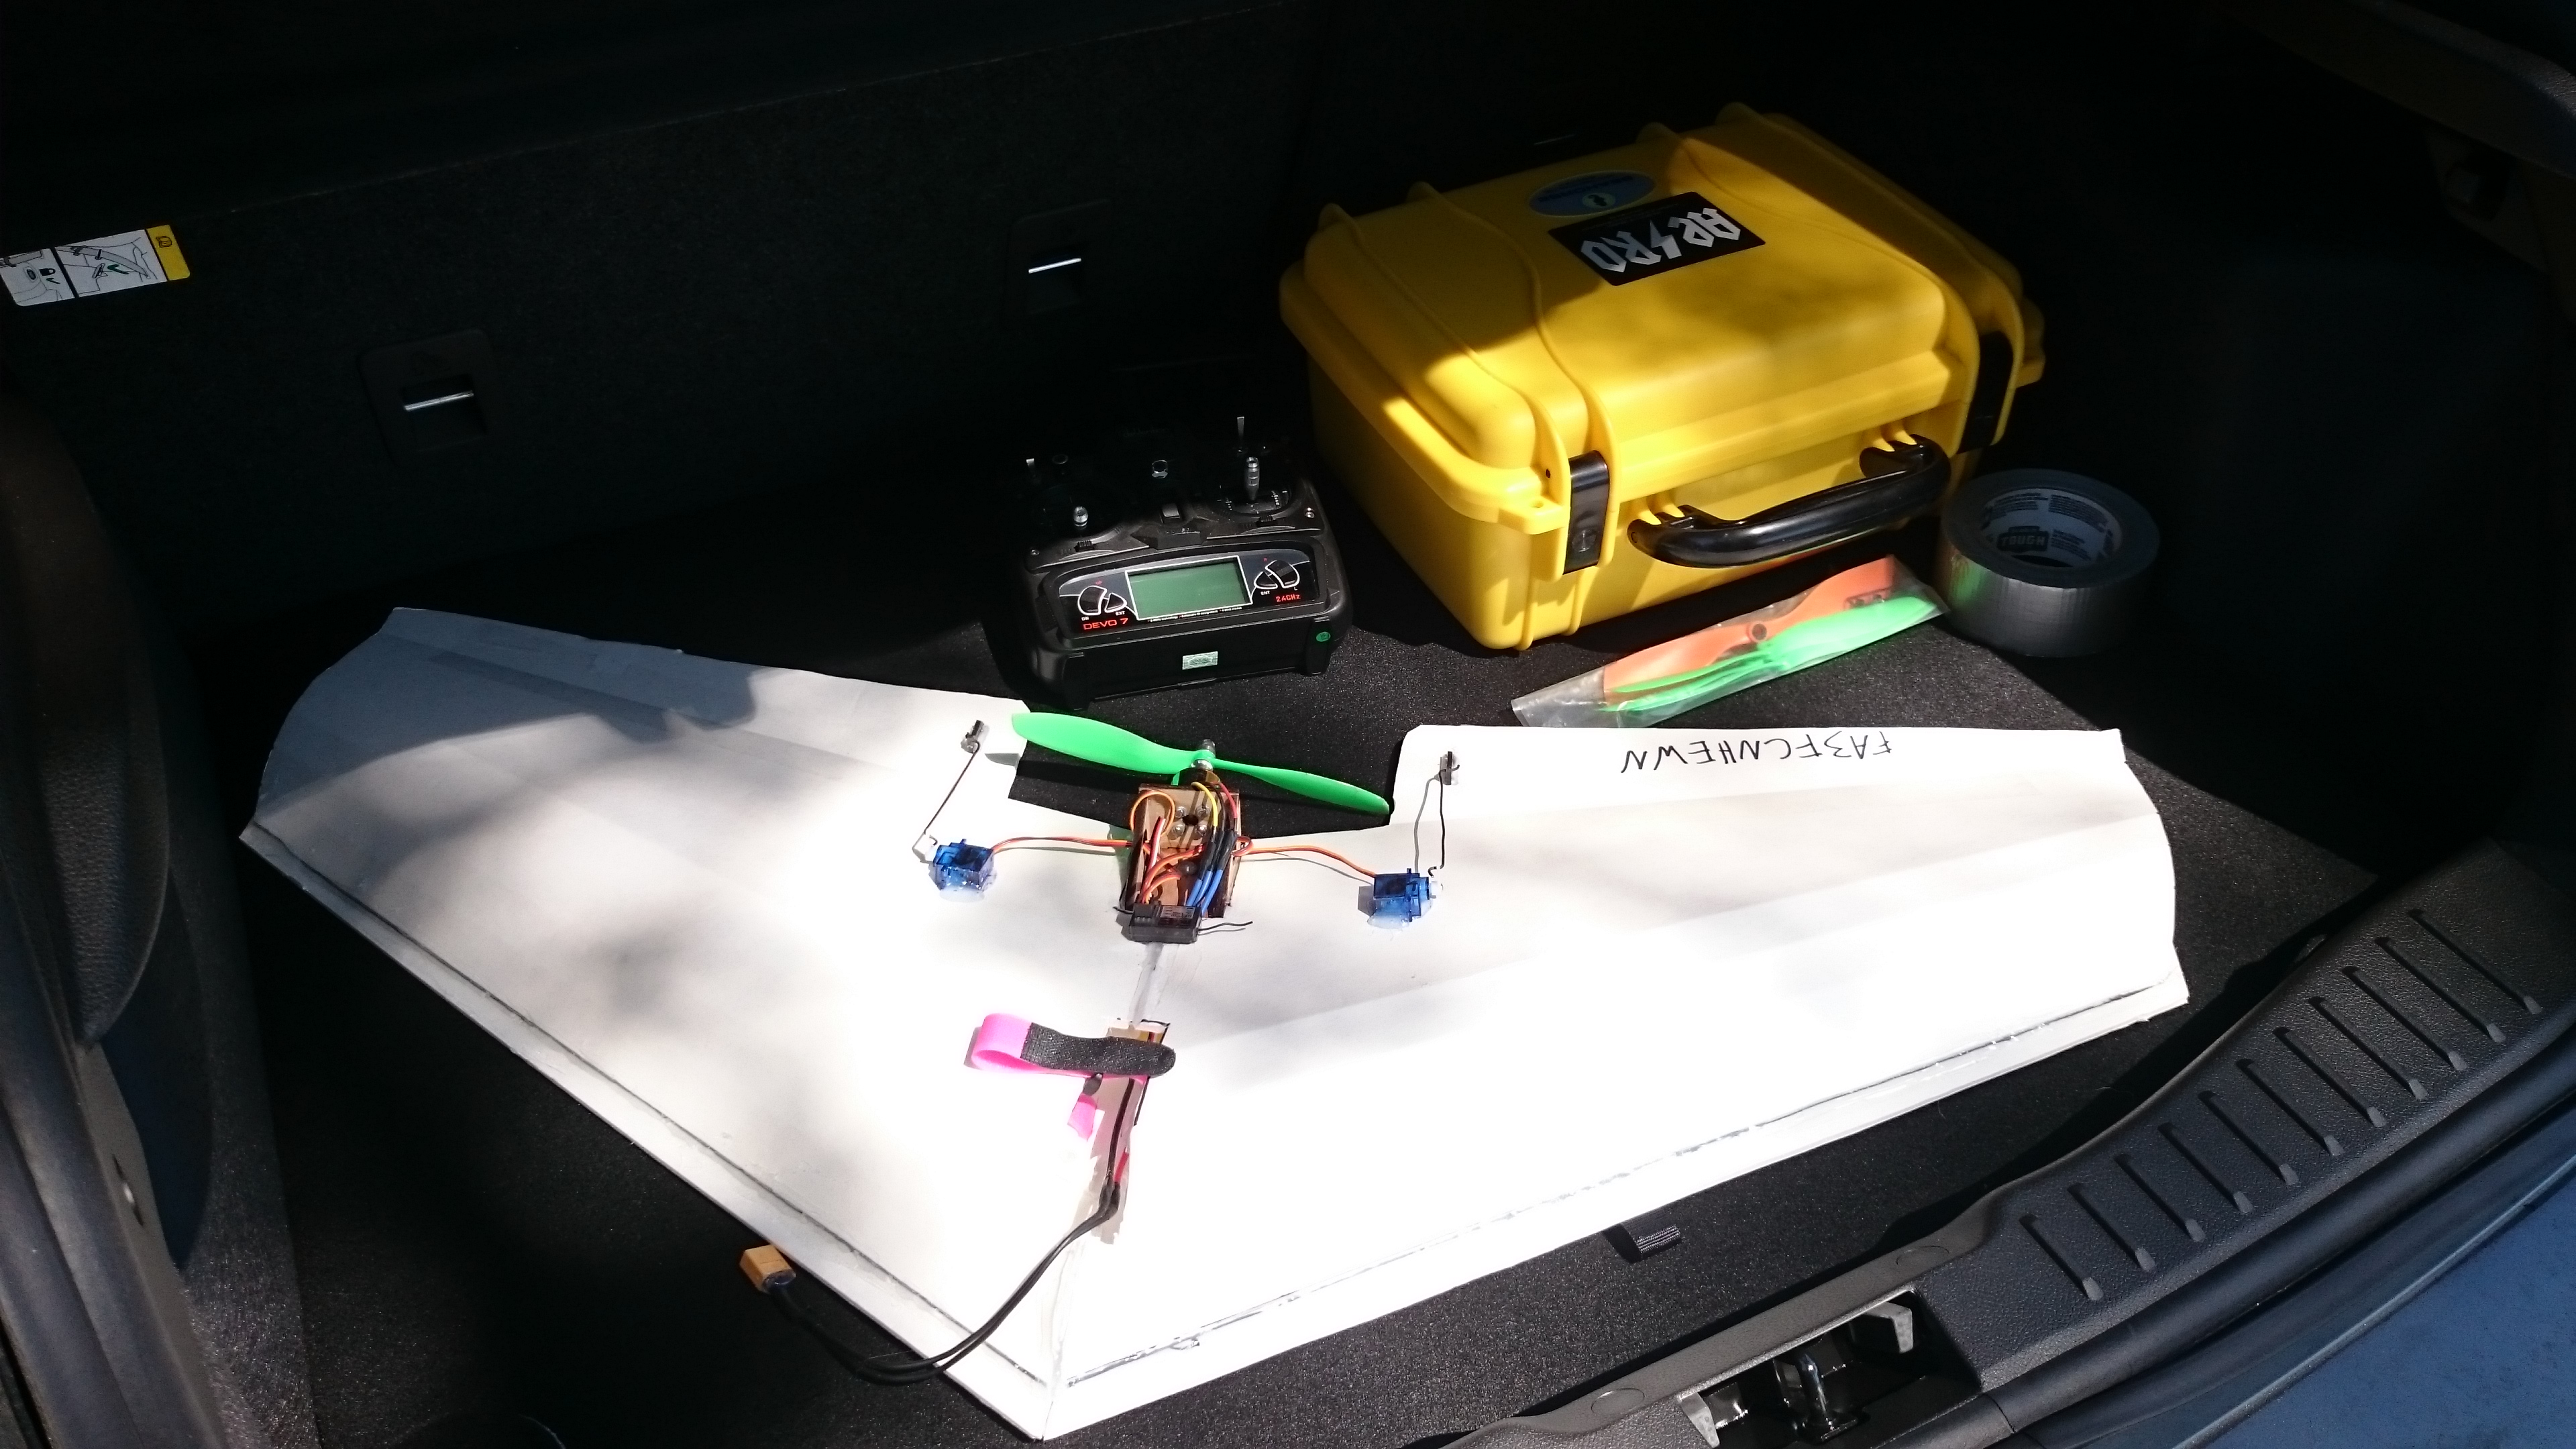
The first plane I built was based off of the Flite Test Versa Wing, in a pusher configuration. I opted for a flying wing style airframe because I wanted as simple of a control scheme as I could possibly have. Minimizing hinges (read: failure points) was also a driver for selecting the flying wing, and as a nice bonus, my radio (Walkera Devo 7) has a pre-canned mixer setting for flying wings, so literally all i had to do was plug the servos into the receiver, and I instantly had pitch and roll control.
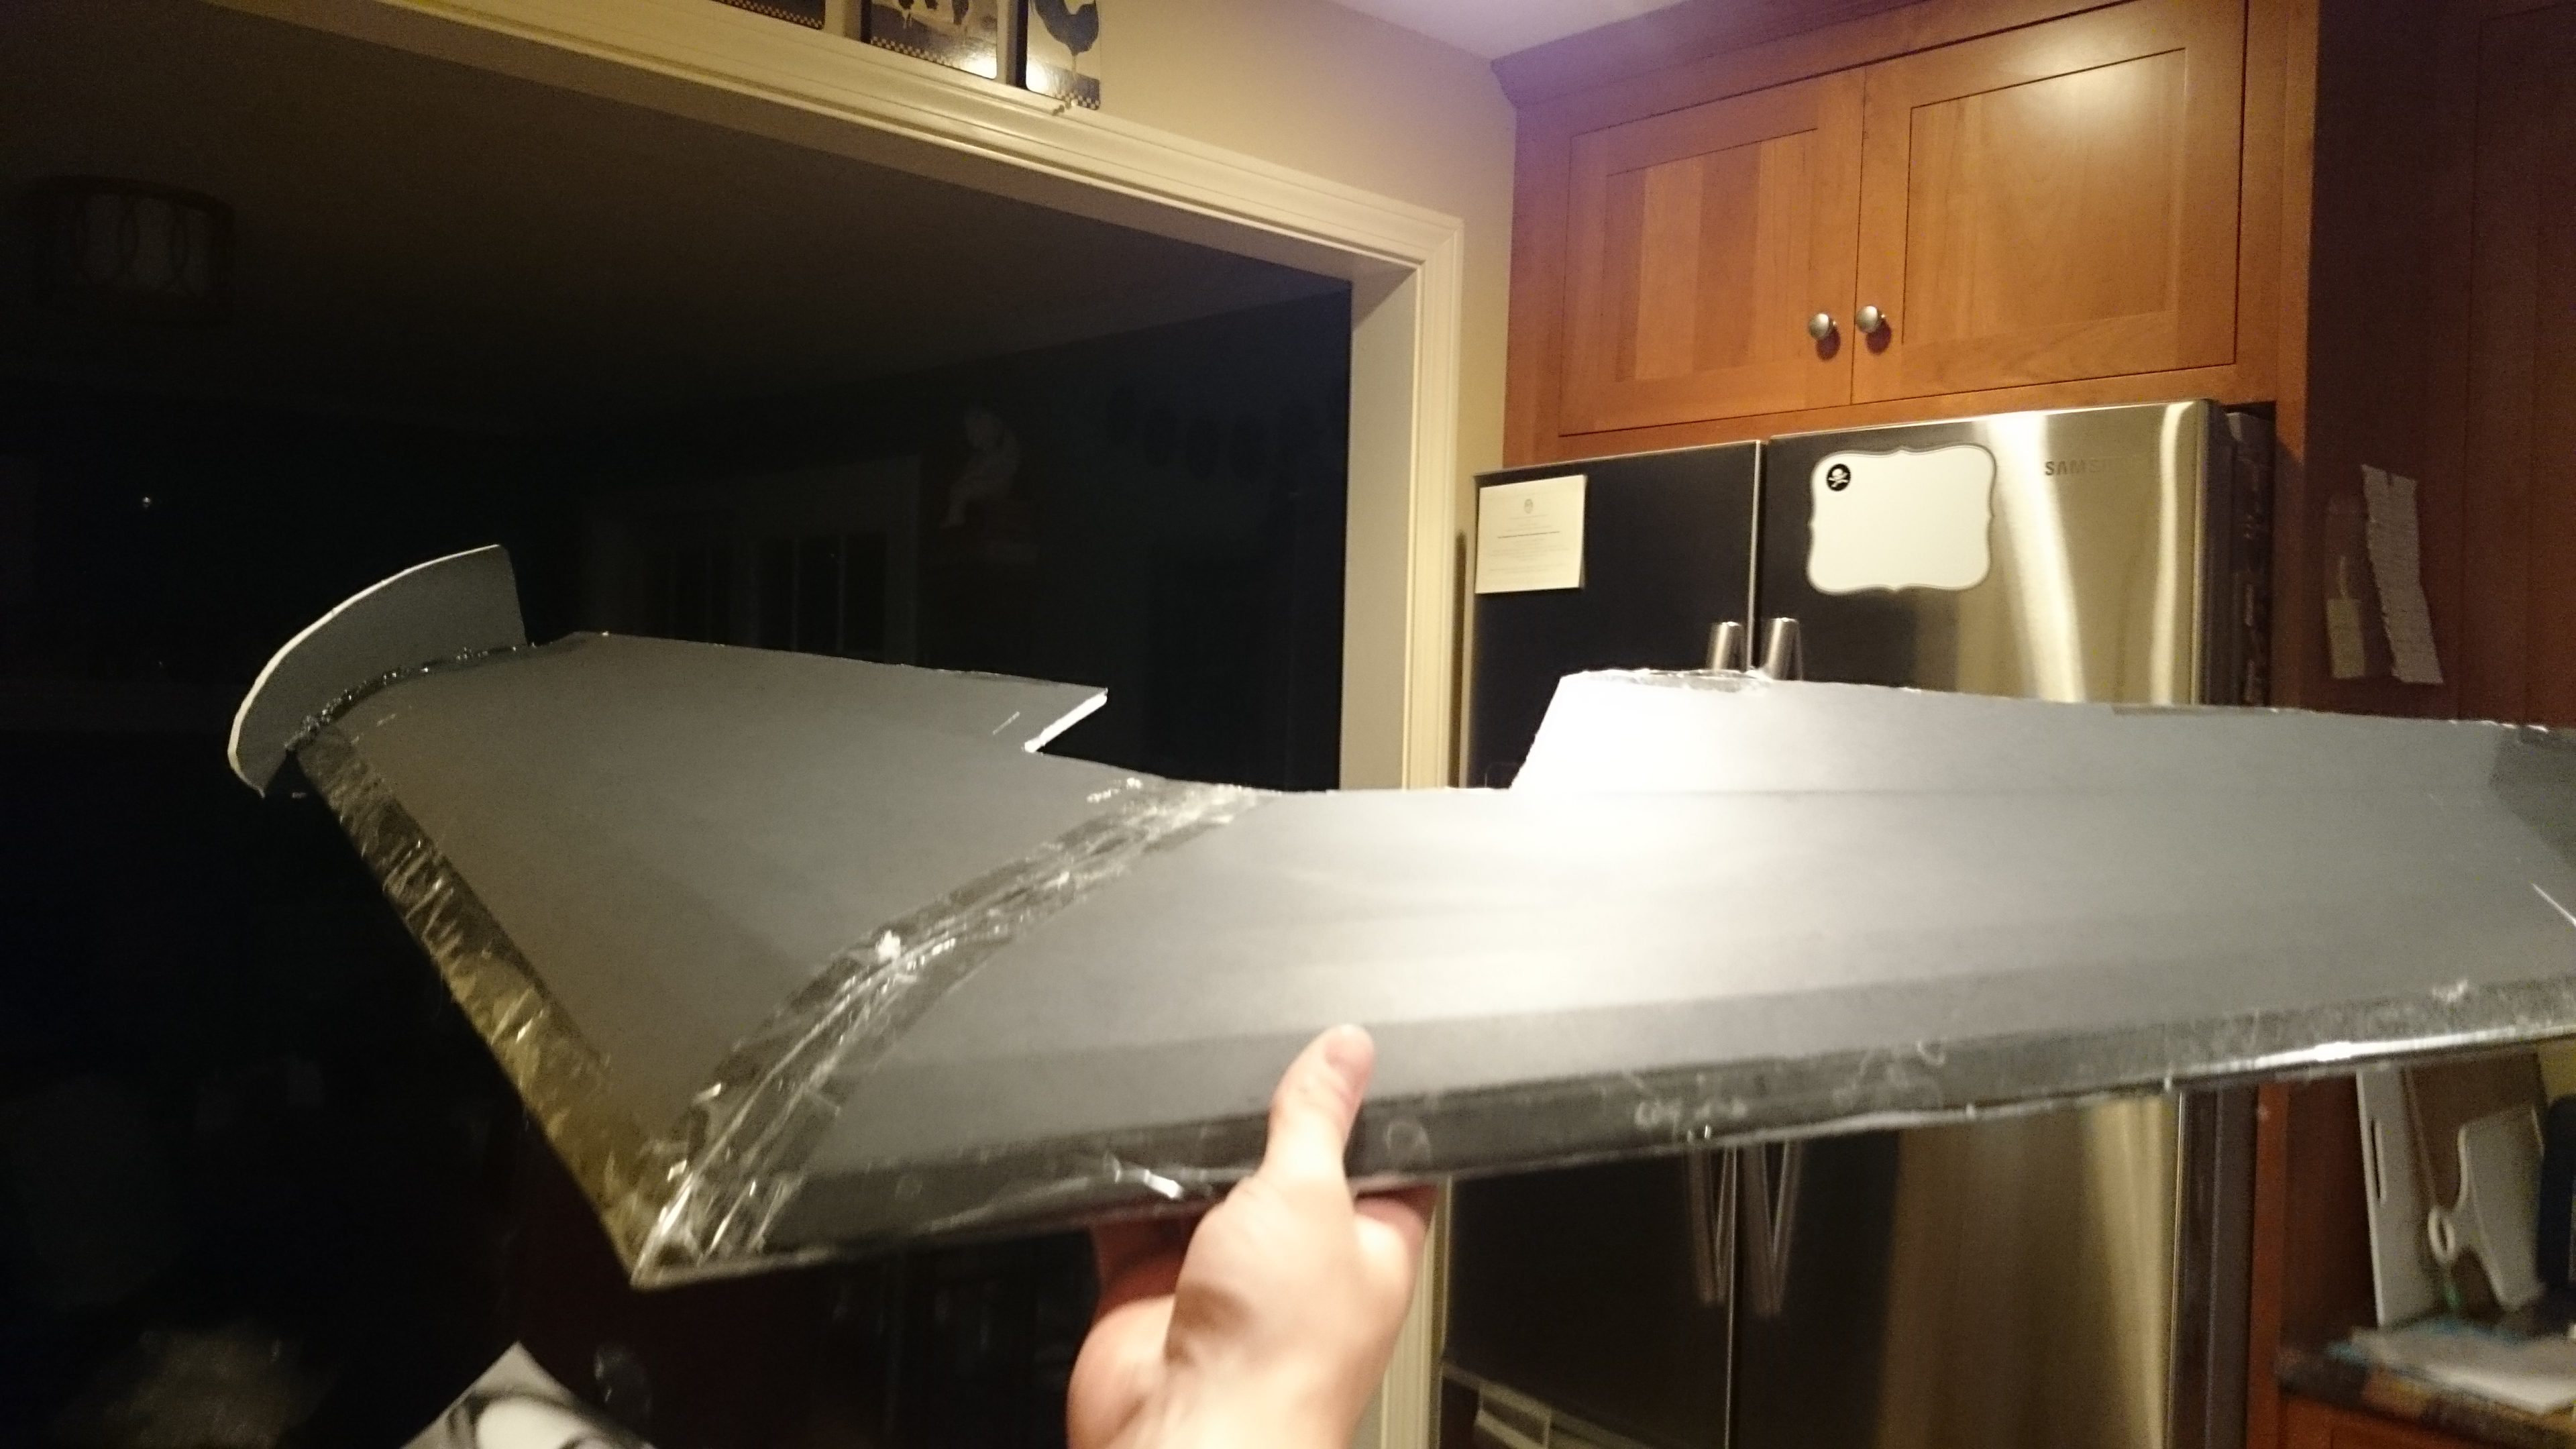
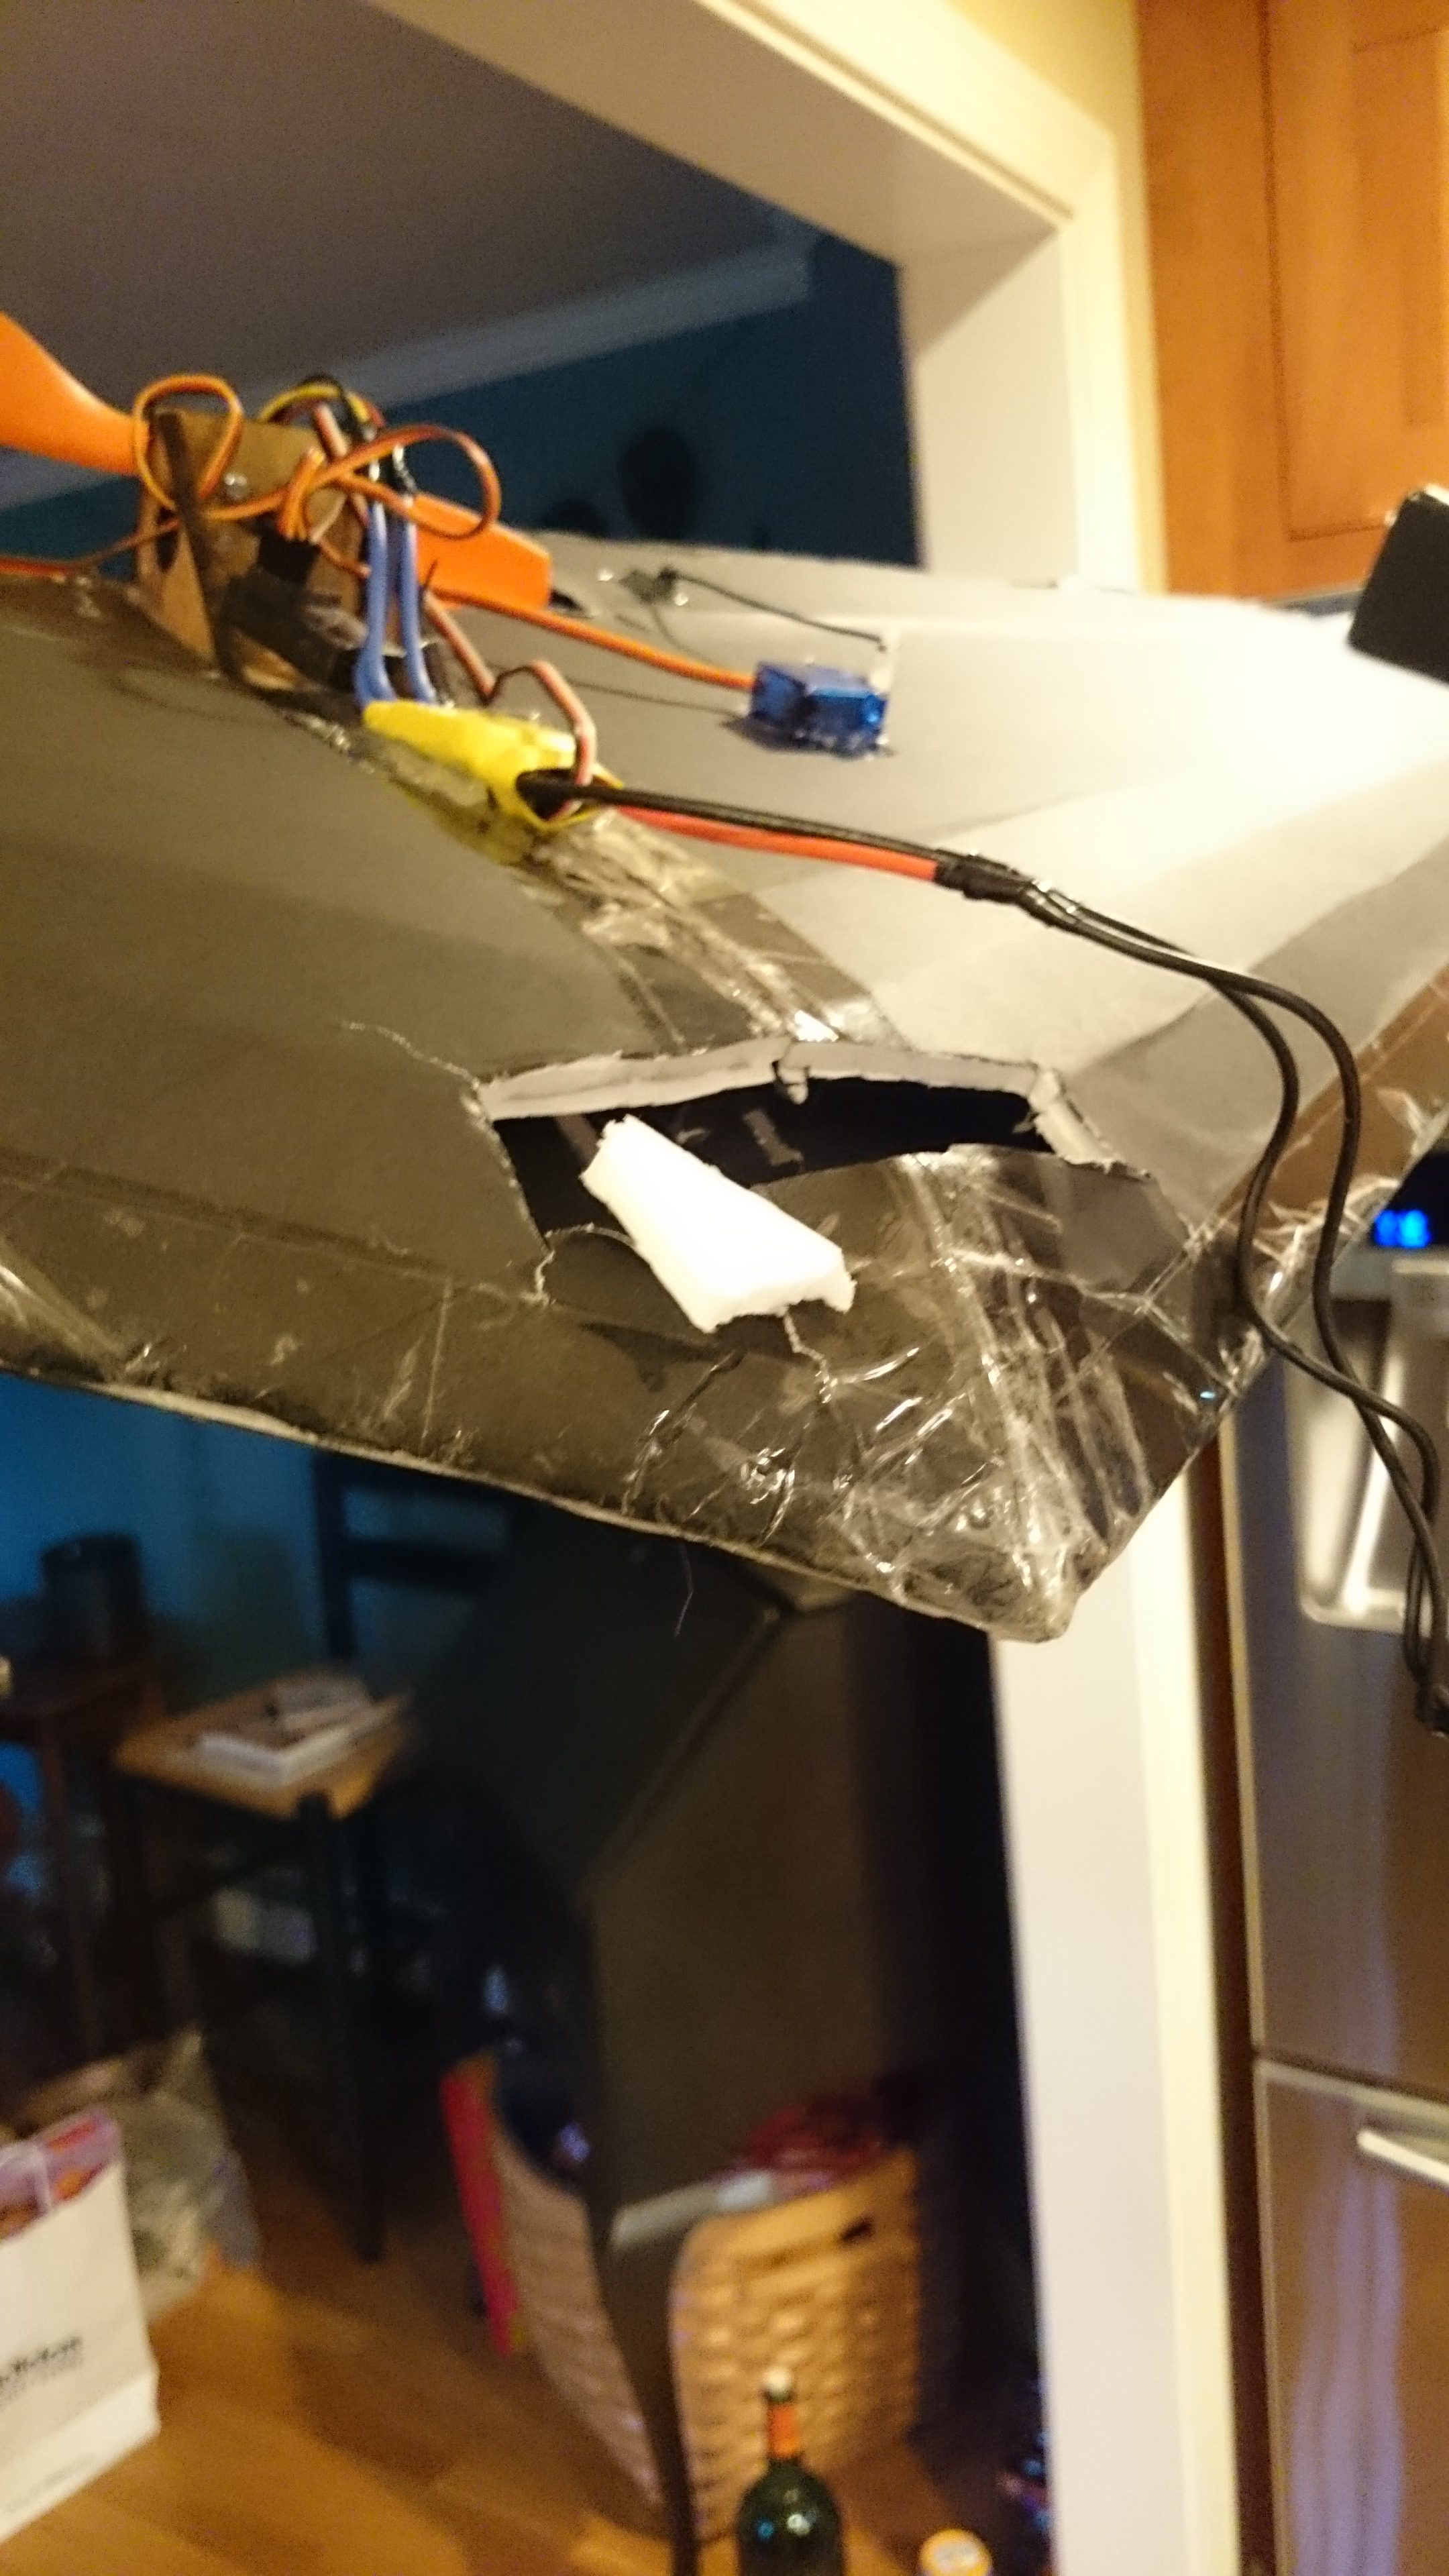
I ended up printing the plans on ~14 sheets of paper, and needed to tile them together, which went pretty well considering my limited arts and crafts skills. Cutting the foam board to shape ended up being pretty tough since I was using the cheapest utility knife that Dollar Tree had and the blades would dull after cutting just a few linear inches. The final glue-up was actually pretty uneventful, and I ended up with this (insert picture of plane in kitchen). To mount the motor, I designed a firewall based on the Flite Test version and cut it out of some 3/16” plywood on the laser cutter at work. Just add a bit of superglue and suddenly you’ve got the single strongest component on the plane
The first batch of propellers that I bought were too long, so they’d clip the control surfaces on the wings. This was easily solved with some scissors, and cutting my own bullnose props. Surprisingly this wasn’t the root cause of future crashes.
First flights in the back yard were pretty comical. I needed to trim up elevator to the max to have a chance at a decent takeoff, but even when I got it into clear(ish) air control was pretty poor. (Video(s)) here. Moving to a larger field at the local elementary school allowed me to actually fly a little bit, until the battery fell off the nose of the plane and made it do an abrupt front flip, that is. For some reason I never added any kind of battery retention device on top of the slight press fit into the hole I cut. I’ve done destructive testing on LiPo batteries, and I would not have expected that these batteries could survive ~40 foot drops, even onto grass. (They’re still good a few months later too!)
By mid-August 2015 I had crashed that plane so many times that the nose point was pretty much a pile of dust held in the general shape of a plane by the layers of tape I had applied. I stripped the electronics, scrapped the airframe, packed the leftovers into a miscellaneous box, and moved to Detroit. The parts sat in that box until May 2016, when I started building another plane.
This time, I had the worst $30 printer that Office Max could possibly to print my plans, which meant that most of the lines didn’t quite line up and lead to some serious confusion when I was comparing the two halves prior to gluing. Currently (June 2016), the new airframe is complete, but the only bit of electronics mounted to it are the motor and firewall. I still need to mount the servos and control horns for control surfaces, motor controller, and battery. The priority is to get the balance of the plane right this time so I don’t need to trim the radio to the max to get stable flight, and the plan is to mount it so that it is on the seam of the two halves, and use a Velcro strap to avoid un-planned acrobatics in the air.
It turns out that this second aircraft had awful balance. So much worse than the first one, seriously. I tried launching it a few times in a field by my apartment, only to have it nose dive every time. It was a real ground-seeking missile.
The 2nd flying wing still exists in its complete form, but now the plan is to build a Flite Test power pack, and just build swappable airframes. Supposedly flying wings are notoriously difficult to fly, especially for beginners, so I’ll be starting (again) with a more basic design.
Laser Labs includes reference samples with every tint meter so that the user can quickly tell if their meter is in spec. Every single test sample is measured by a spectrophotometer that has been calibrated with NIST-traceable light transmittance reference standards.
The old method of accomplishing this involved manually reading the spectrophotometer, typing it into a program, and pressing the print button. Since we were aiming to vastly increase our sales volume with new products, we needed a faster solution that was immune to fat-fingering in wrong numbers.
Luckily the spectrophotometer has a “Print” button that dumps its current measurement value out through a serial port. A USB-Serial module was used to connect the PC to the spectrophotometer. The Visual Basic program opens a serial port, and listens for incoming data. The “Print” button is not debounced, and the data dump is raw data with no headers or footers, so the Visual Basic program captures a stream of ASCII characters, scans for the number format (xx.x), and injects it into the label generation code along with the date. The label printer is a Zebra, so it uses a proprietary formatting language called “ZPL” (zebra programming language). The static portion of the label is saved as a series of strings, and the parts that vary (transmittance reading, date, serial number) are concatenated into some other strings. Its kind of chunky, but it gets the job done…
The end product is a small application that can automatically generate labels by hitting the print button on the spectrophotometer, in varying batch sizes (in case you want multiples of the same label with incrementing serial numbers), with the option to manually set the reading and date for calibration and testing purposes.
Please don’t call it a drone, it can’t do anything by itself.
After watching this video and a bunch of Flite Test videos, I decided that multicopters were cool and that I really wanted one.
Being new to RC aircraft, I started small with a Hubsan x4 so that if I was a terrible pilot or just didn’t like the hobby I wouldn’t be breaking the bank on a toy. I turned out to be terrible at flying the thing but it was wicked fun. Within a few weeks two of my friends had bought Hubsan X4’s for themselves, and another bought a knockoff DJI Phantom. The rest of the fall was spent flying around the field outside my apartment building and crashing into fences, walls, the ground, and each other. The X4 is surprisingly robust, surviving full speed crashes into brick walls (with a tailwind!) and tangling with the 10” props of my buddy’s fake Phantom without so much as a broken propeller. The little Hubsan turned out to be a great starter because spare batteries and propellers are dirt cheap, and because I could fly it indoors easily. The latter was important because fall turned to winter, and standing outside in Vermont without gloves on for extended periods of time isn’t exactly a pleasurable experience.
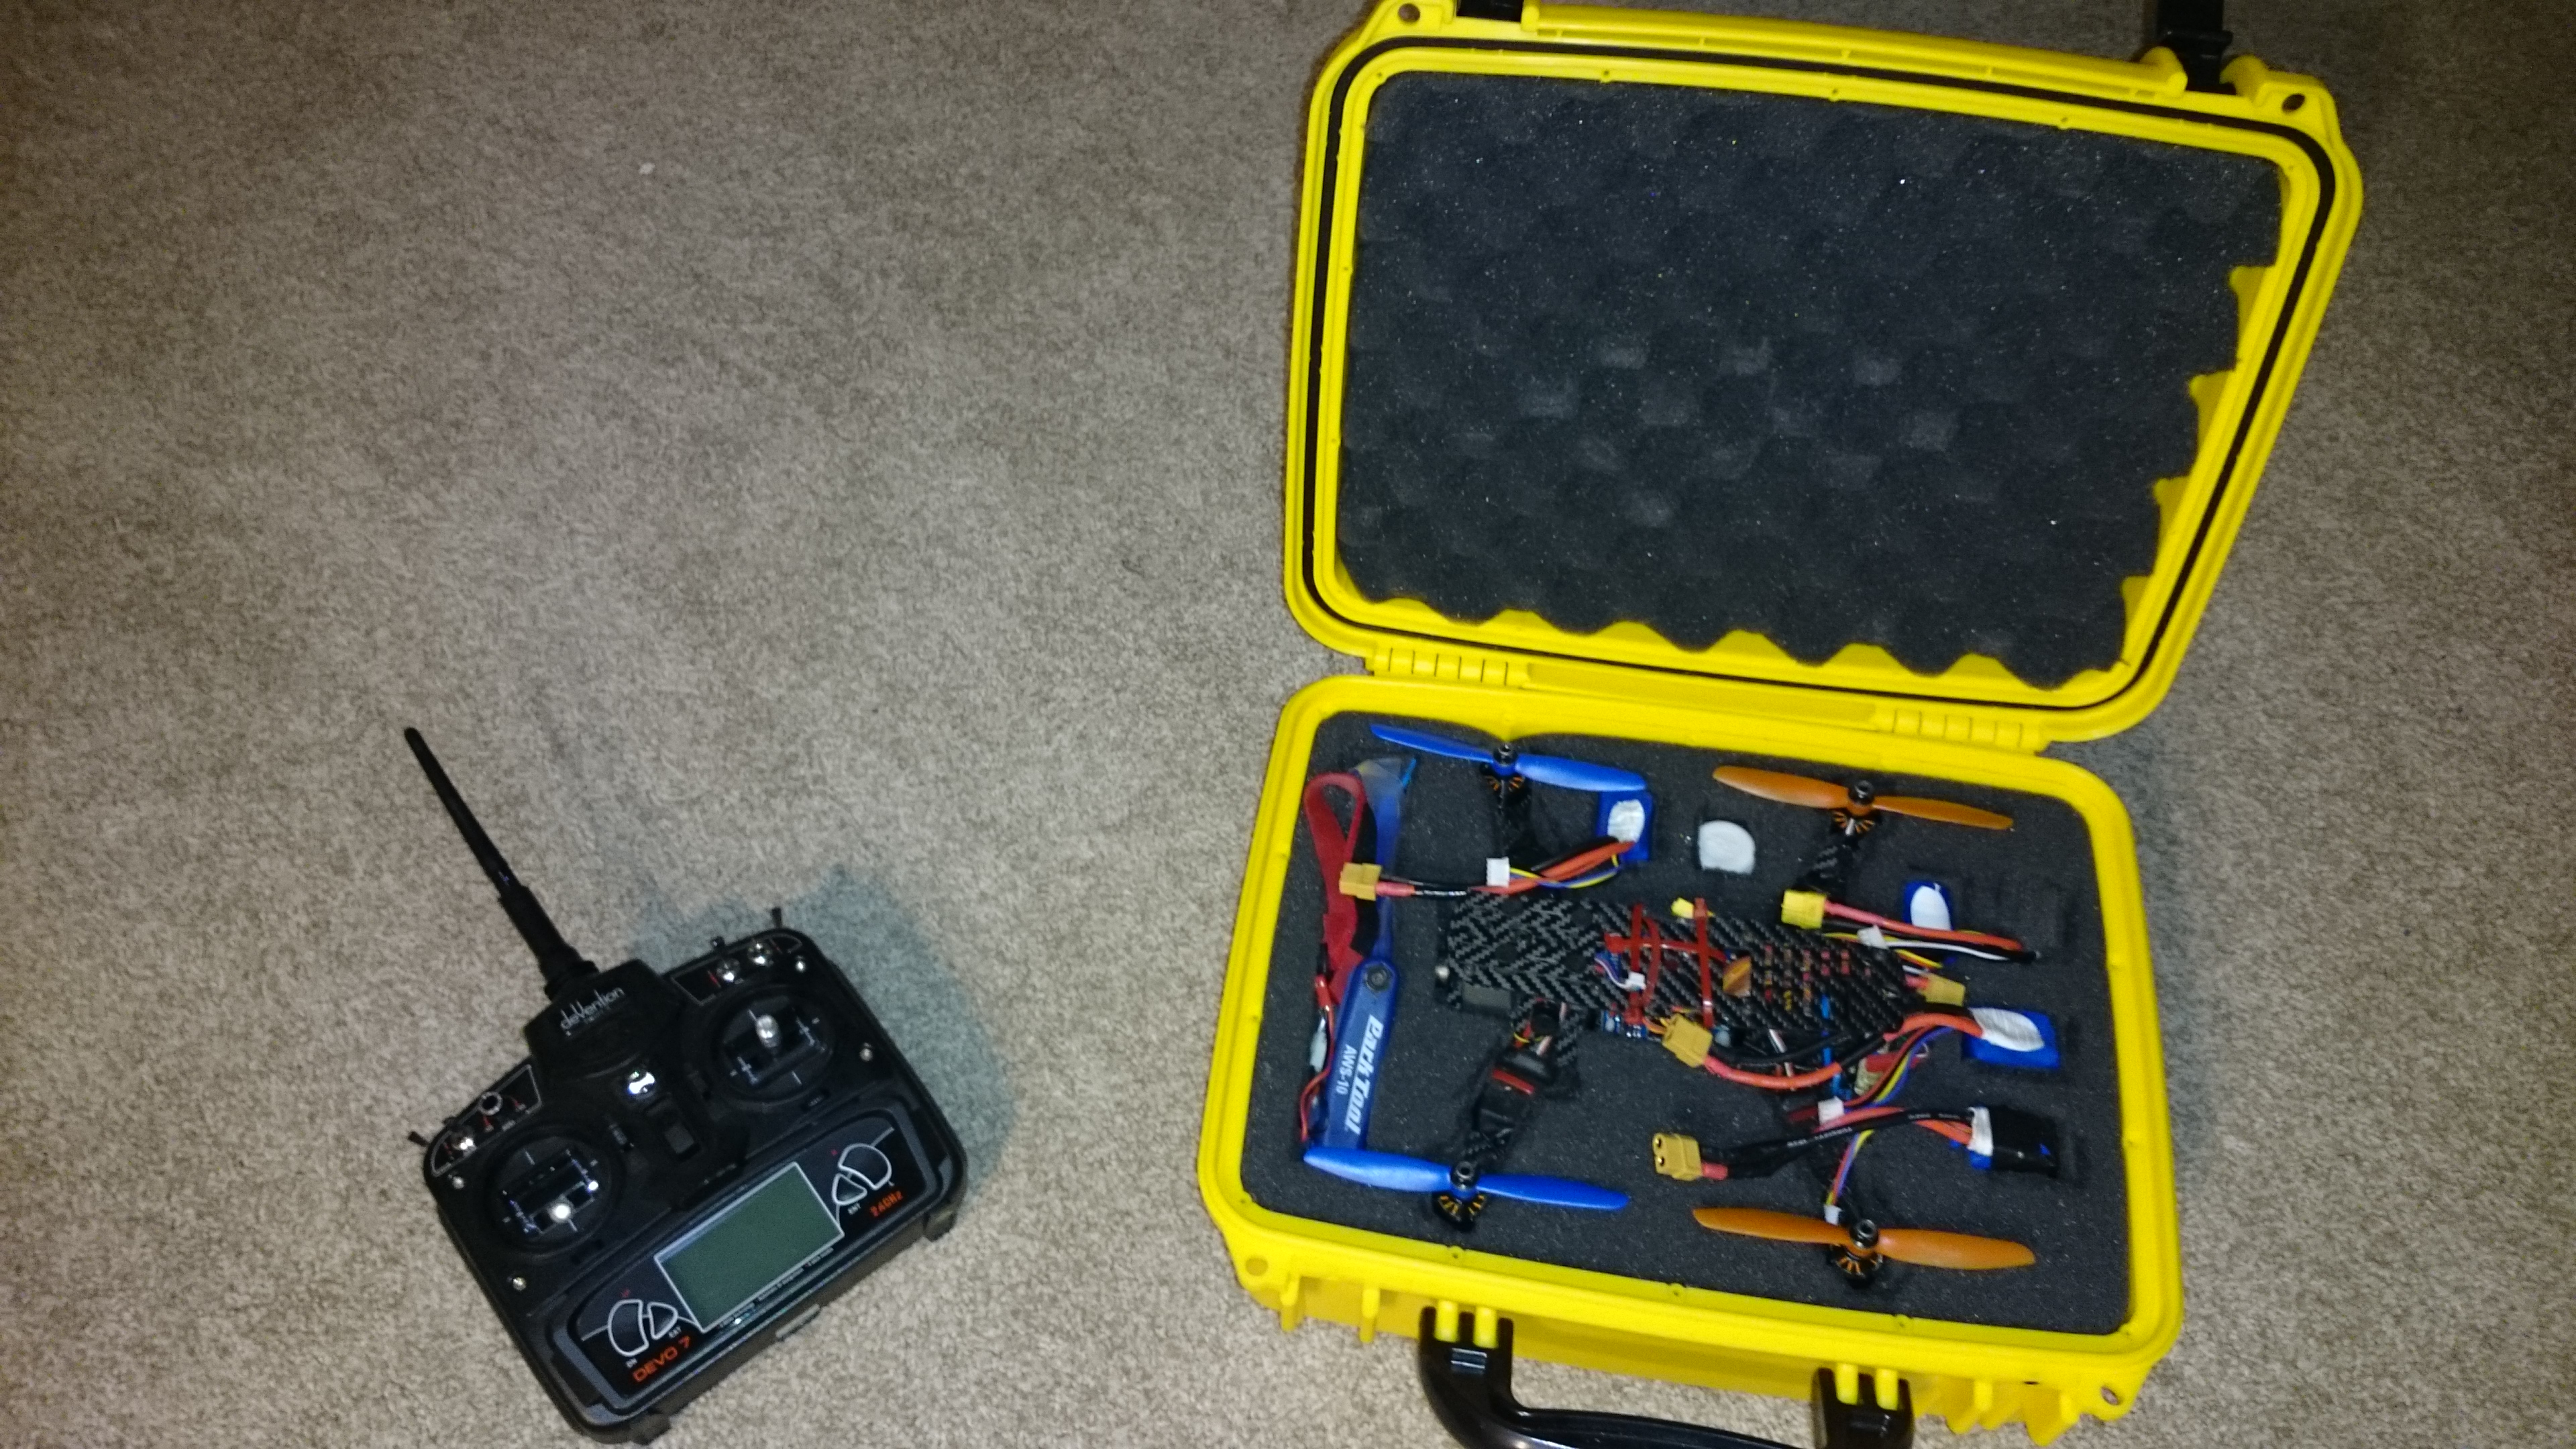
By mid-December, I was still having tons of fun flying the Hubsan and I had gotten good enough to fly confidently and consistently so I started looking into larger multirotor aircraft with first person viewing (FPV) capability. I picked a ready-to-fly 250 class quadrotor from myrcmart.com because it seemed like a good balance between size and maneuverability. Even though MyRCMart seems sketchy, and is run by some dude in China with access to cheap parts, the transaction went smoothly for me. Plus they accept PayPal, so you have that layer of protection if something were to go wrong. I also considered building my own from assorted HobbyKing parts but is was just so much cheaper to buy the pre-built one directly, especially since it included a 7-channel RC transmitter. For FPV gear I bought the starter kit from HobbyKing just because I wasn’t ready to drop hundreds of dollars on legit goggles.
The only things I added to my 250-sized quadrotor were landing gear and LED strips to help with keeping orientation. It actually came from China with some carbon fiber clip-on landing legs, but they weren’t tall enough to touch the ground if I mounted the battery on the bottom of the frame. A few #10-24 bolts through pre-cut holes on the motor mount arms solved that problem for a while, but a few cycles of crashing and bending the bolts then bending them back to straight broke them clean off. One thing I highly recommend is getting a carrying case for all your gear. I got a protective case for my airframe, tools, batteries, spare parts, etc. and it makes travel and setup much easier.
So far I can only say that I’m very happy with my quadrotor from MyRCMart. The carbon fiber frame looks to be high quality, and the arms are thick enough to not instantly shatter when you have a hard crash. In fact, the first time I flew it, I crashed arm-first edge-on into a boulder and the only damage is a small patch of dented carbon. I haven’t experienced any delamination anywhere on the frame. The only other area of damage is on the much thinner top plate, and that’s because I crashed top-first into a metal post, shattering two small supports. The flight control board is mounted directly underneath the cracked sections, but its undamaged so that means the frame did its job and protected the critical electronics.
As of writing this (Late July, 2015) I still haven’t really flown using FPV gear. I tried once right when I got it and was still new at flying, which didn’t work well. My spotters would tell me that people were on the field, and I’d immediately chop the throttle because I was afraid of hitting them even though they were a few hundred feet away. I also recently tried in my backyard, but the combination of low hanging branches and a badminton net made that pretty difficult. Now that I’m a better pilot, I just need to find an empty field (of which there are plenty near me) and probably a spotter. We’ll see.
Update, Late February 2016:
I moved two months after I wrote the first chunk and haven’t gone flying once since then. Its still winter where I am so I probably won’t be flying for another few weeks. Unless I experiment with the FPV gear in my apartment… I live alone and have a reasonable amount of open space. what could possibly go wrong?
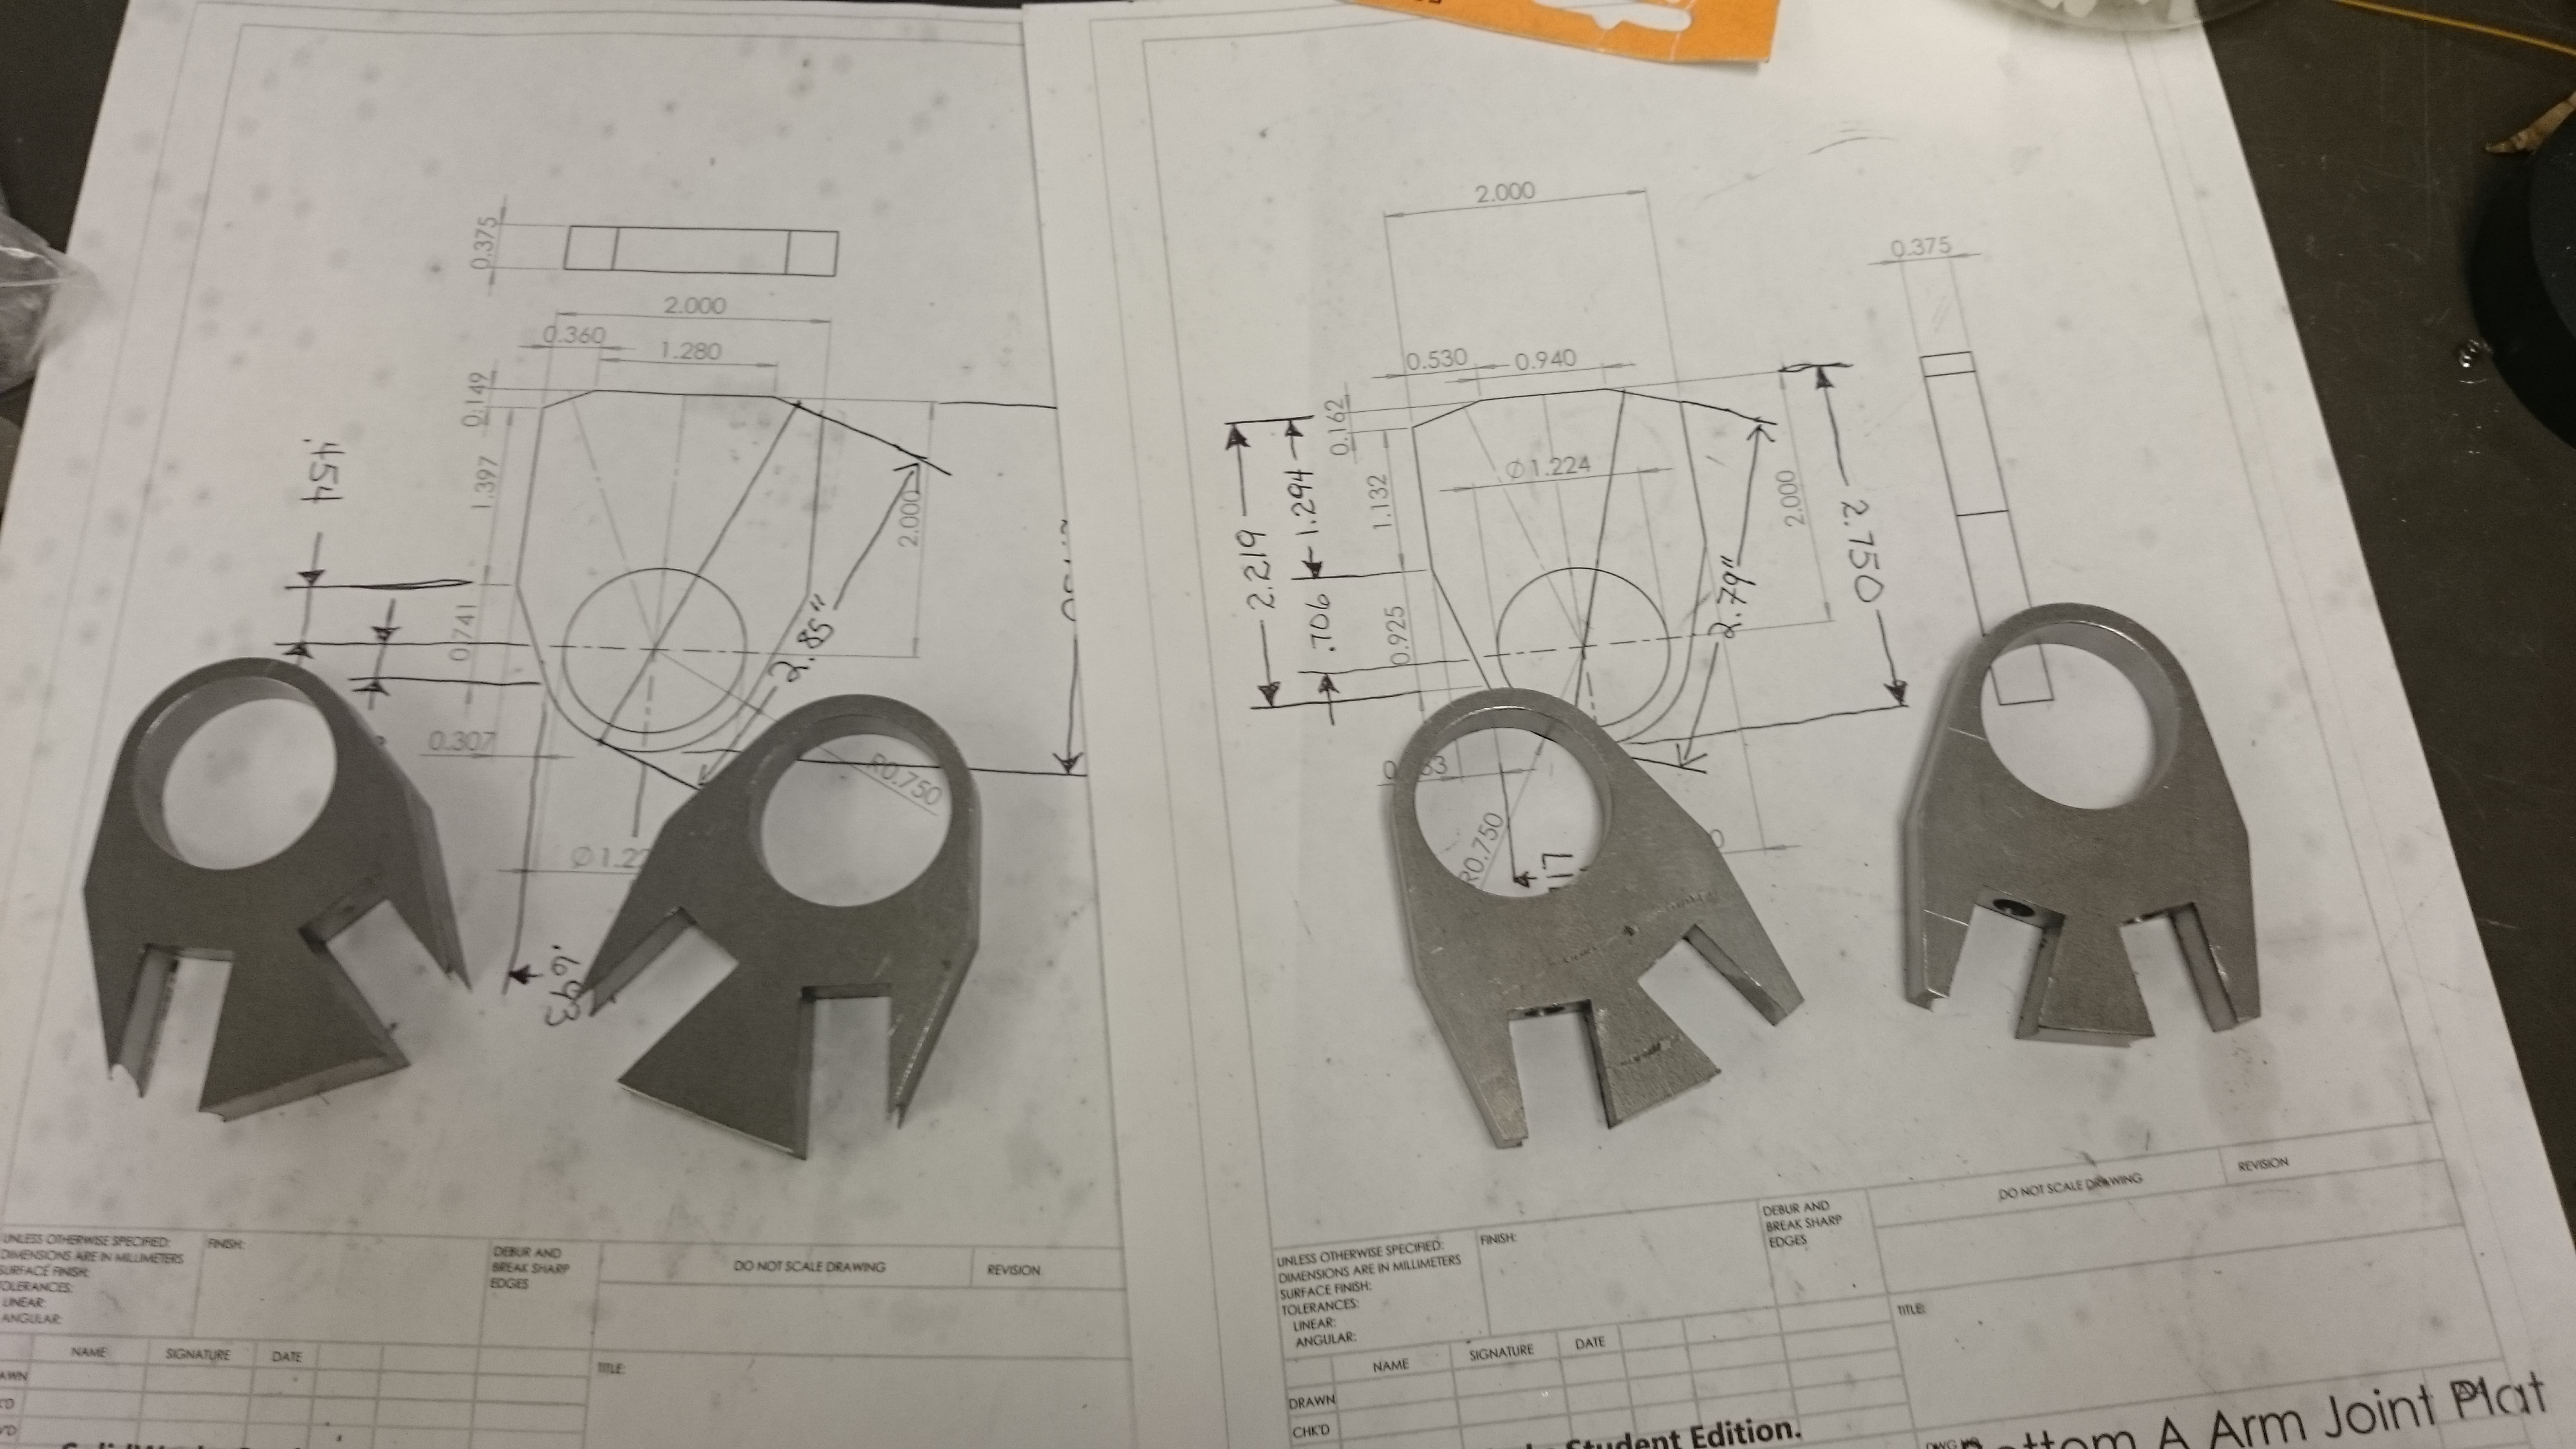
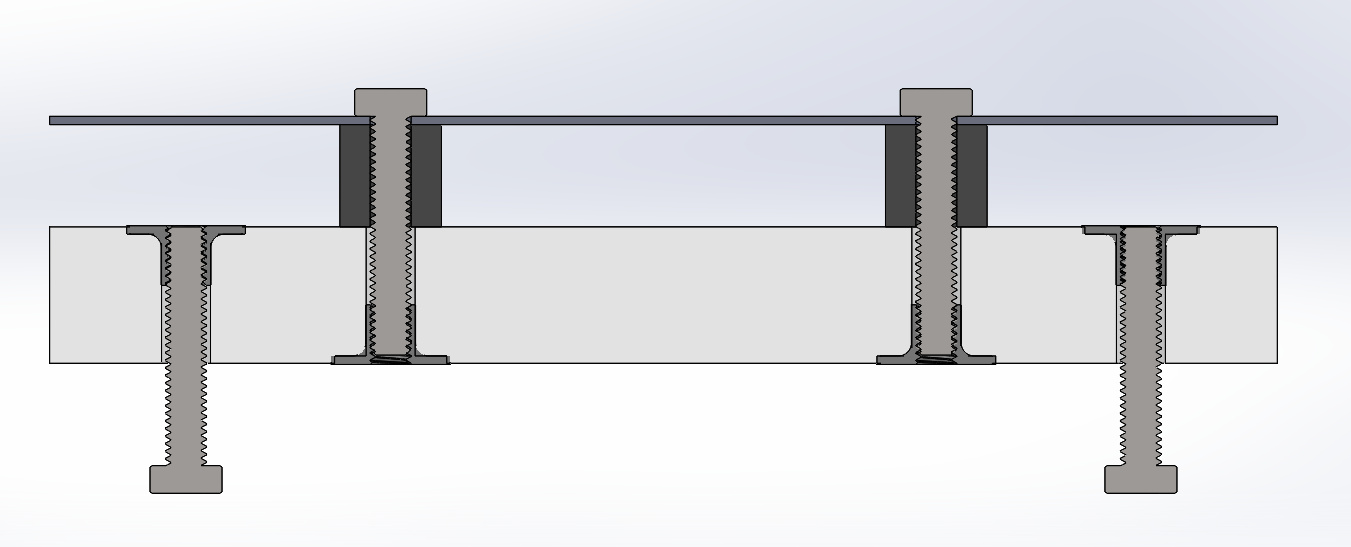
I was elected to the position of Vice President of the team for my junior year (2013-2014). Duties included assisting in managing team resources and being a point of contact with our sponsors in addition to redesigning the battery enclosures. Major changes included a more robust mounting system, improved side impact protection, and better electrical isolation. The batteries were held to a steel plate in the battery box by interfacing with the grooves in their insulation. The steel base plate was held to a plastic bar which was anchored to the bottom of the battery enclosure. The plastic bar had weld nuts embedded in it, which allowed for robust mechanical connections between the batteries and the enclosure, but maintained electrical isolation as is required by the Formula Hybrid Rules.
Holding the battery to the box
Battery packaging
Mounted on car
Mounting bar cross-section view
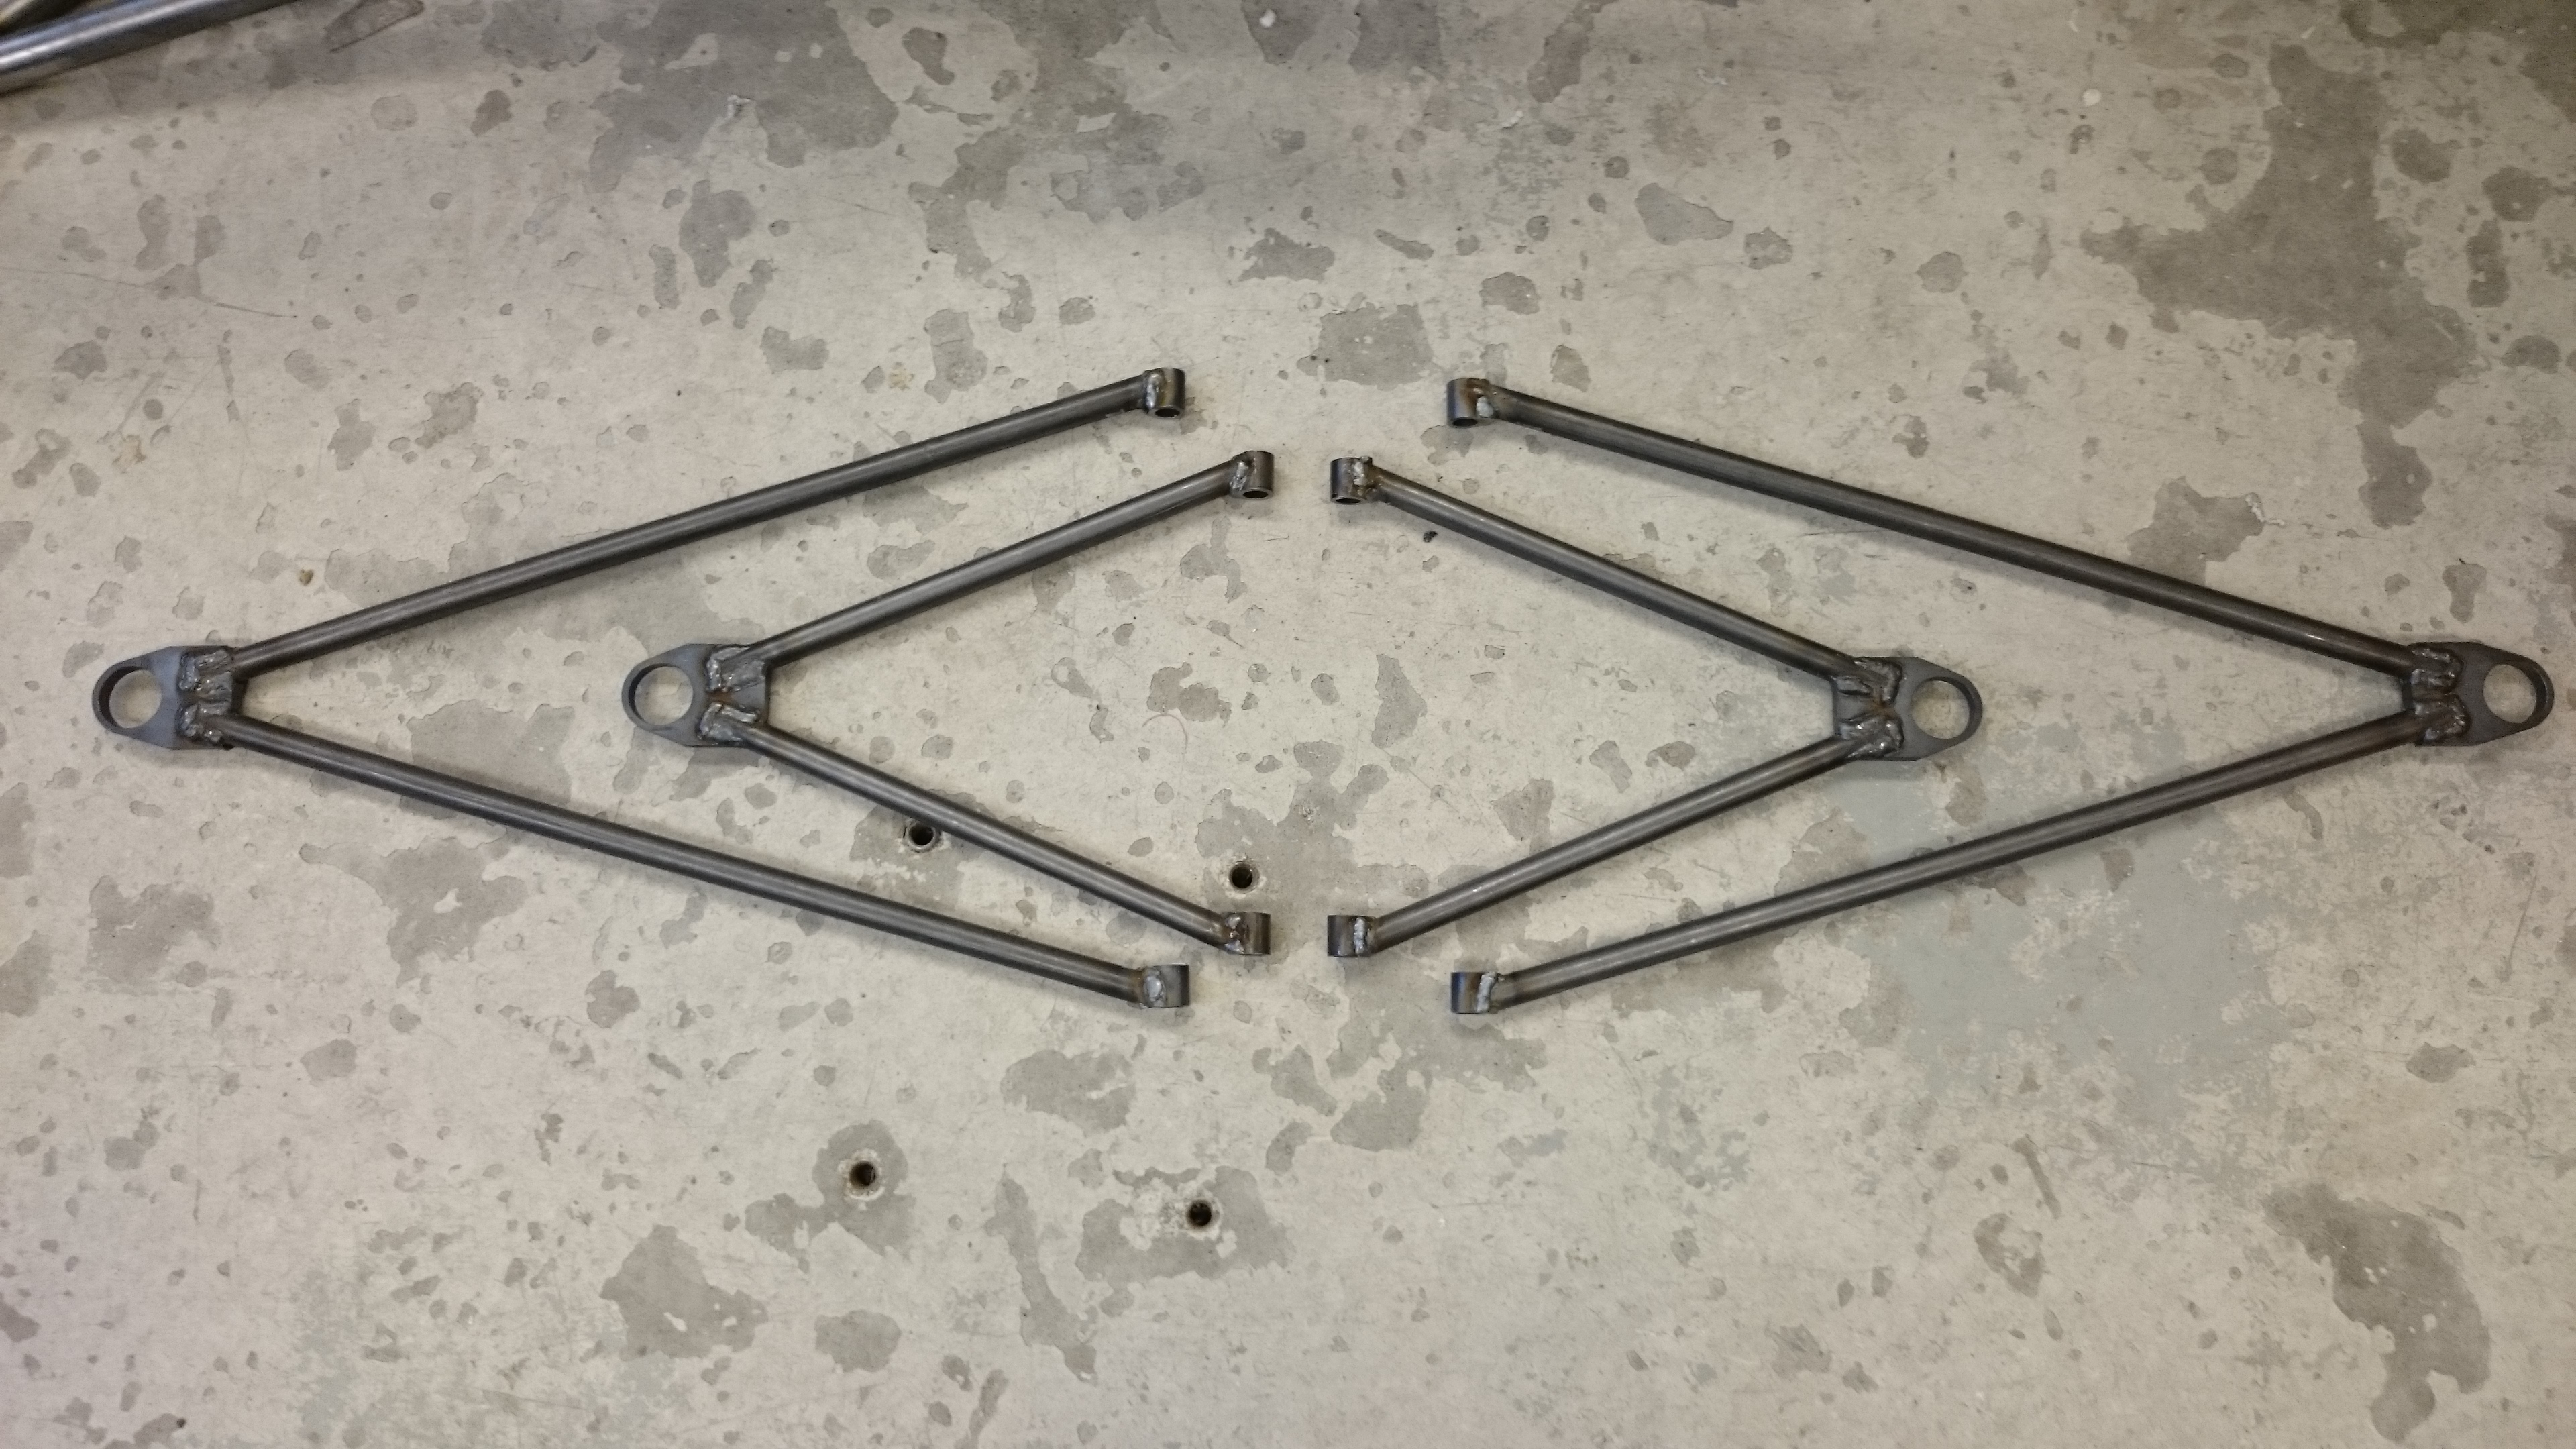
In addition to developing the packaging for the batteries, I was in charge of protecting them from a side impact. This involved designing and fabricating a steel cage around the battery boxes on the side of the frame.
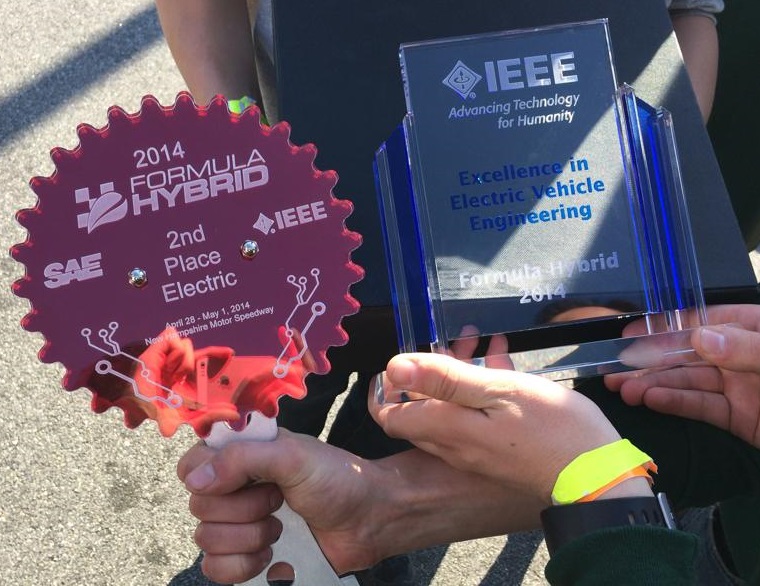
We came in 2nd place for the second year in a row, and we were awarded the IEEE award for excellence in electrical vehicle engineering. All that separated us from first place was a single lap on the endurance course, where instead of taking it easy for at least the first lap, I put the pedal to the floor and browned out the battery management system (BMS), putting us out of contention. Oops.
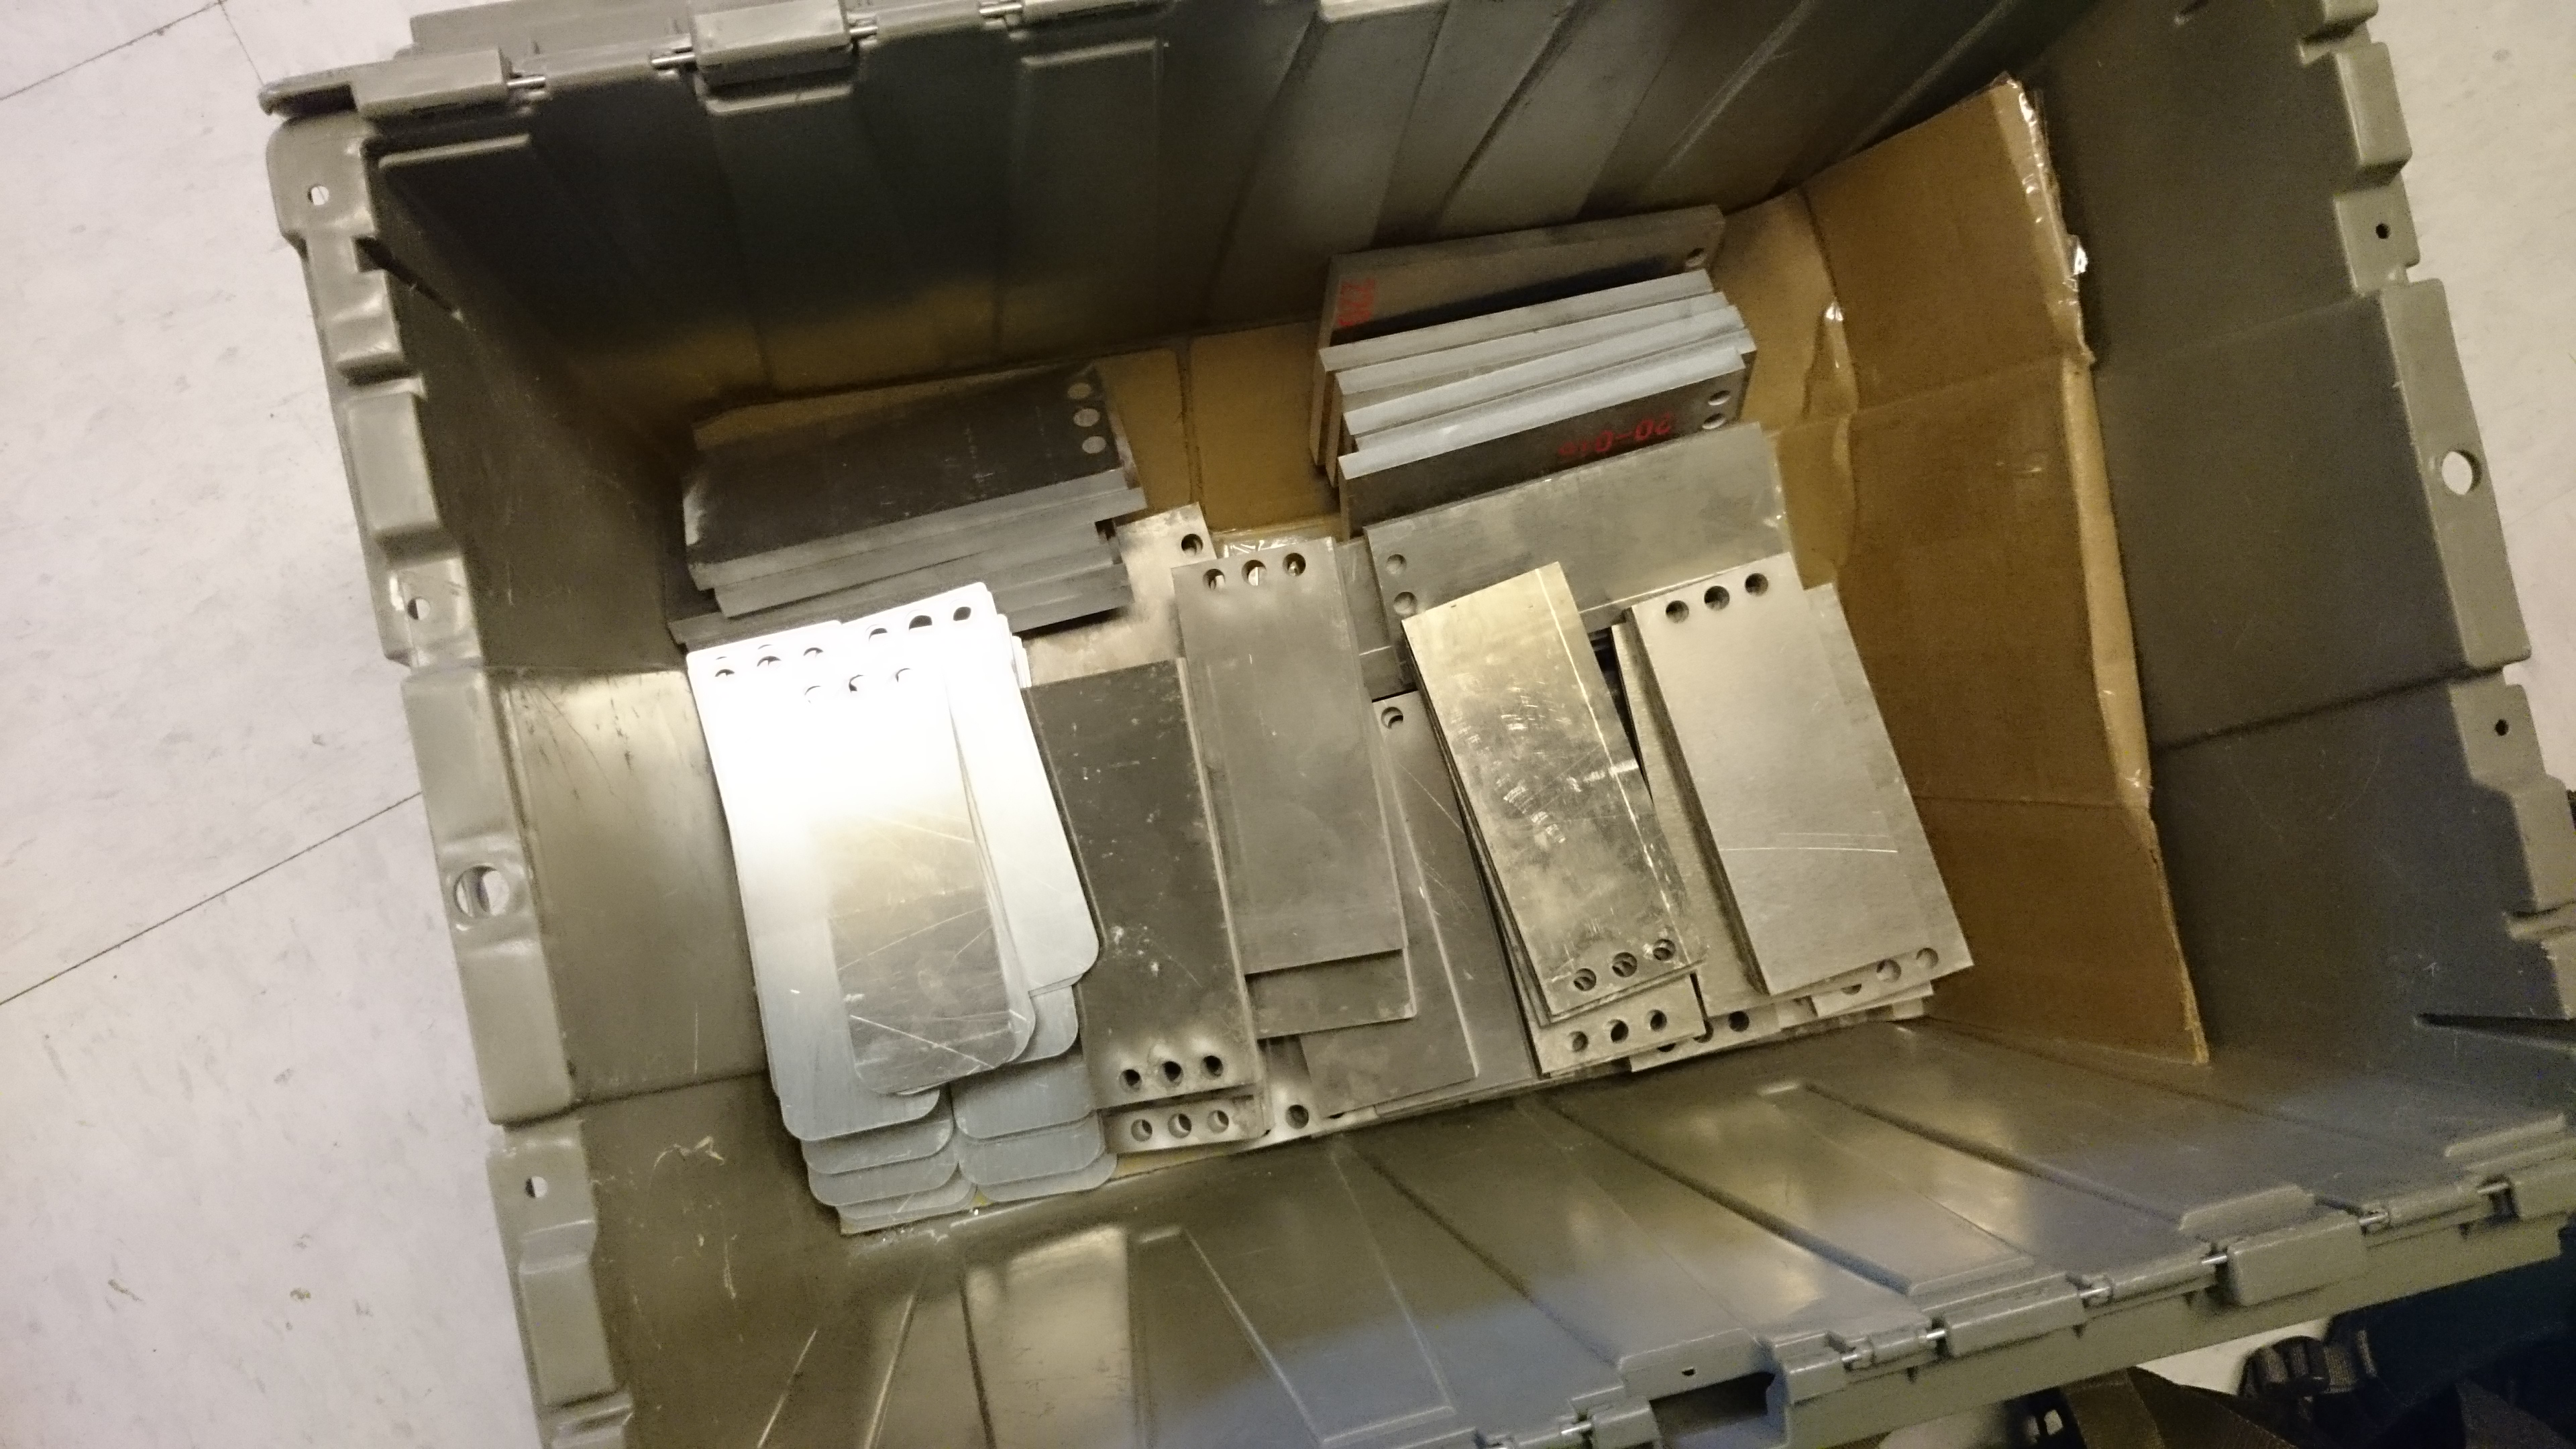
My first major project with the team was during my sophomore year (2012-2013). I was tasked with developing a system to mount the batteries to the car and protect them from a side impact. Luckily, during my freshman year I was given the job of assembling the previous design which involved irregularly shaped aluminum walls and about 1000 pop rivets, so I had a good idea of what not to do. Instead of making a custom enclosure during my sophomore year, I opted to use off-the-shelf parts to make the enclosure easier to build and maintain.
Figure 1: CleanSpeed 1.0 proposed design
Figure 2: CleanSpeed 1.0 final design
I used a Stanley tool box as the shell of the enclosure because they are lightweight, waterproof, and inexpensive. I designed a steel skeleton to affix the battery cells to the inside of the enclosure and an exterior cage to protect the battery from a side impact. There were two features of this design that I knew would violate competition rules; the polyethylene box was readily flammable, and the enclosure had conductive penetrations. I fixed these issues before the competition by using an intumescent paint to shield the plastic box and by designing acrylic caps to electrically isolate the inside of the enclosure.