
With the cooling system disassembled and flushed, the only thing standing between me and reassembly was some RTV and corrosion byproducts on the sealing surfaces between the block and water pump & thermostat. A bit of scraping and buffing with a plastic putty knife and Scotch Brite, and I was set to install my new parts.
new water pump, thermostat, and hoses
With a new thermostat, water pump, coolant expansion tank, and radiator hoses installed, I was ready to fill and bleed the loop, following the Forum-Approved method of setting the heater to max temp + low fan to allow the heater core to fill and bleed as well.
Having solved my coolant leak, I moved onto diagnosing the main issues of the car; It drove like crap. When I test drove it, the owner told me that one of the rear springs was snapped, but a new set of springs were included, and sat in the trunk of the car. Upon inspection, I discovered that both of the rear springs were indeed snapped,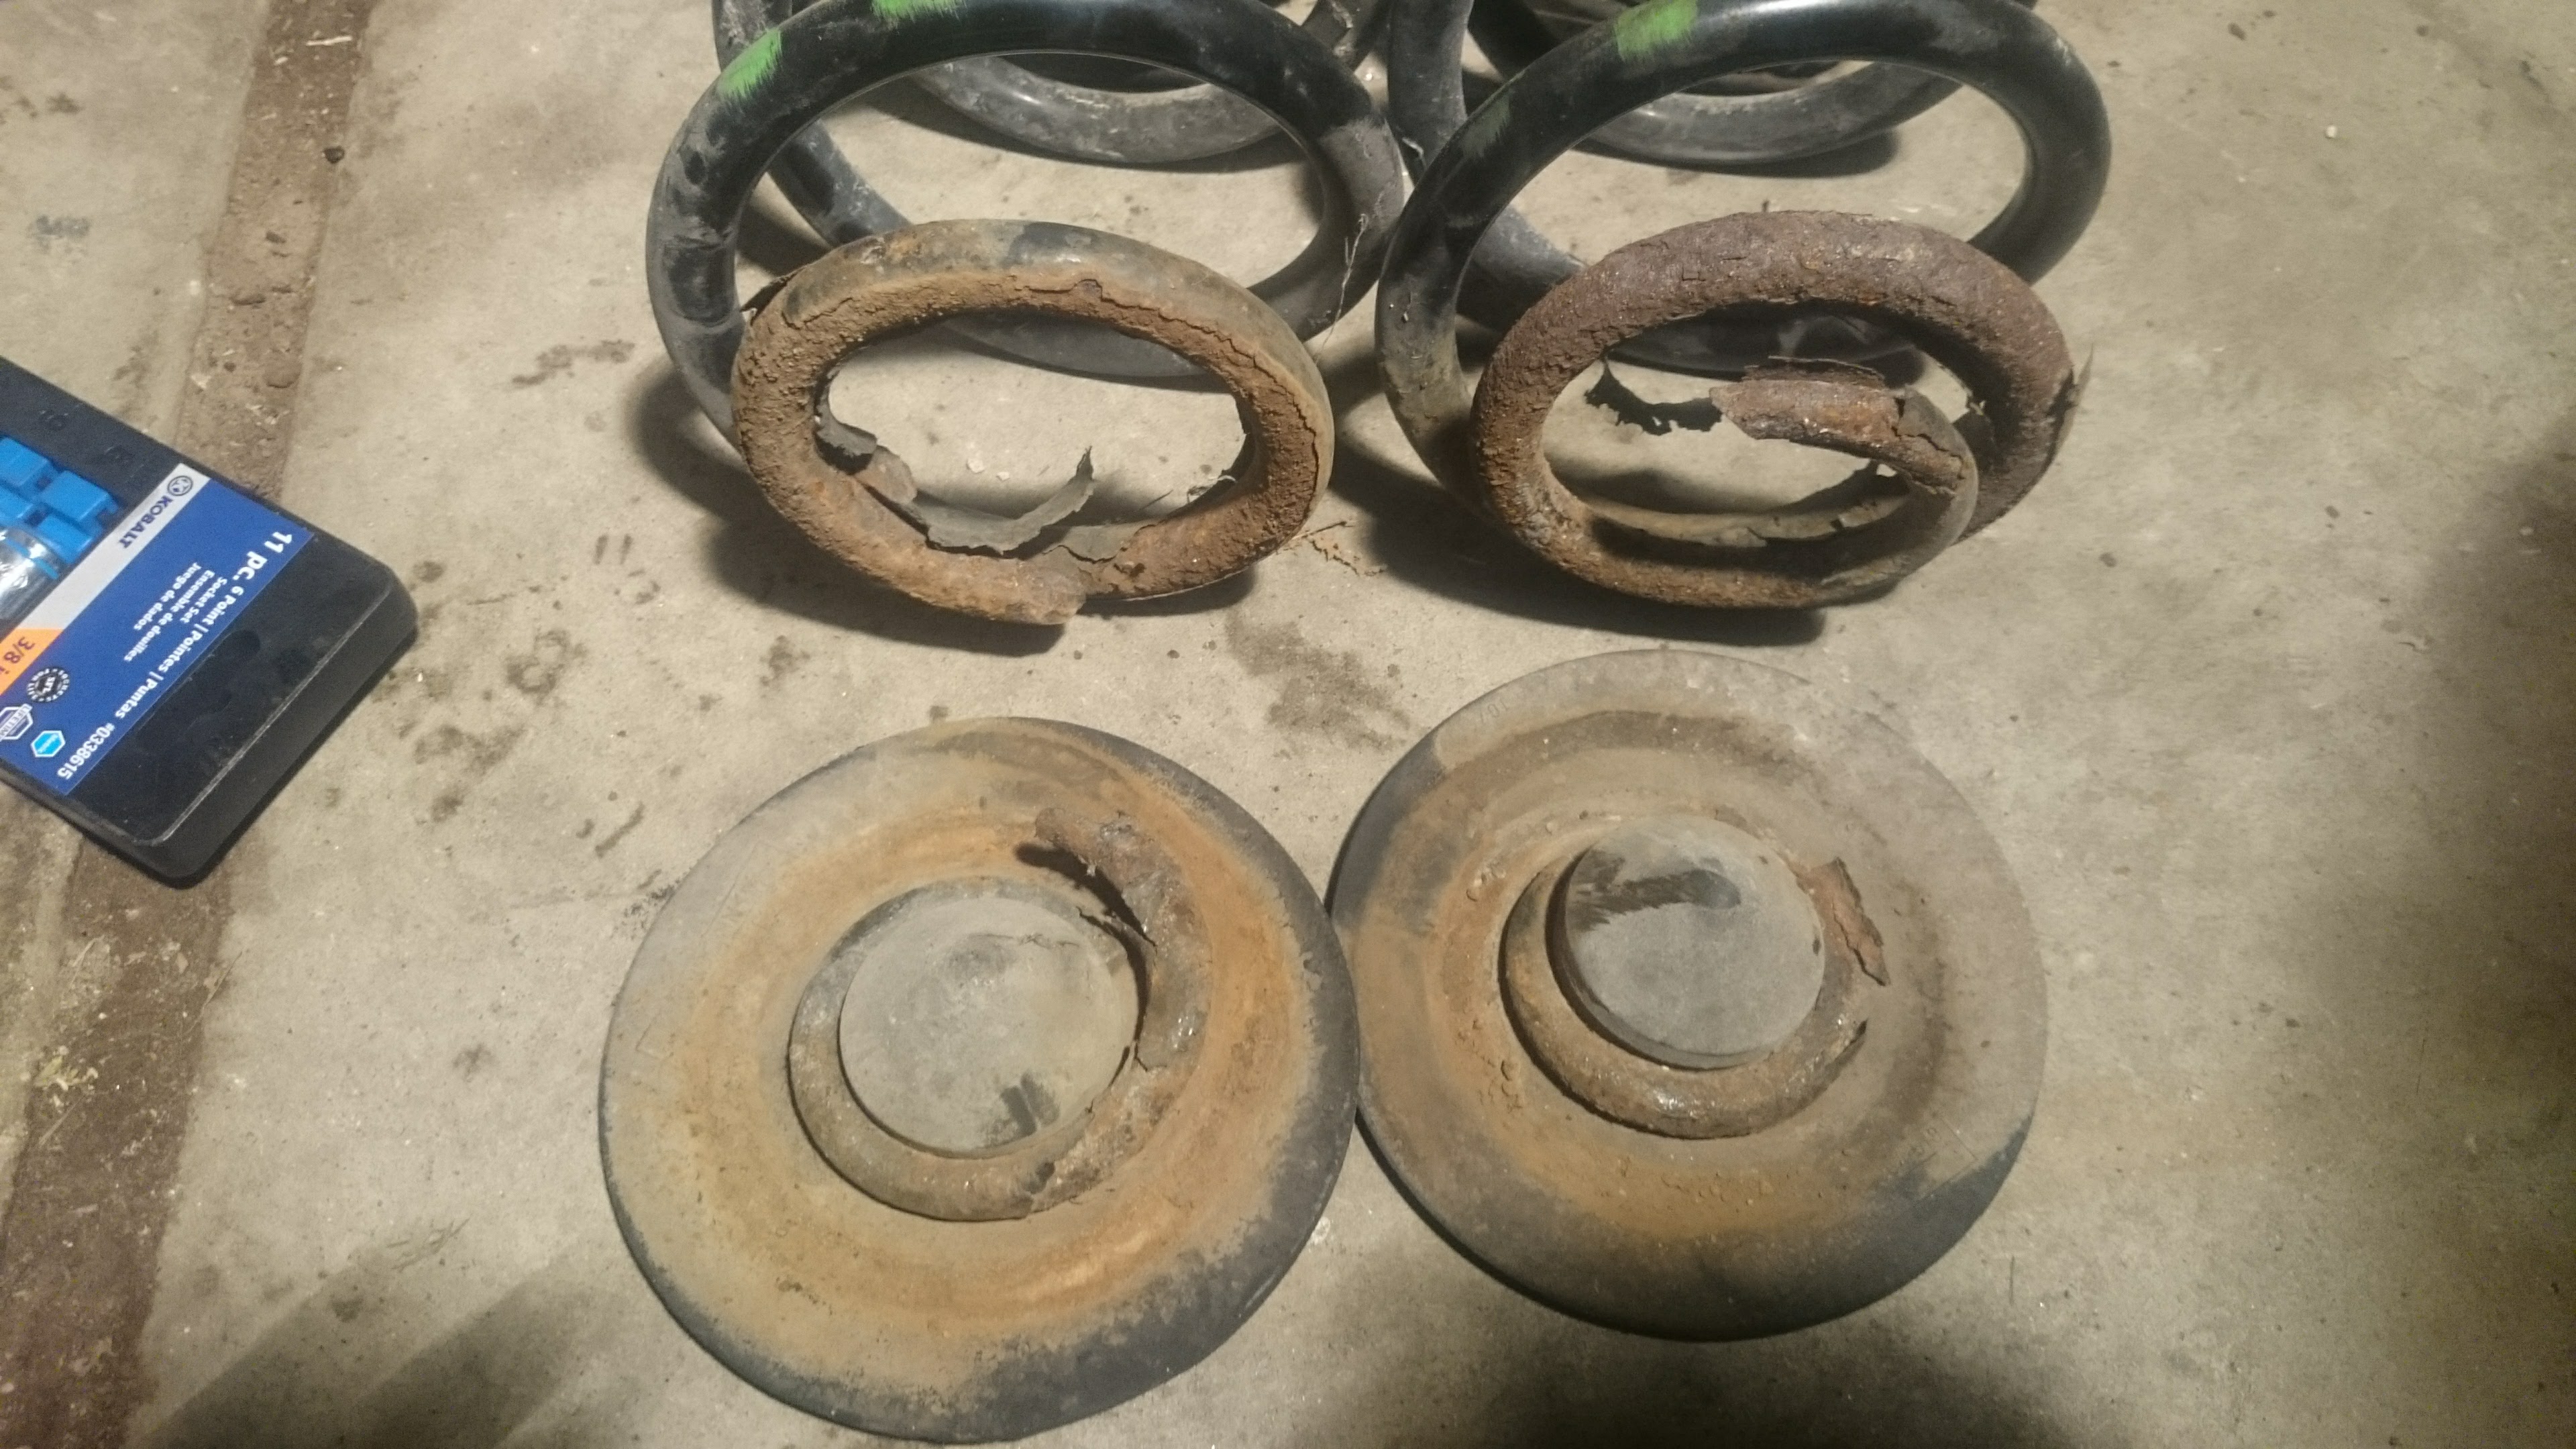 due to the design of the lower suspension arm trapping grit and water in the spring groove. Replacing the springs is very easy in the rear of the car; you simply press down on the trailing arm with your foot and pull the spring out with your hands. Unfortunately, that was the least of my problems.
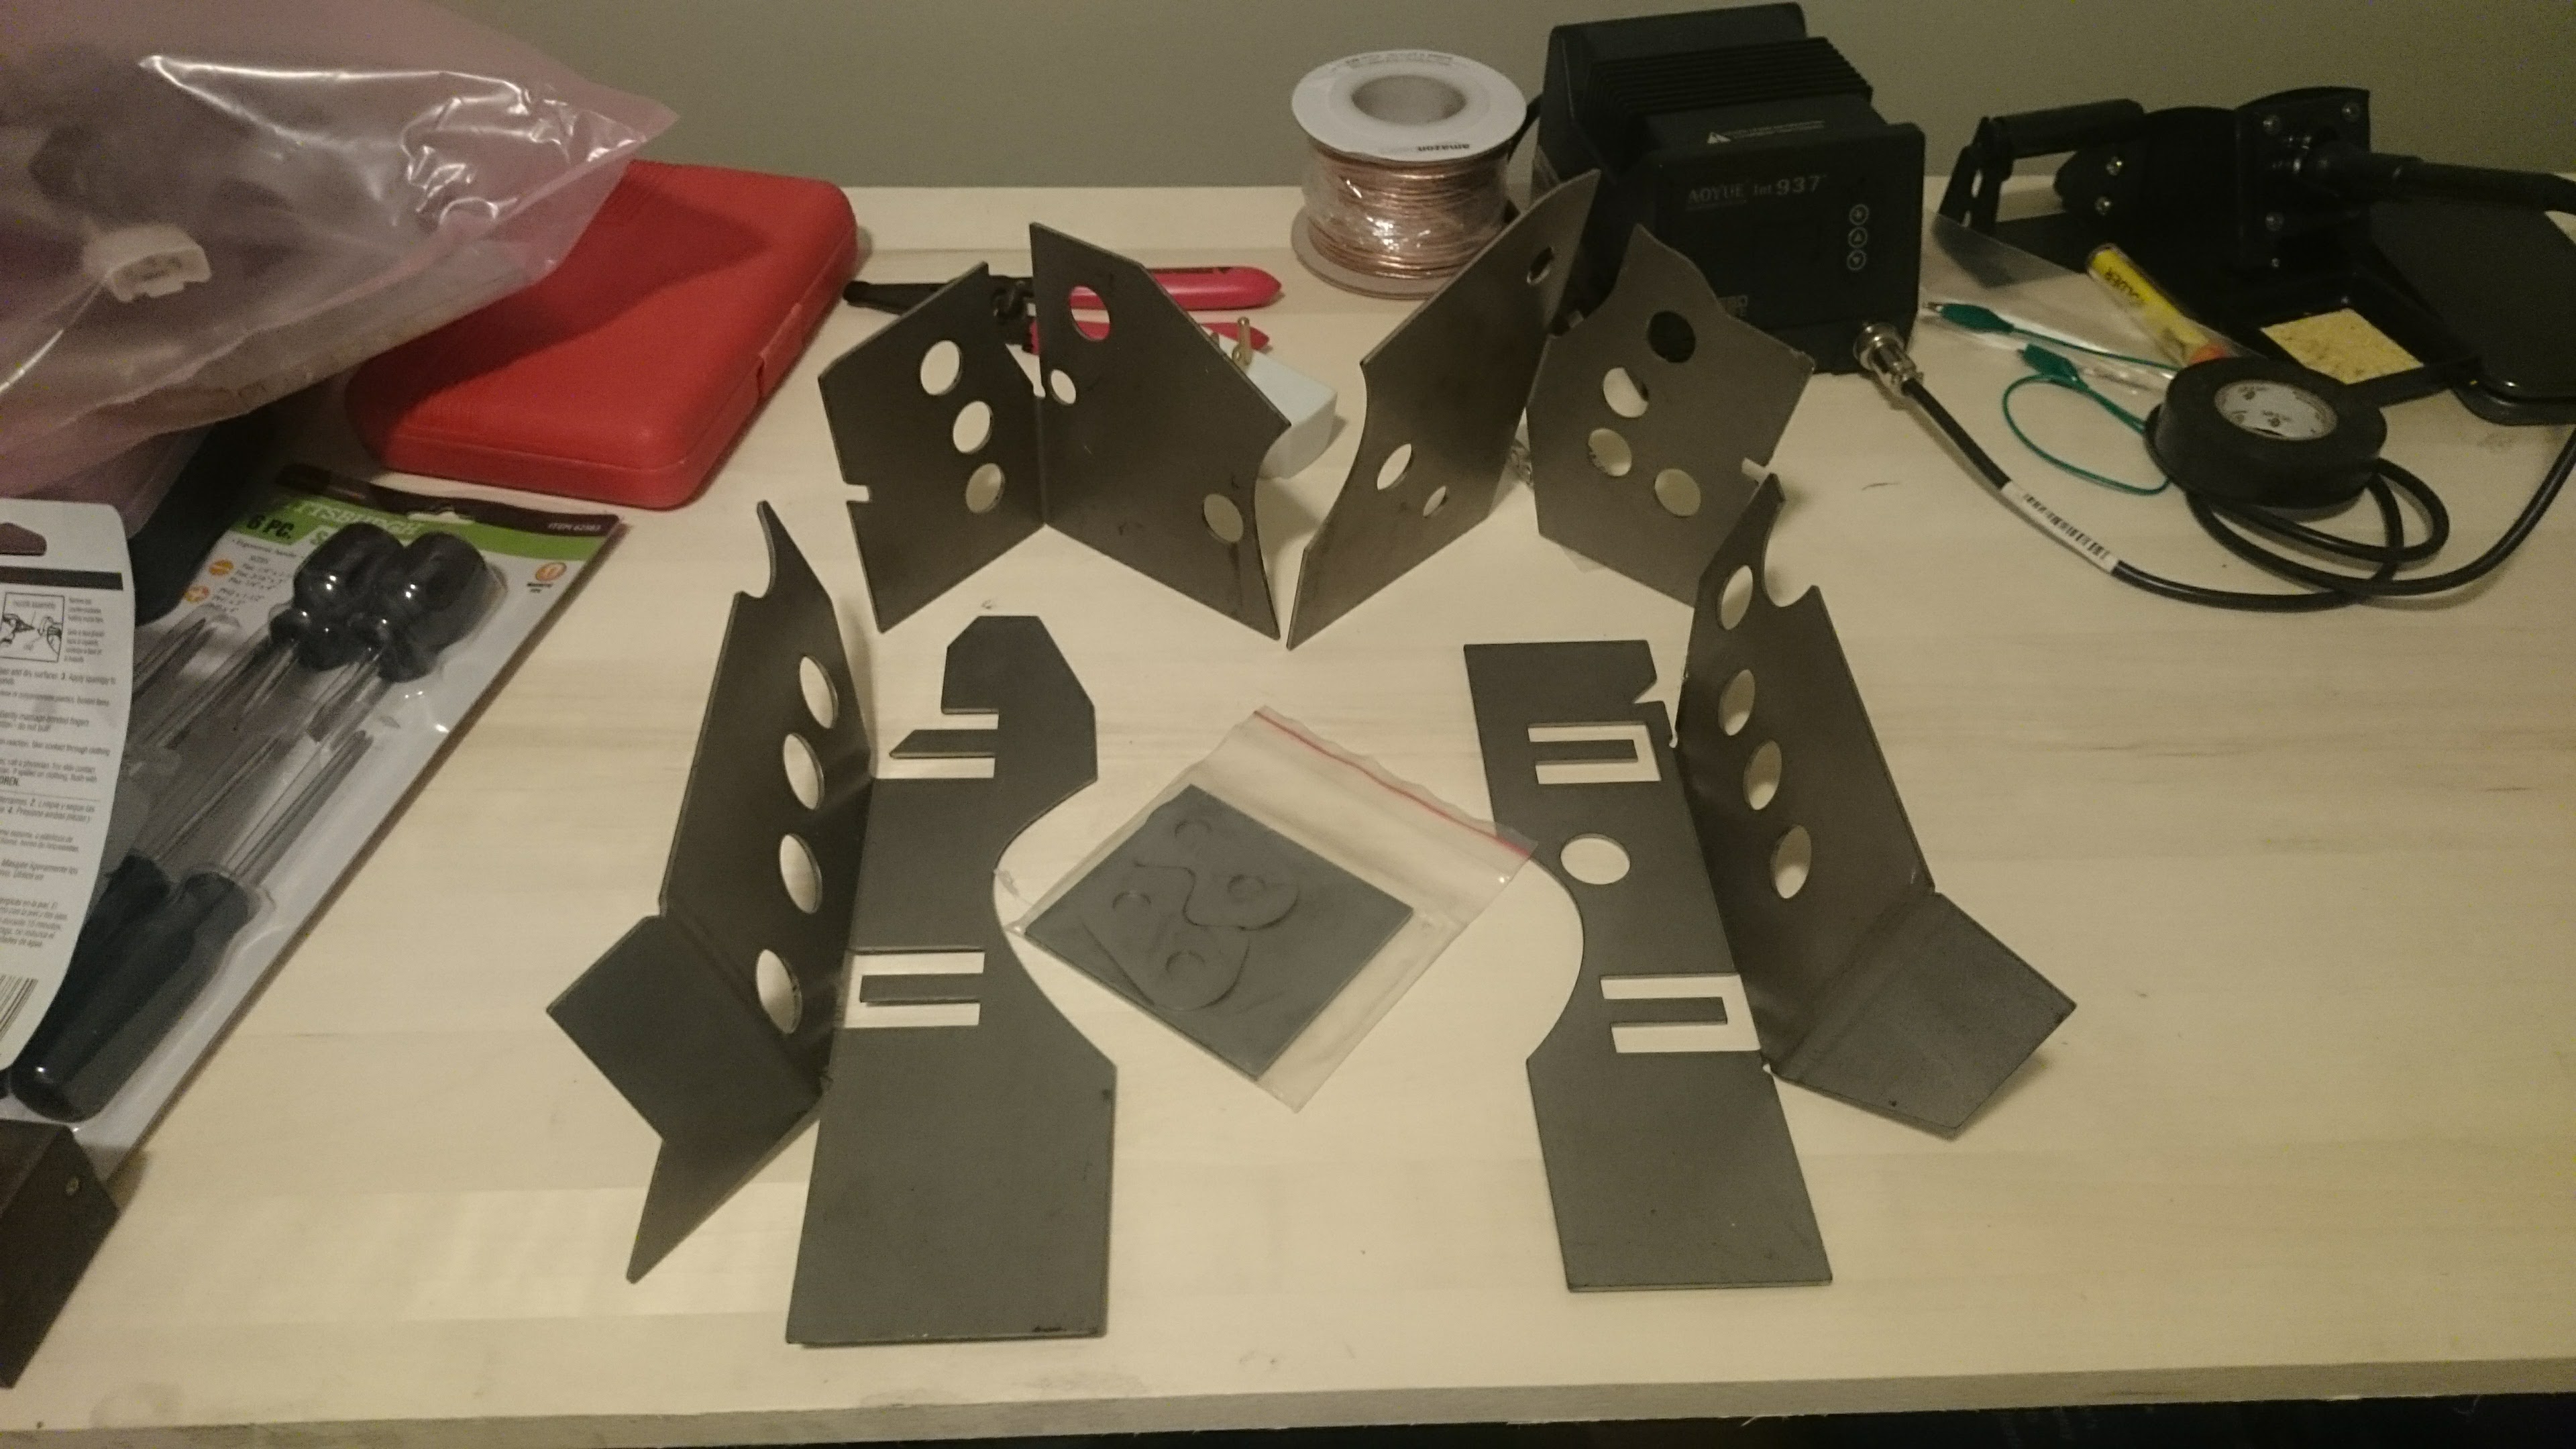
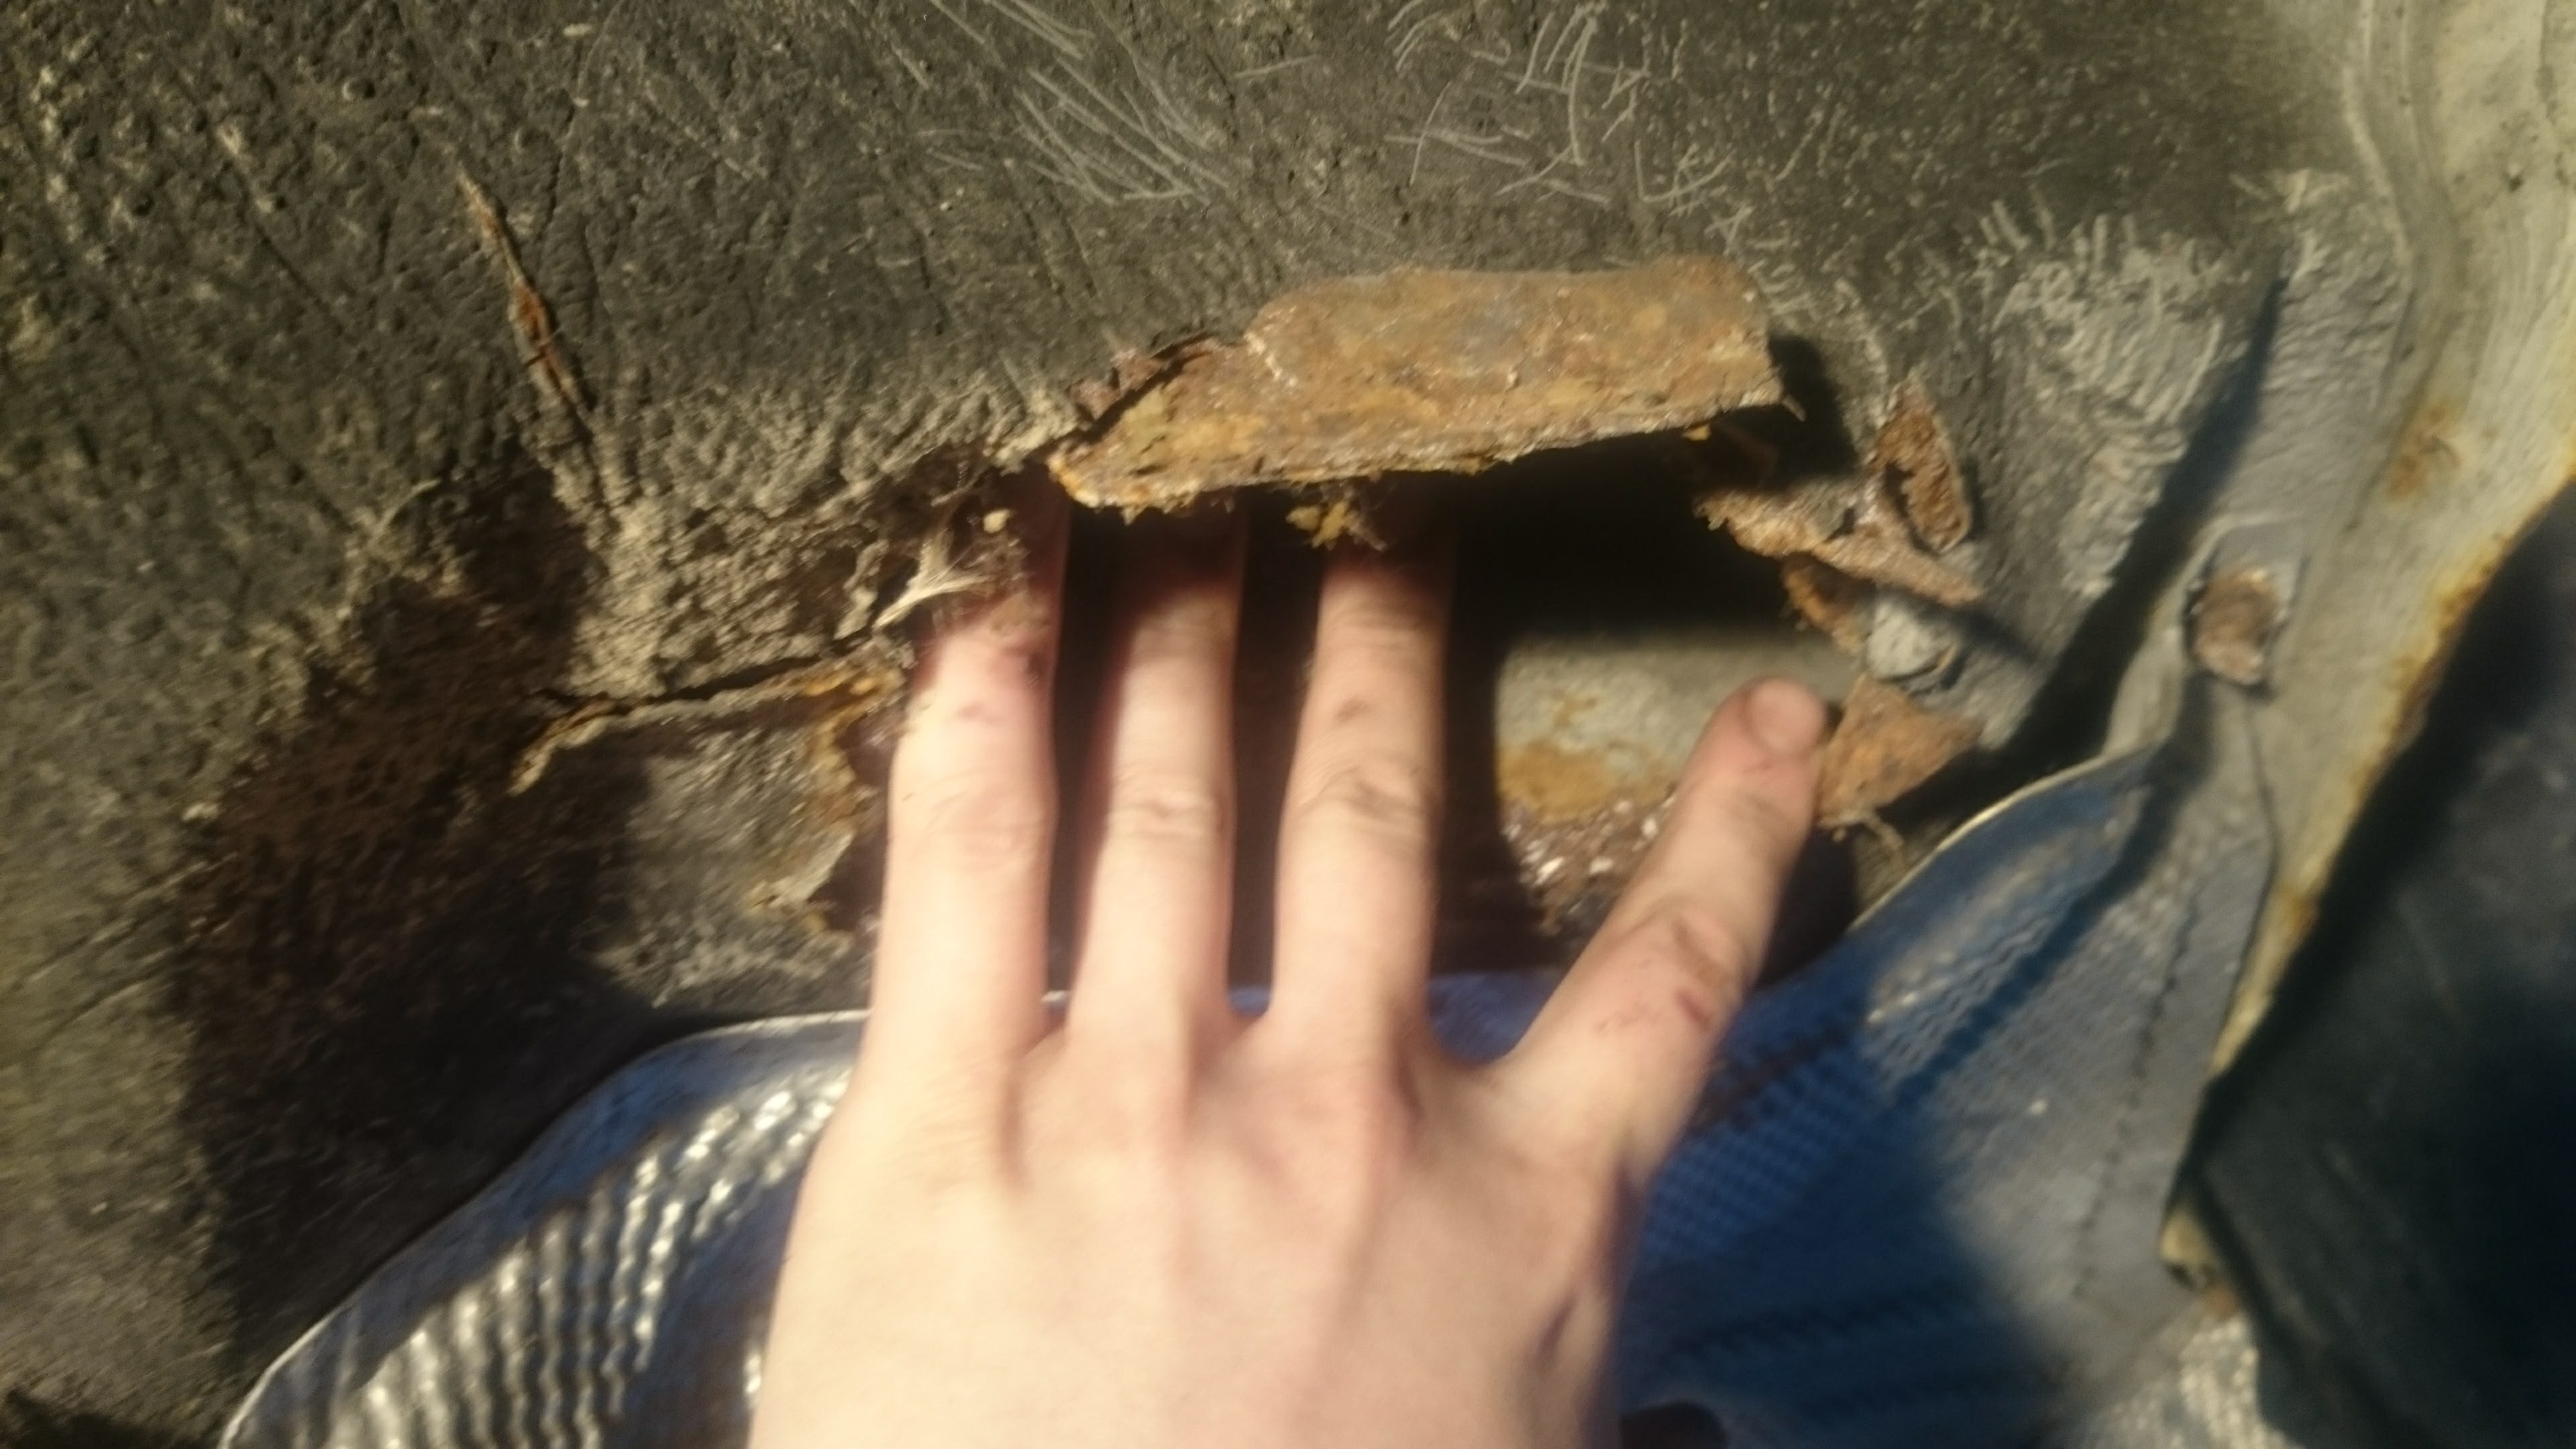
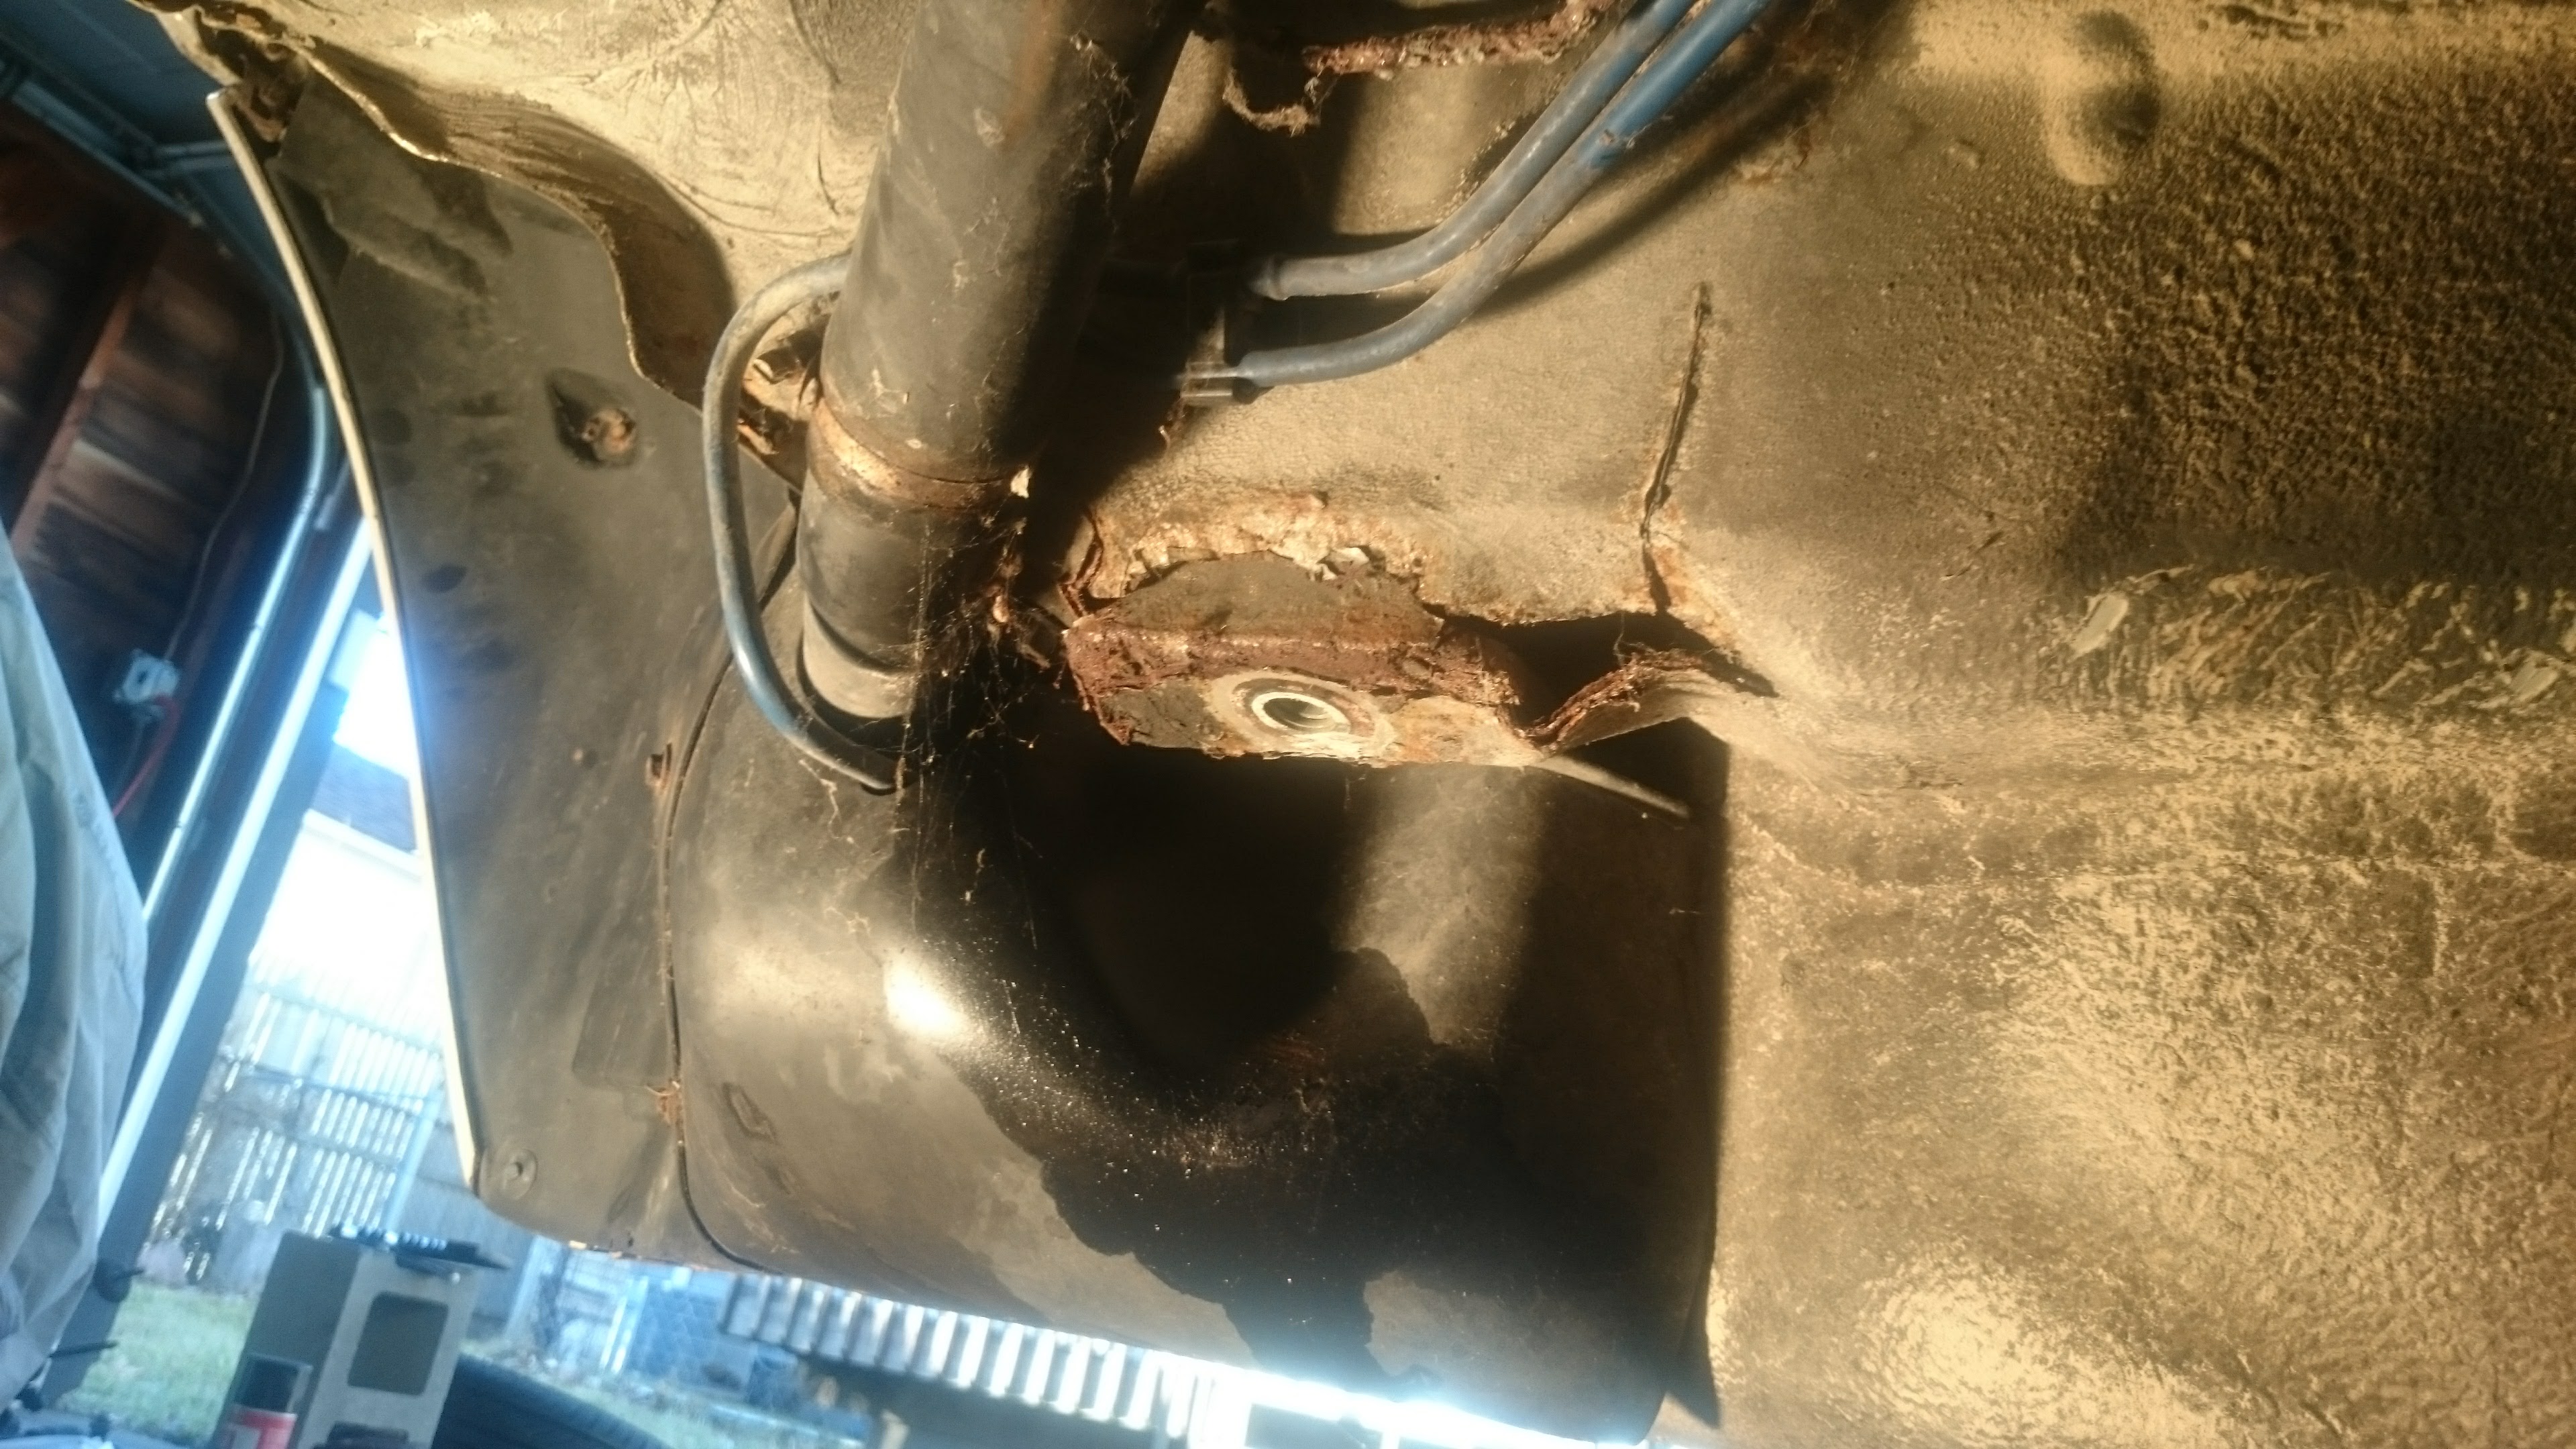
I had discovered that my rear subframe, the part that holds the differential to the body, had torn out three of its four mounts. That meant I’d need to remove every part of the car between the rear bumper and the transmission to patch the sheet metal. Somehow this was a known issue, unique to the 1999 323i, that I had missed before buying the car. Forums argued that it should’ve been a recall, with BMW replacing the rear floor of the car, but I was well out of that service window, being a 19-year-old car. This is where the private sector took over; there were many kits available to reinforce and patch the failure points. Some merely covered the surface where the subframe mounted, but others sought to fix the problem and ensure it never happens again by also covering a significant area around each mount point. I bought one of the larger, more robust kits, from an eBay seller in Russia. (I’d later learn that it was a knockoff of a different kit)
 In order to remove the subframe and repair the mounting points, I would need to remove the exhaust, driveshaft, subframe, fuel tank, and brake lines, roughly in that order. Being the dead of winter (2016) in an unheated garage, I had limited time to work.
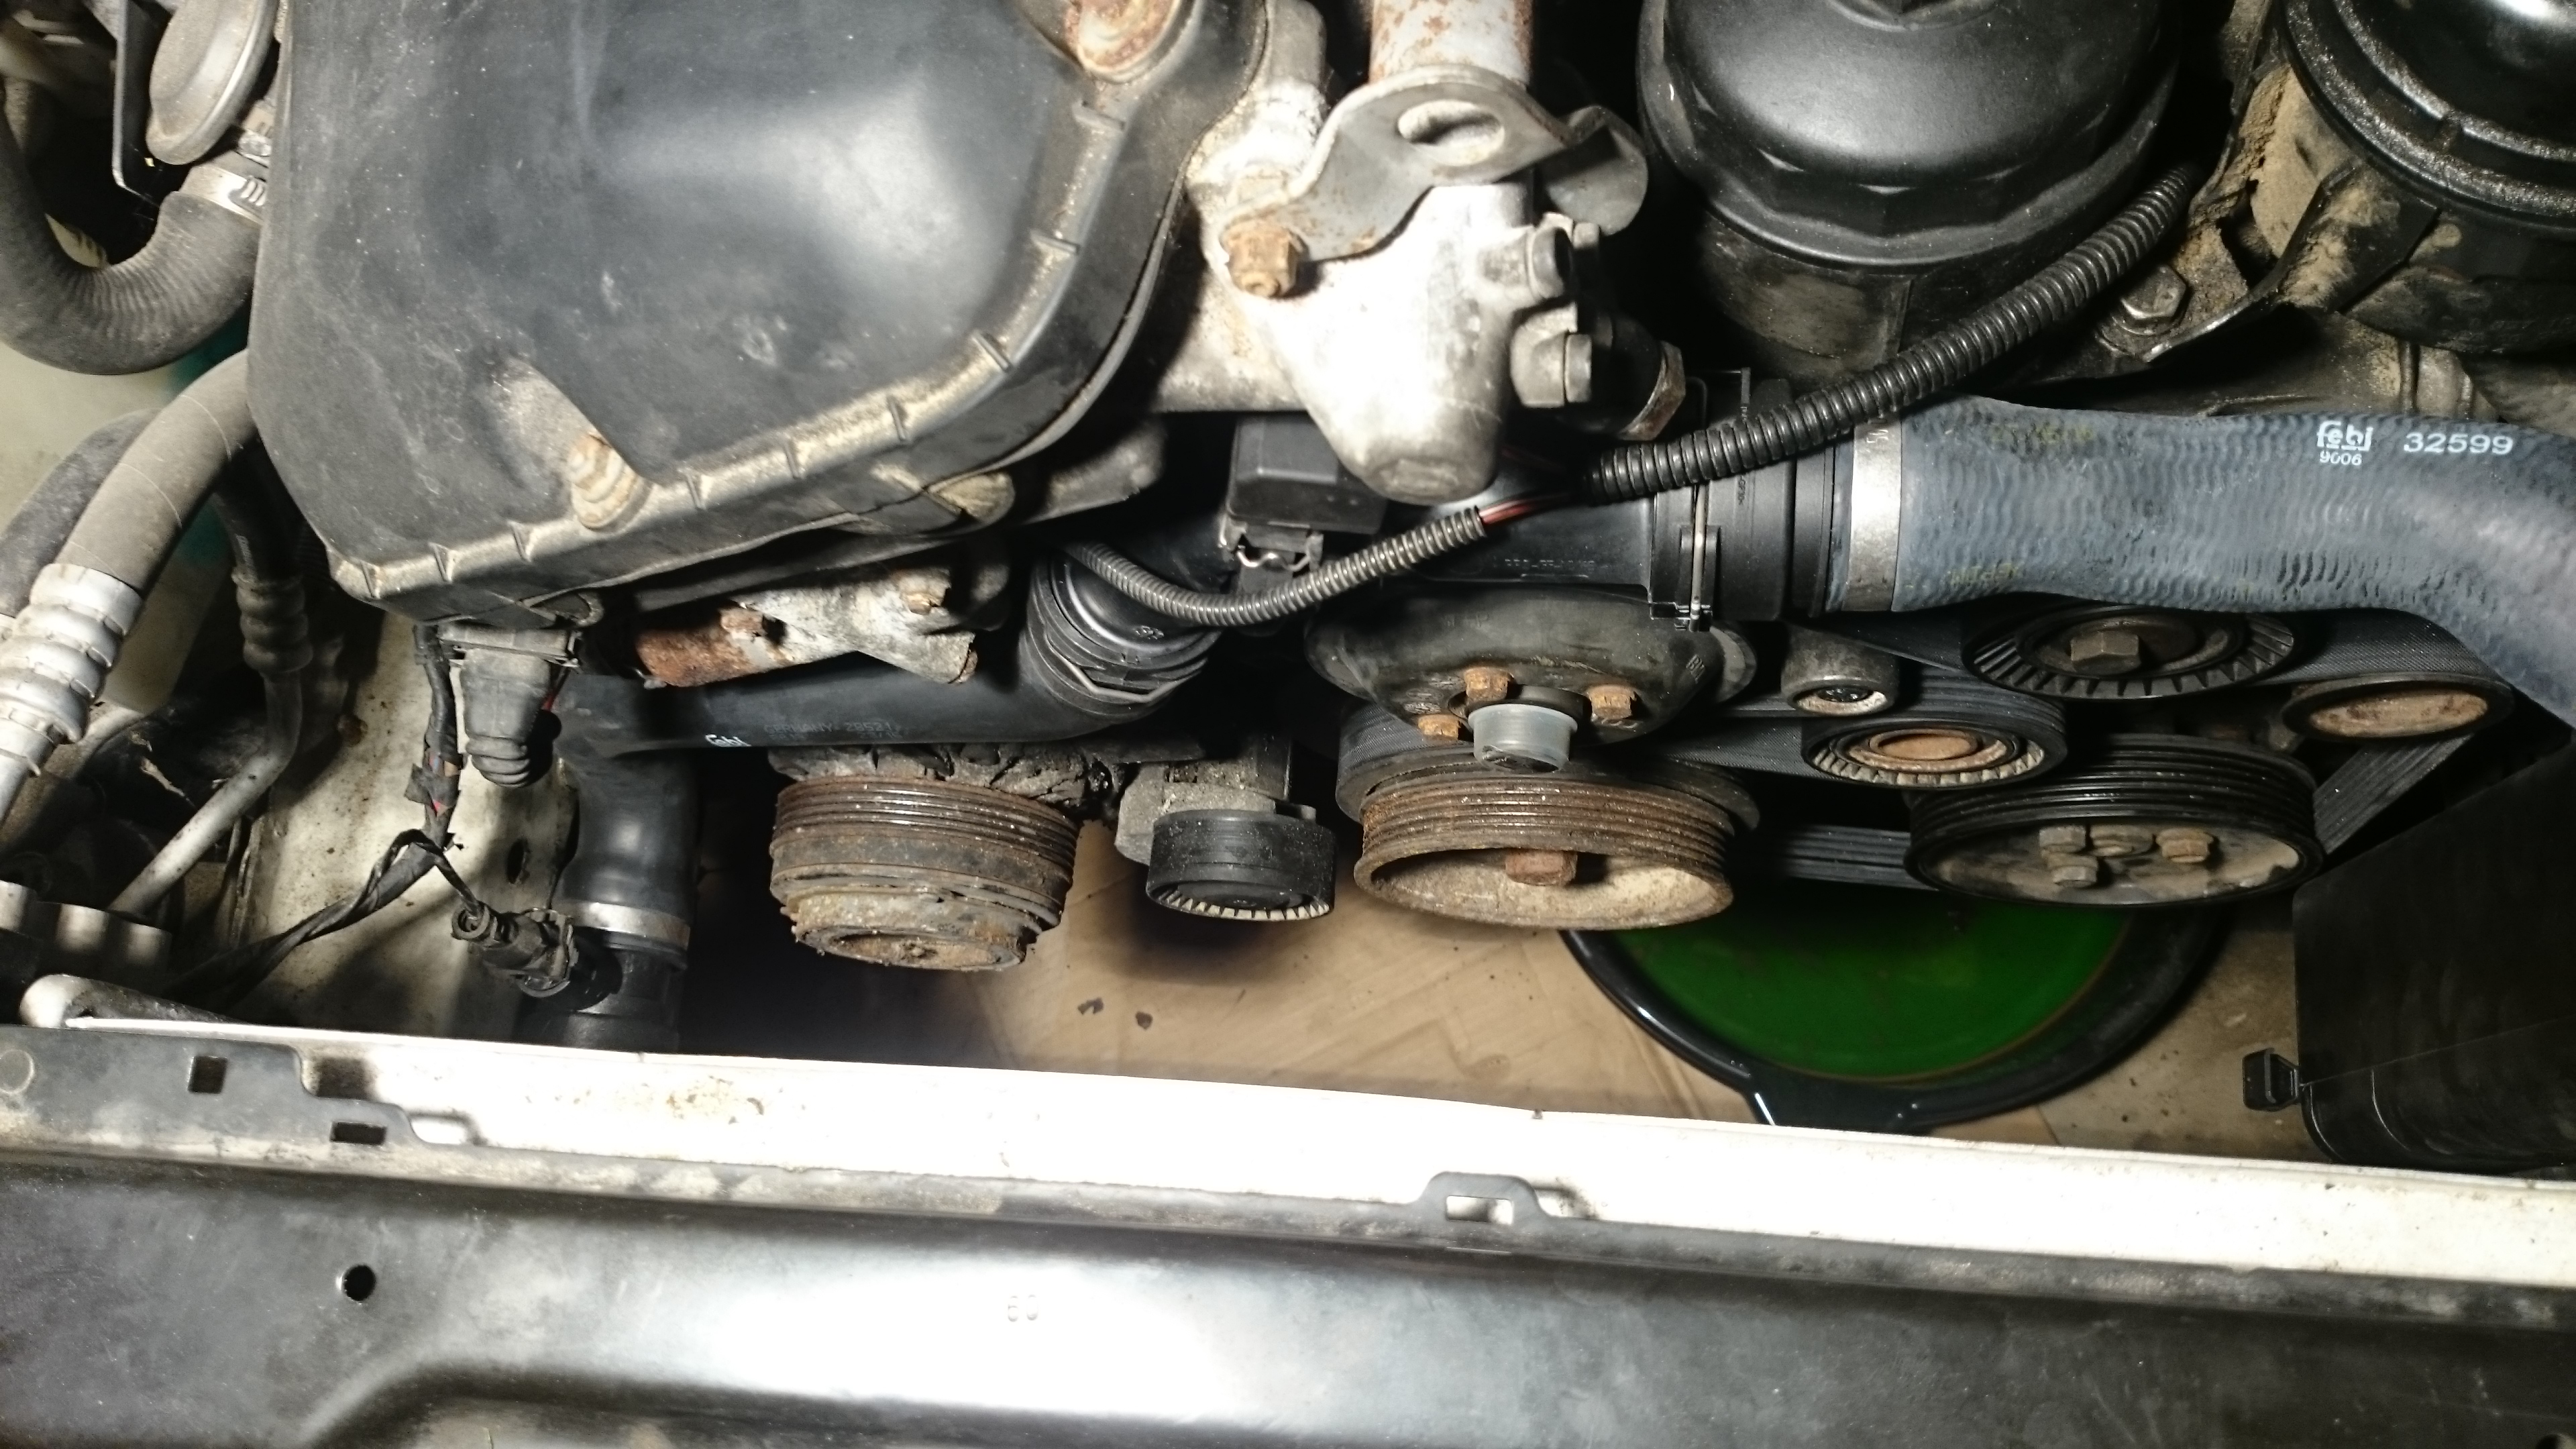
Up first was the exhaust. The middle supports were first, and were relatively easy, since they were vertical studs an had limited access to water splashes. The muffler at the rear of the exhaust pipe was held on by four nuts right at the bumper. At the front of the exhaust pipe, it connected to the exhaust manifold of the engine with four copper nuts on four stainless steel studs clamping two flanges together. 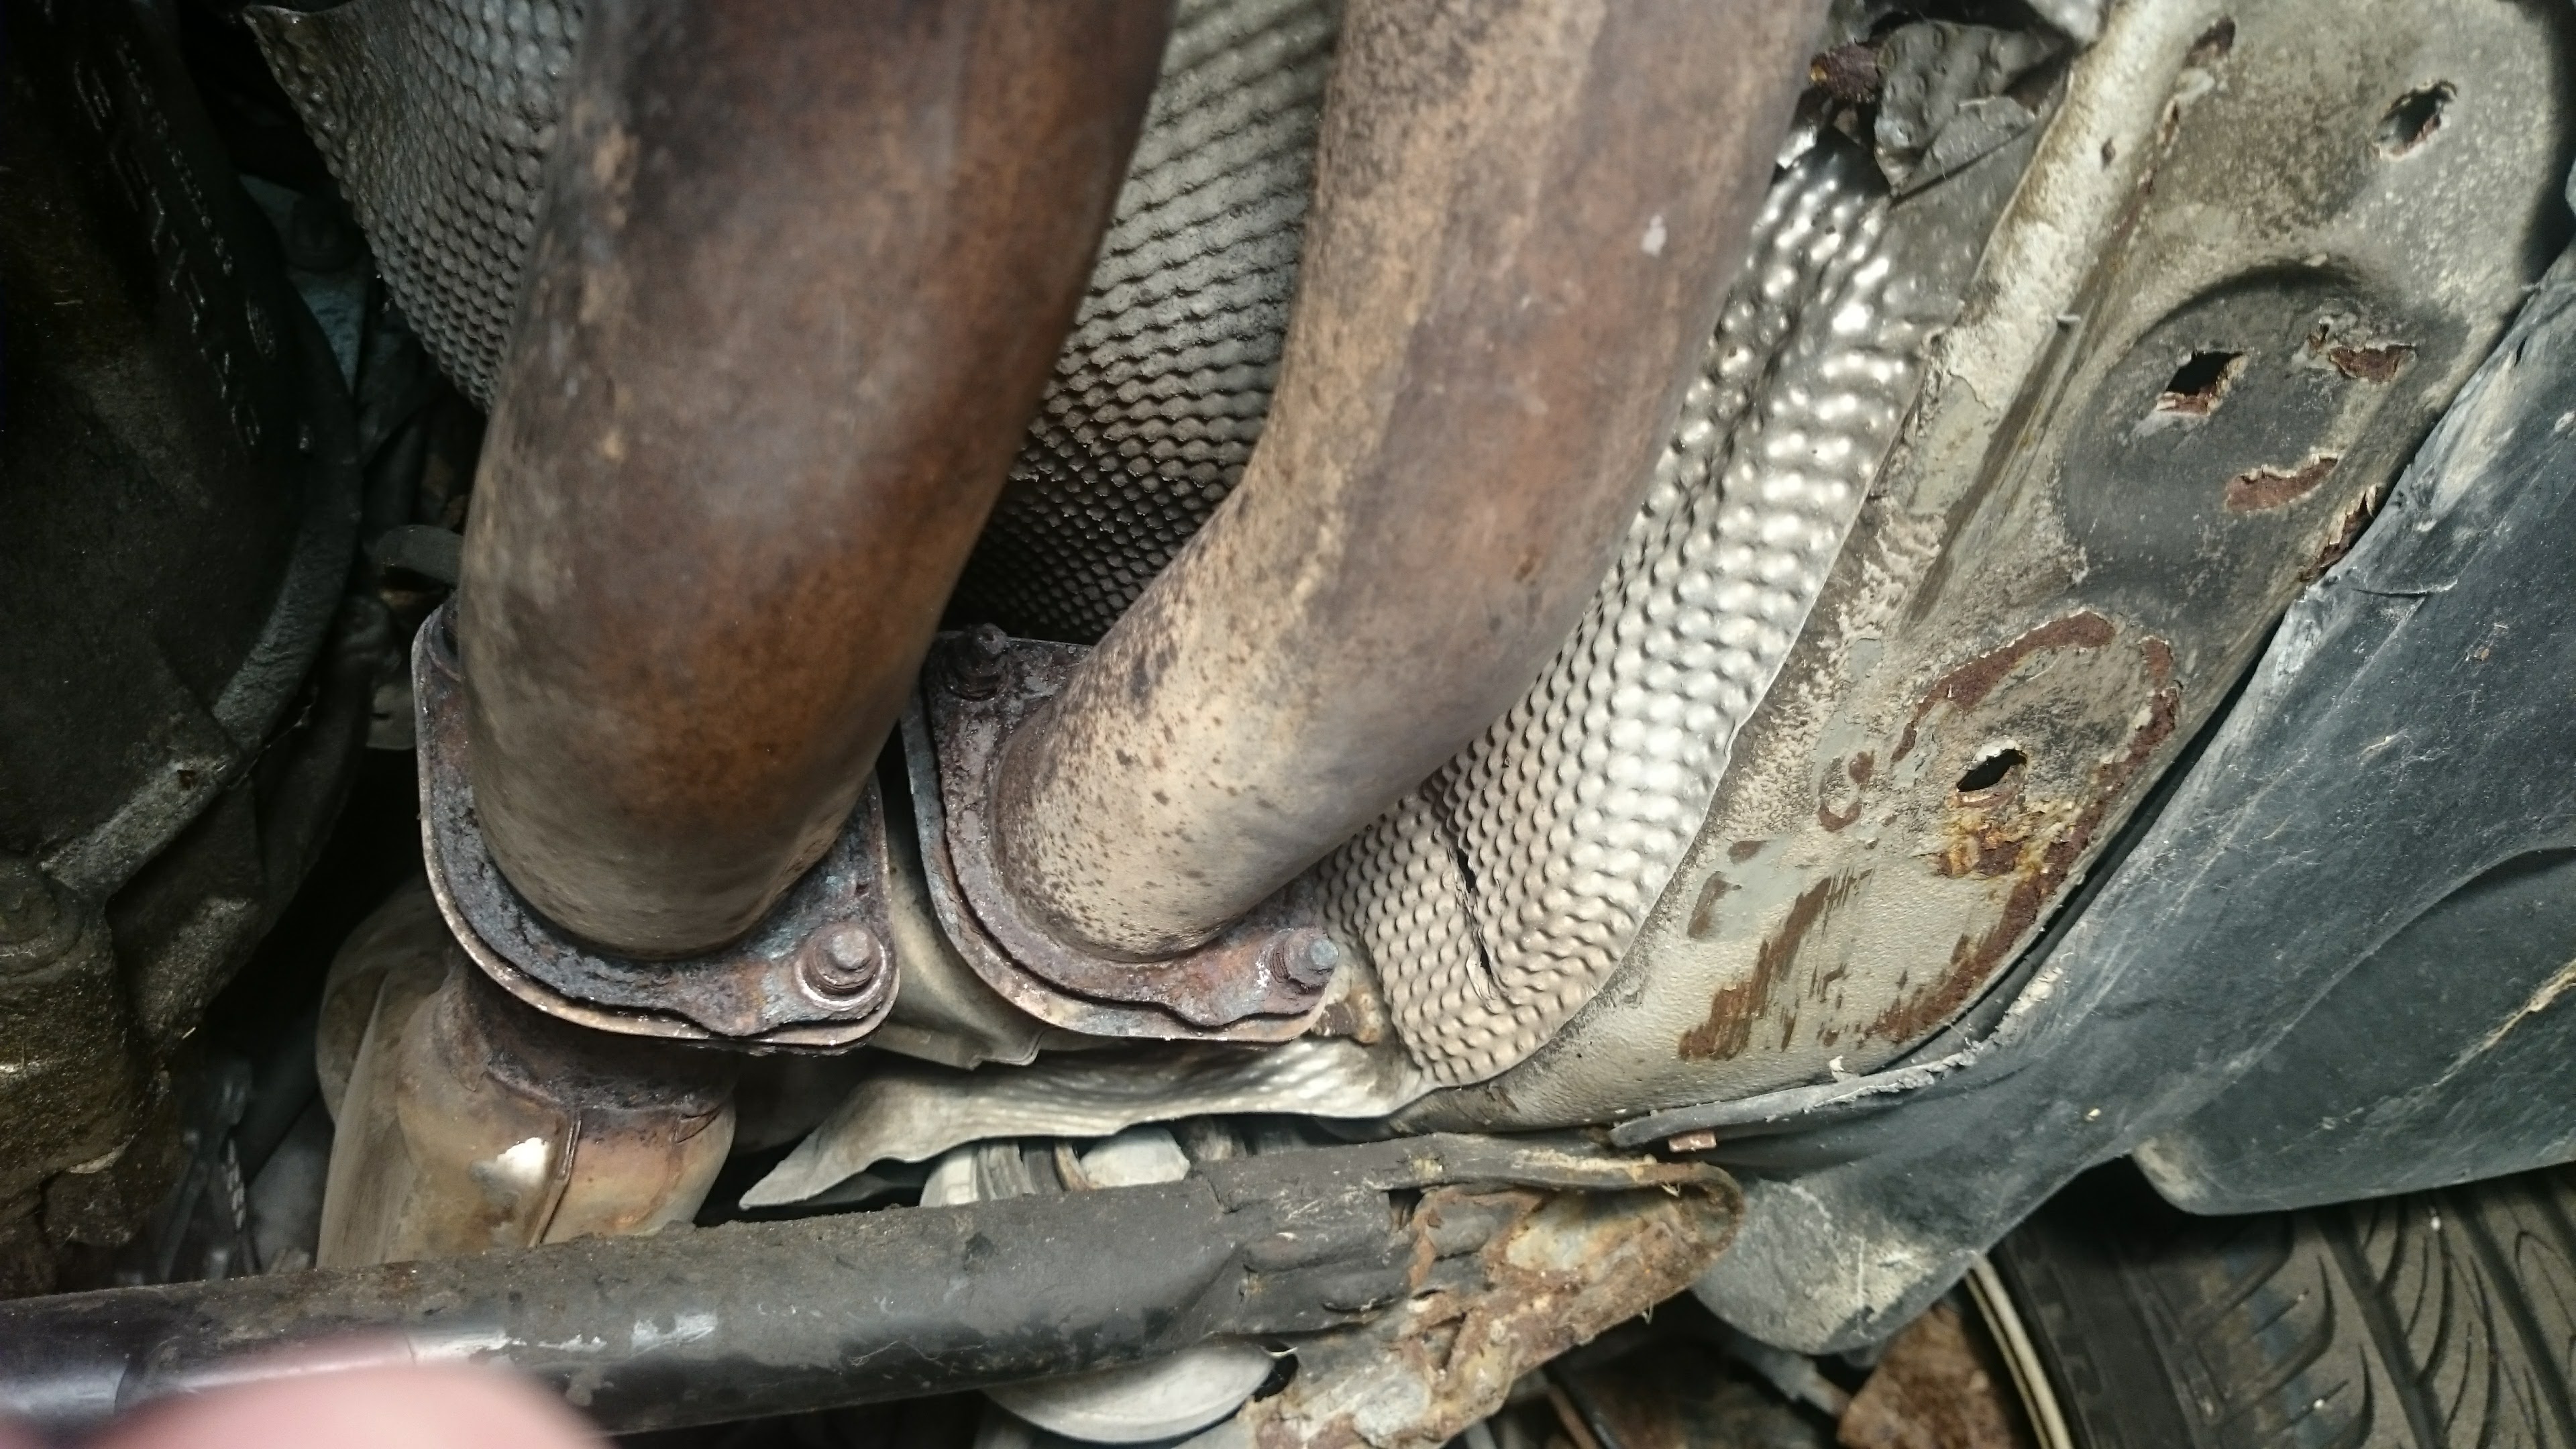 These would prove to be some of the toughest connections to break on the entire car. One nut was completely gone, one I pried off with vise grips, one I hammered a 14mm socket onto, and the other was still the specified 15mm. While I covered that in one sentence, I want to emphasize that it took many hours of torching and prying at the fasteners in a 14°F garage. Somehow the gasket between the manifold and the rest of the exhaust pipe had fused the pieces together. Freeing the exhaust tips and using the length of the system as a lever to break the exhaust free wasn’t an option because I was worried I’d crack the manifolds. I resorted to chipping out as much of the gasket as I could with a thin putty knife, and then cutting and drilling out the studs holding the exhaust flanges together. I consumed a non-trivial number of drill bits in destroying those studs.
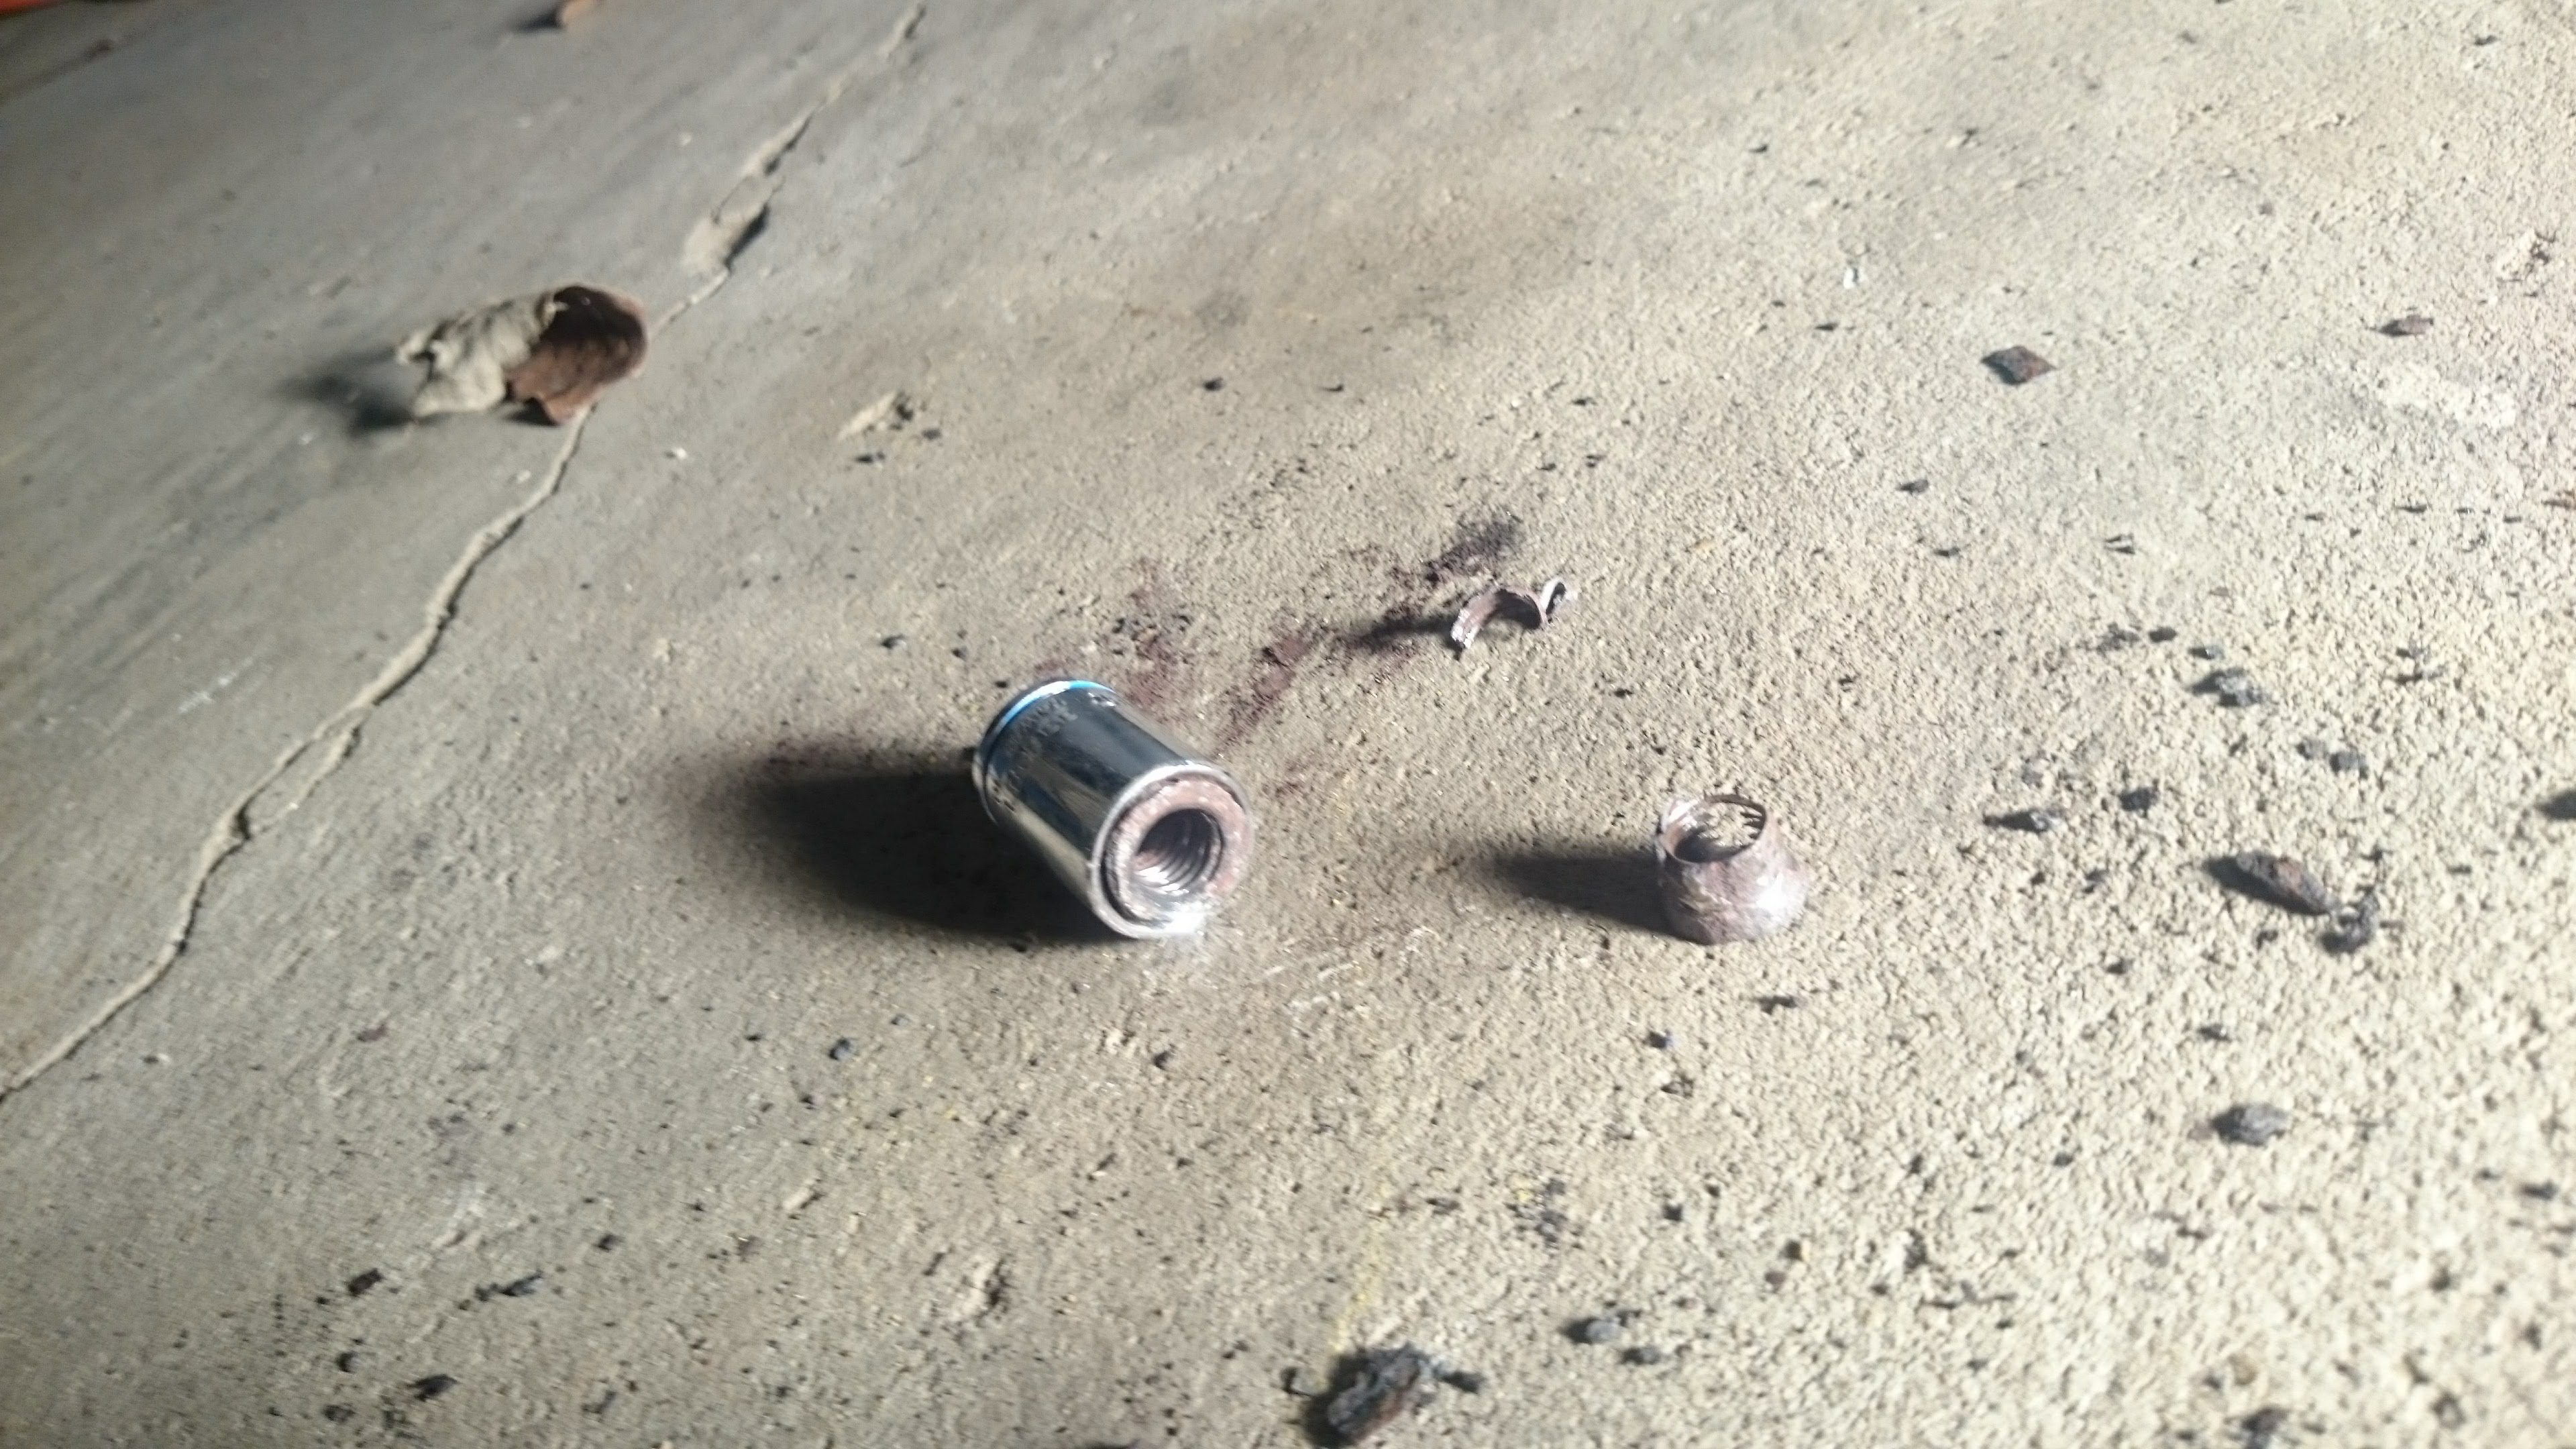
yes, that is three 15mm nuts
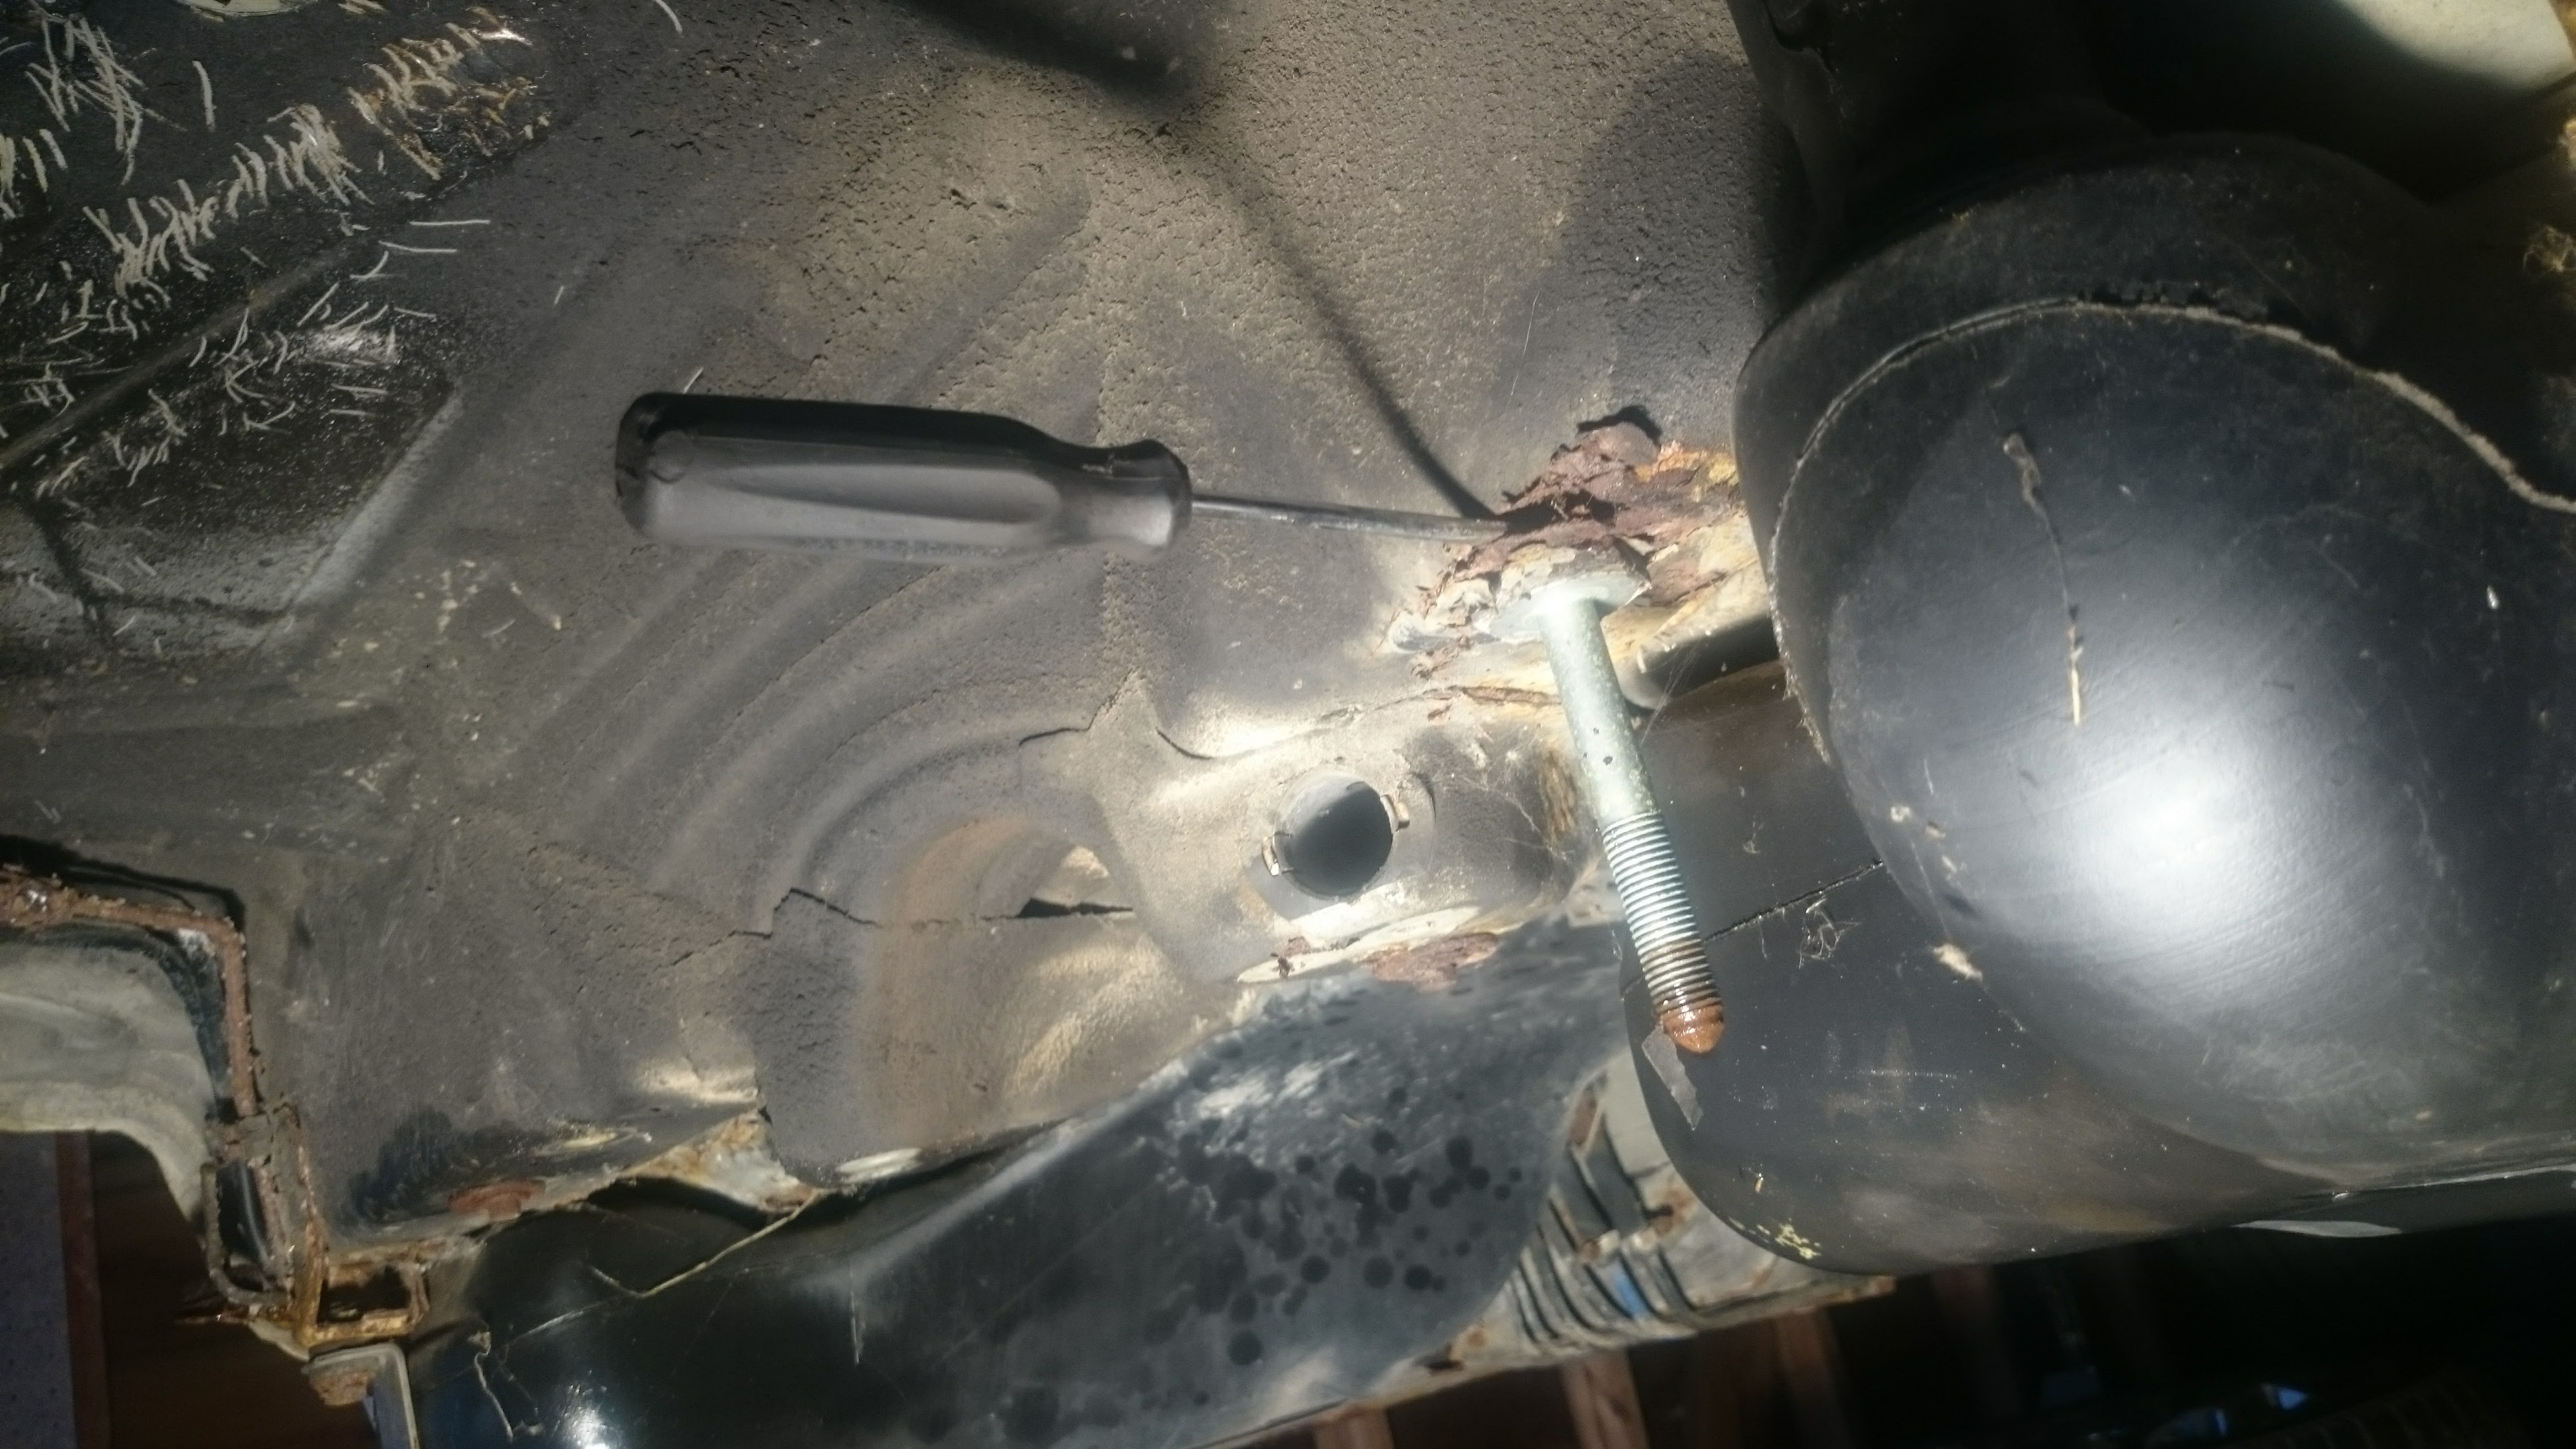
With the exhaust out, the driveshaft was exposed. Seven bolts total held it to the transmission and differential, with an additional pair of studs holding a central support bearing.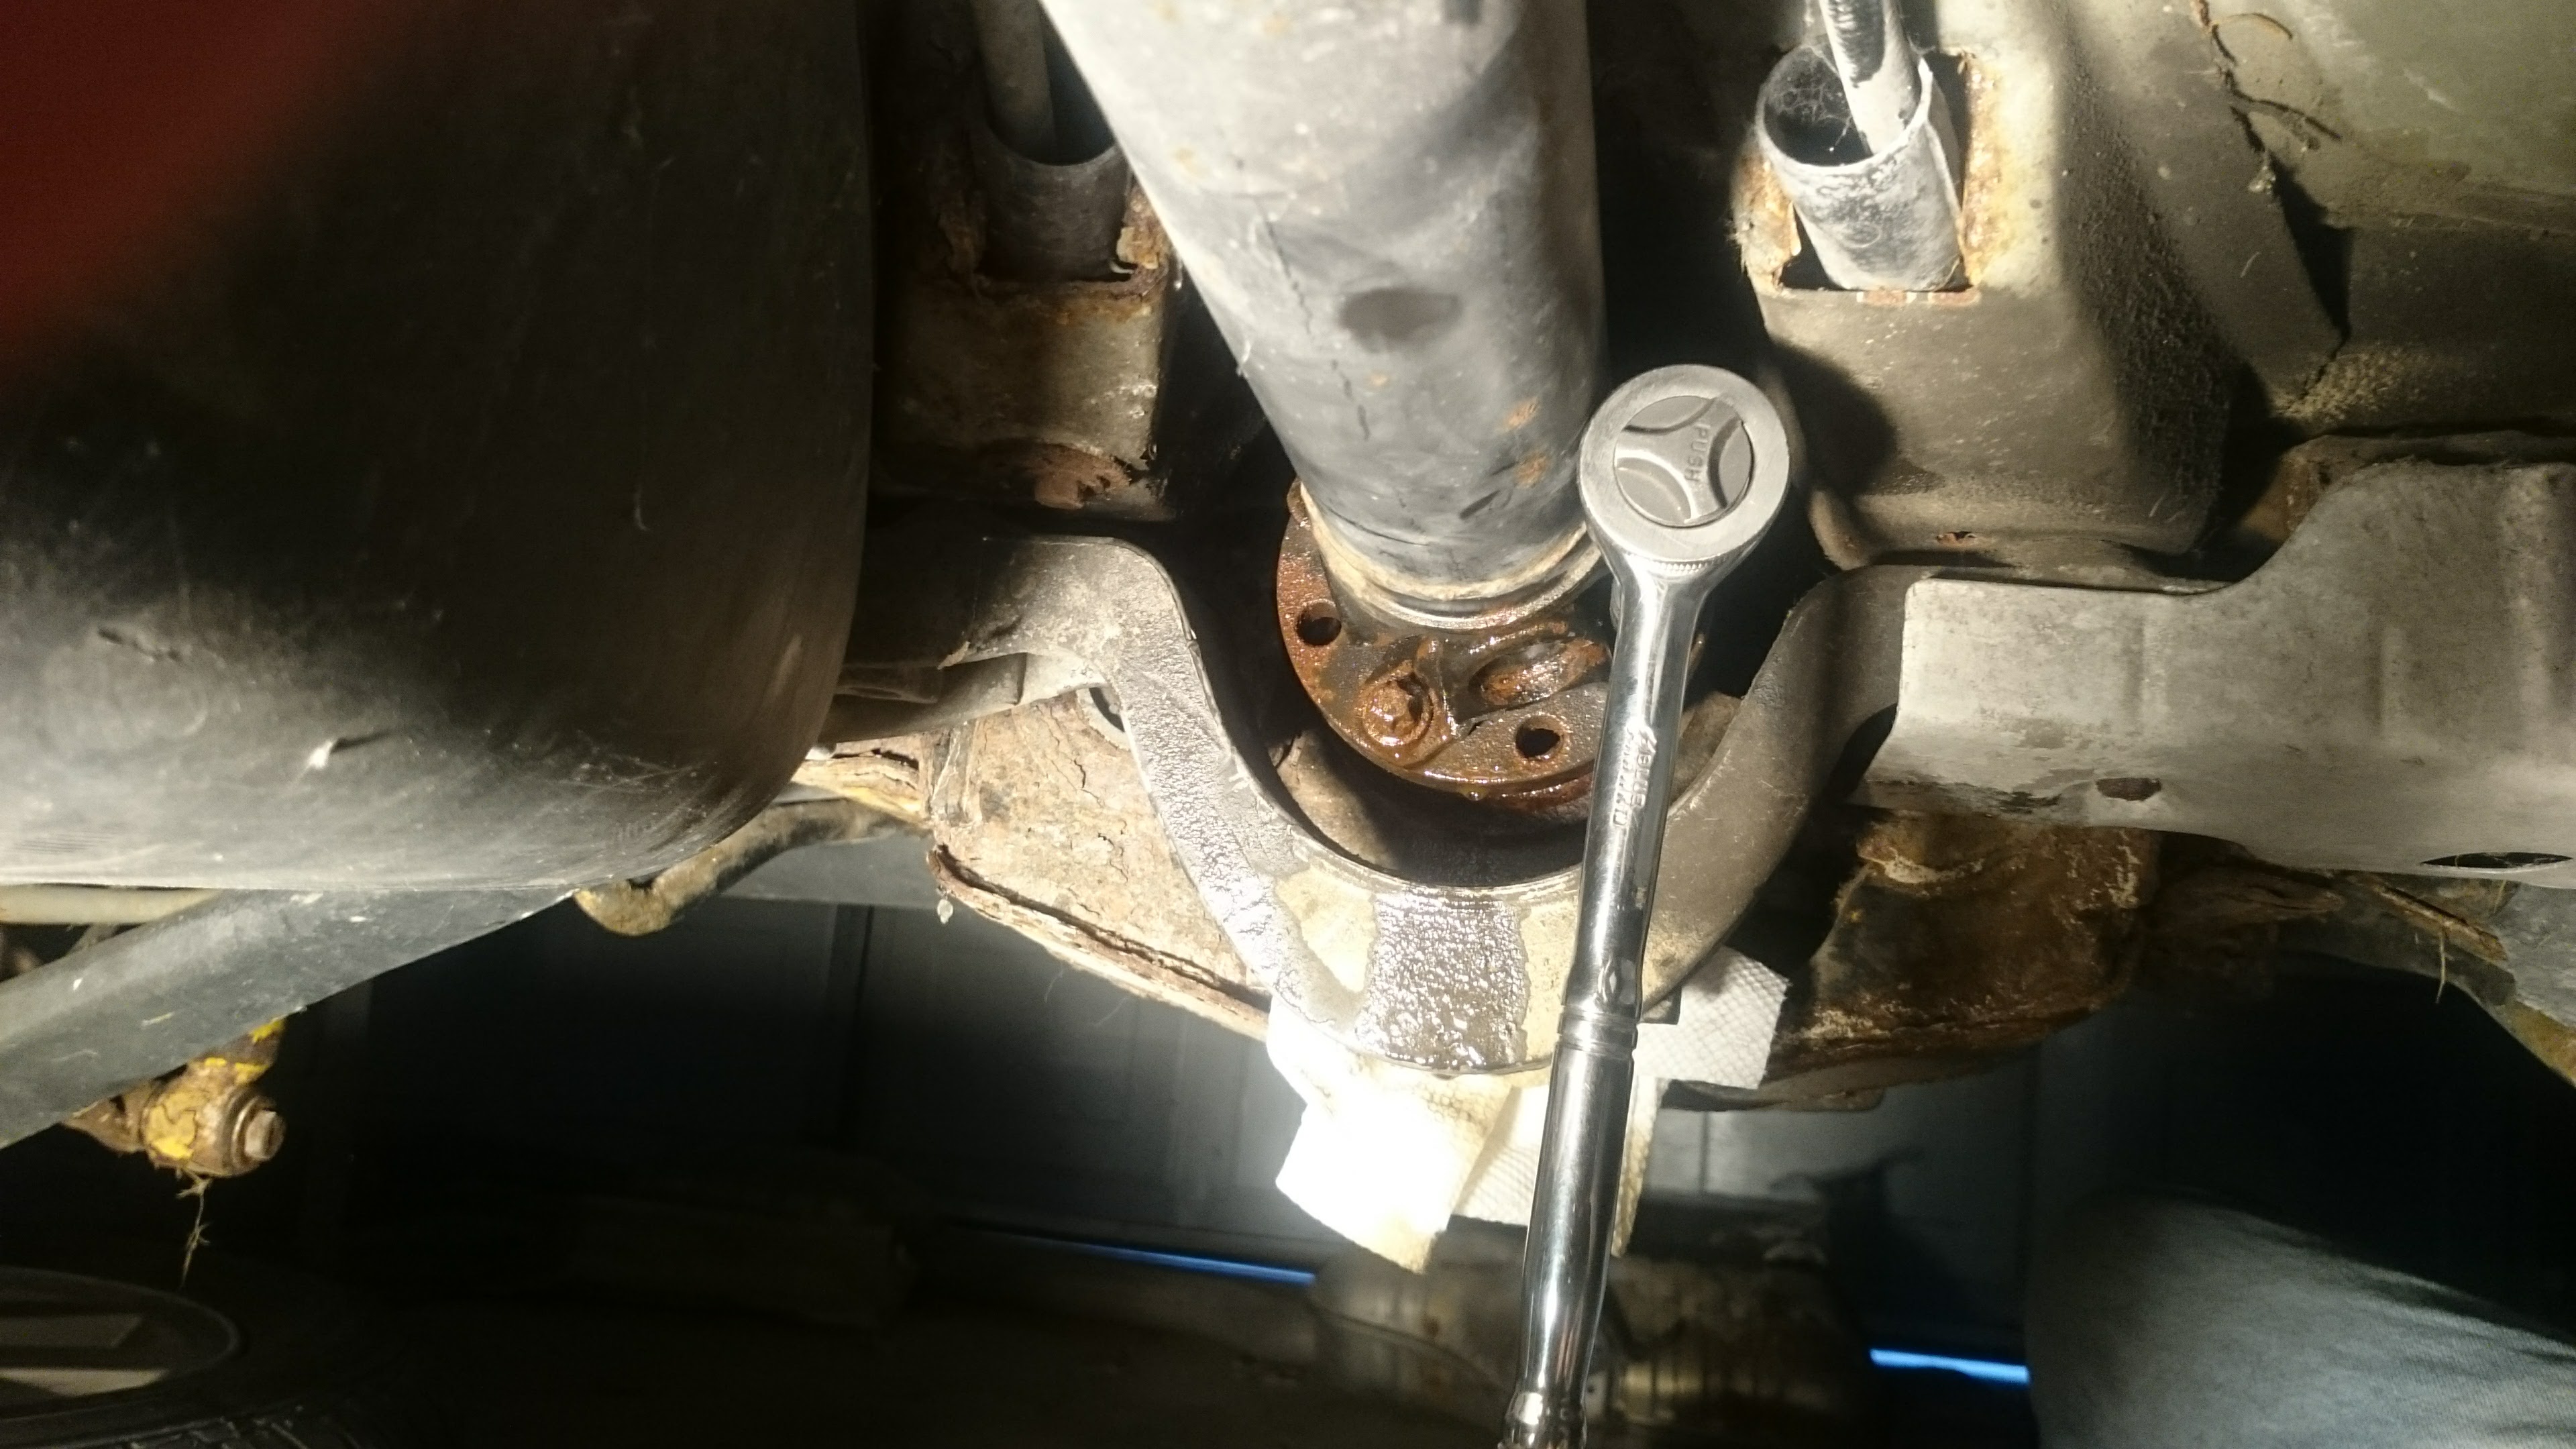 Next up were the hydraulic brake lines, and the parking brake cables. They hydraulic brakes were a piece of cake since all the fittings were brass, you could twist and they’d either come apart or get shredded. The parking brake cables were a bit of a hassle, since the parking brake components were mostly fused into one solid block of iron oxide. The brake lines themselves are included in this carnage, the rear right snapping as I bent it away from the caliper, the rear left holding on by a thread.
Once these were disconnected, I could drop the subframe freely. Three nuts later (the 4th was completely torn from the sheet metal) and the subframe, diff, and half shafts could be lowered from the car, and pulled aside.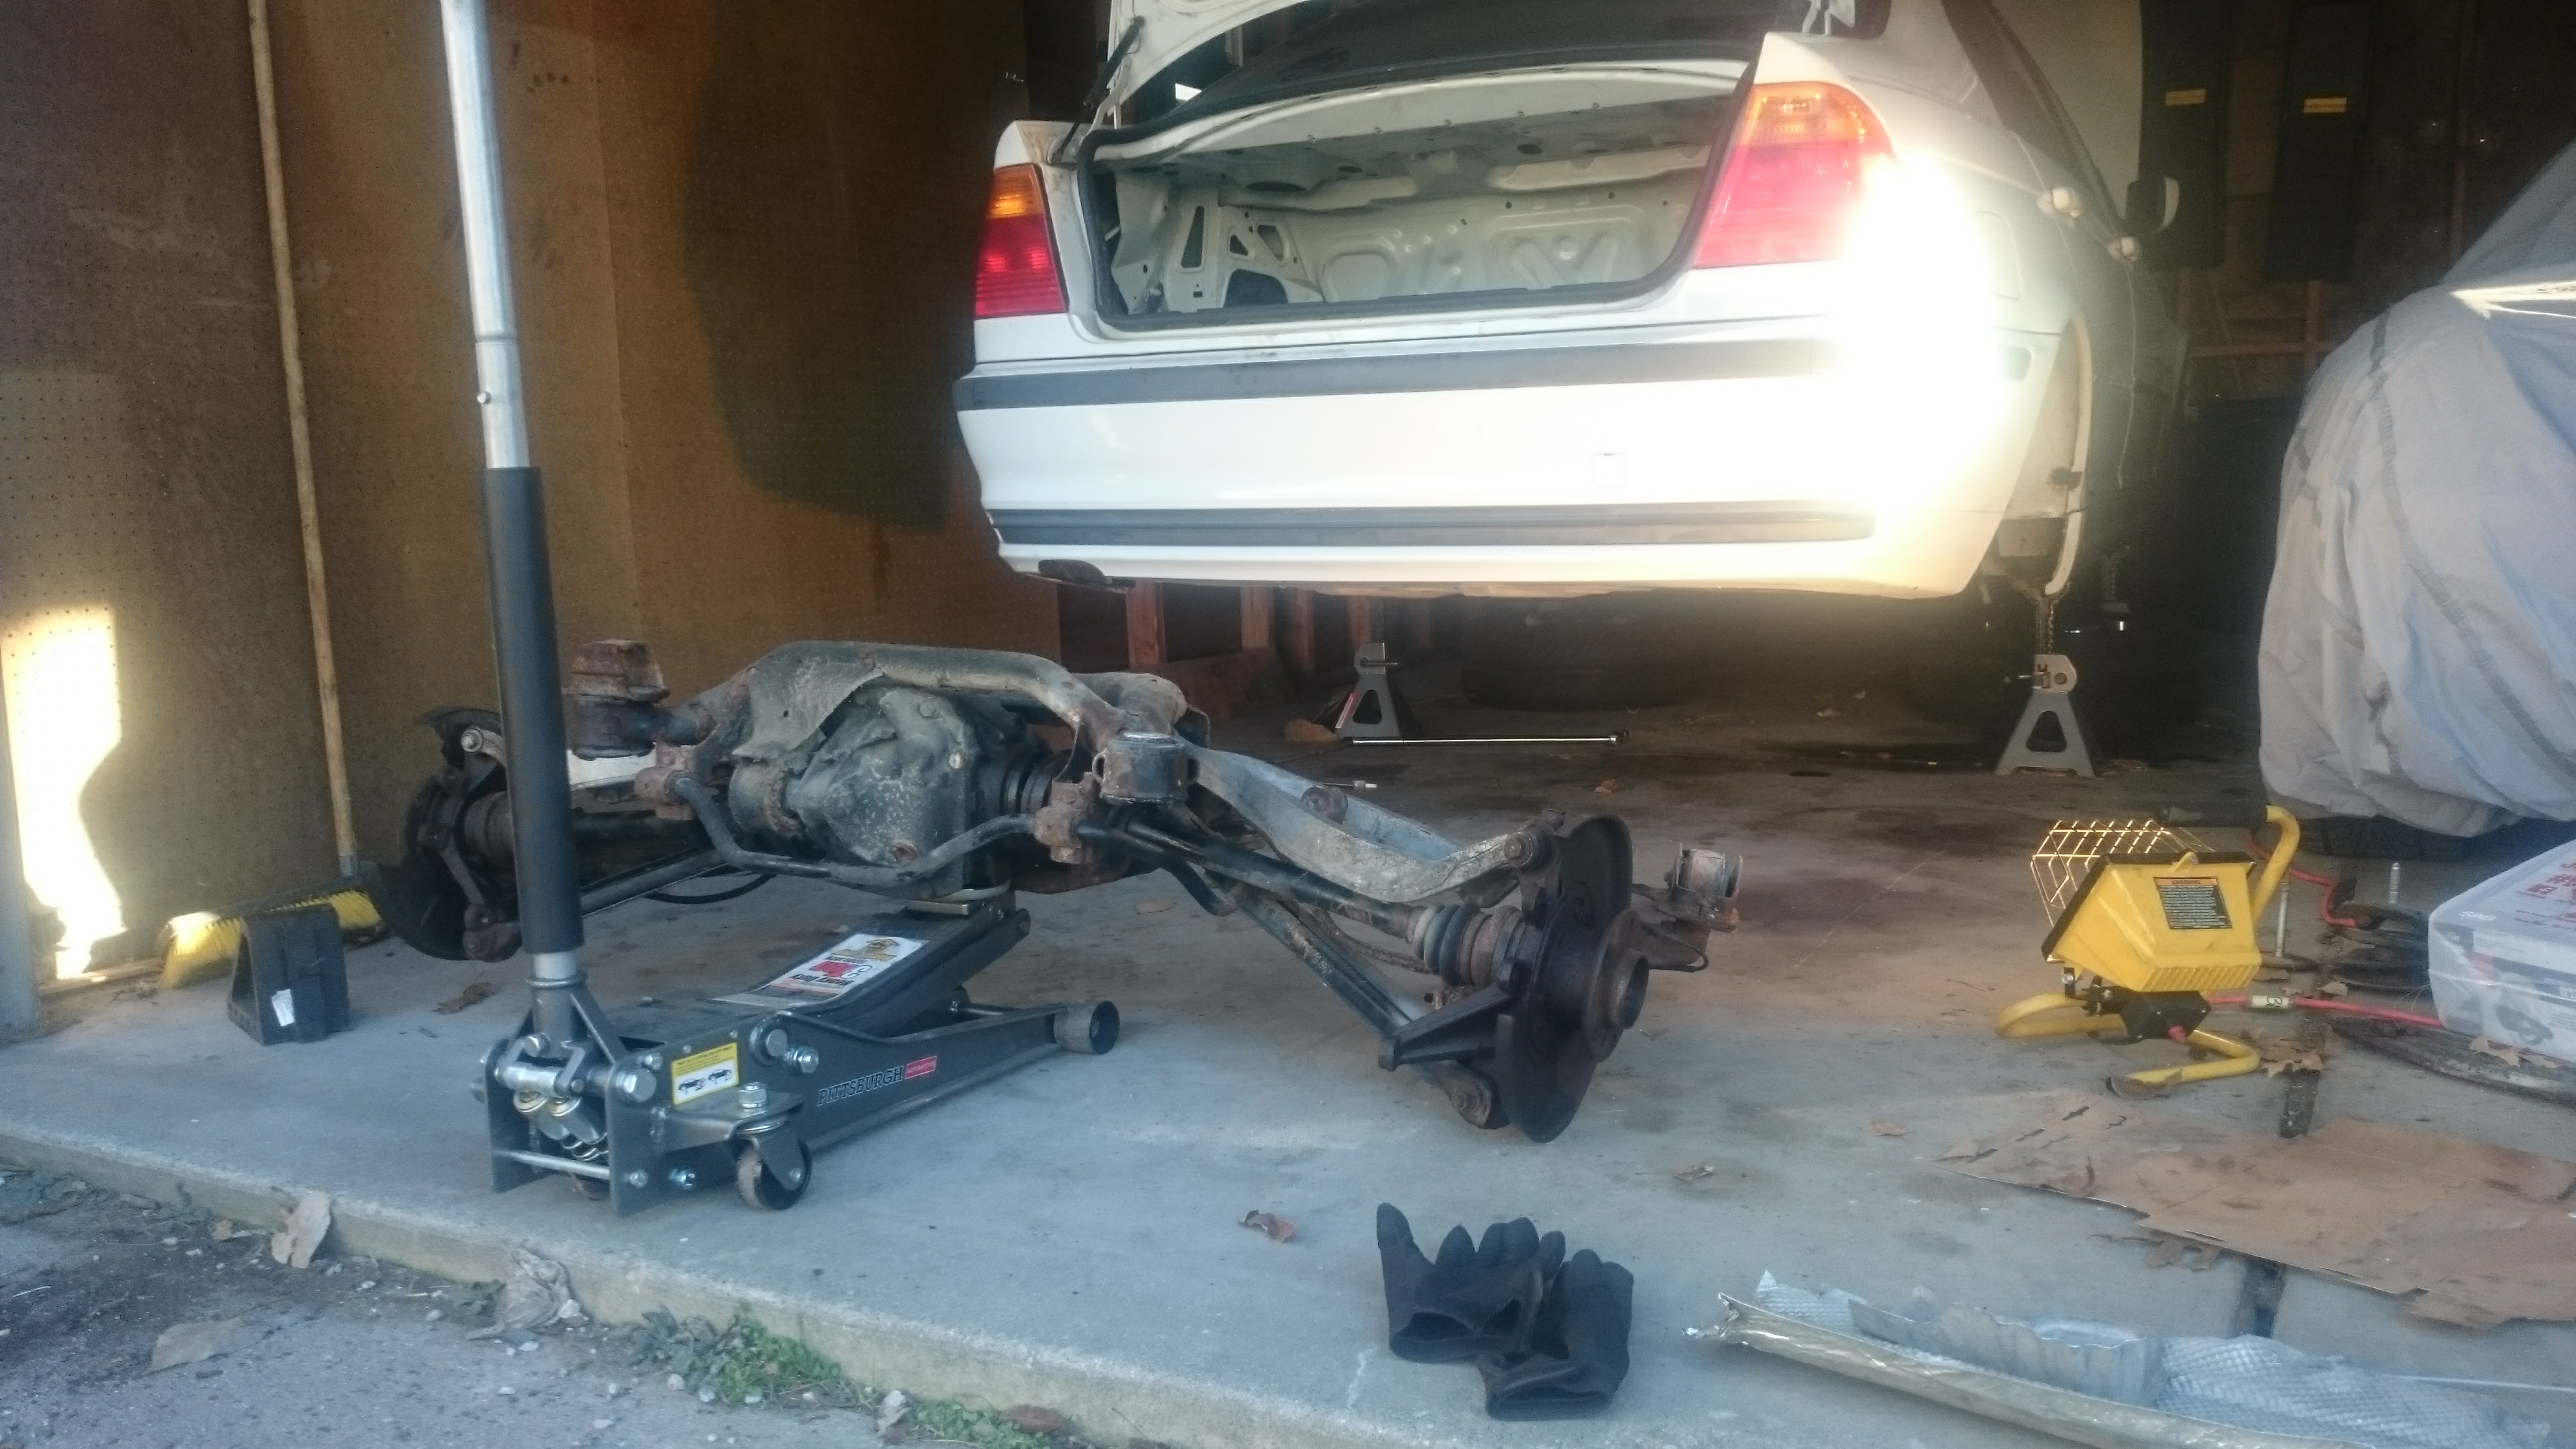 I simply lifted the assembly from the diff, and let it fall from the mounts. The fuel tank was more of a challenge since its an irregular shape, and had many rubber hoses that had fused to the barb fittings over its 210k Mile life. A bit of prying and a sheet of plywood later, and the fuel tank (and evap system) were removed, finally exposing all the mounting points of the subframe.
Now is about the time when I realized why an $800 price tag might’ve been too much.